


ceat-speciality:blogs-tags/all,ceat-speciality:blogs-tags/tyre-care
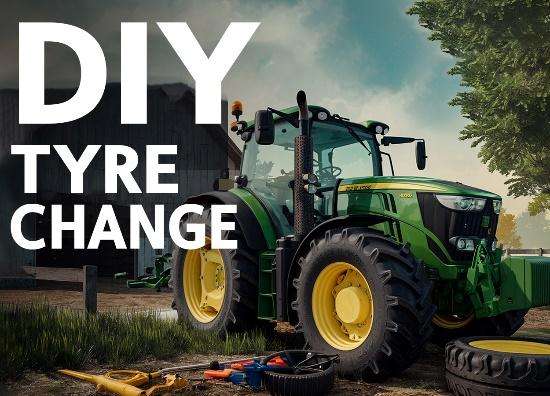
DIY tyre change: A farmer's guide
Wed, 4 Sep 2024 | PRODUCTS

Search Further
Search Results for :
Products ![]()
Blogs and Related Content![]()
Testimonials![]()
Other Pages![]()
ceat-speciality:blogs-tags/all,ceat-speciality:blogs-tags/tyre-care
Wed, 4 Sep 2024 | PRODUCTS


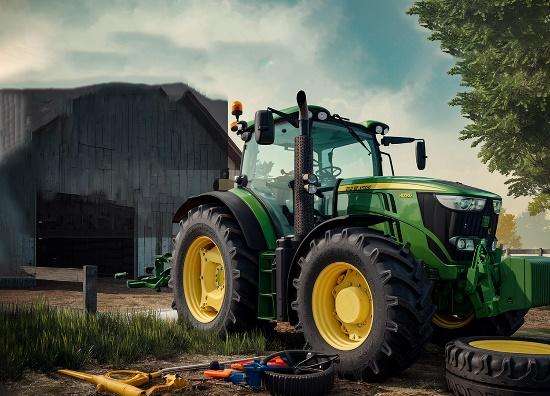
Changing a flat tyre on your farm tractor might seem daunting. Nevertheless, with the right tools and a bit of know-how, you can handle the task yourself. This tyre replacement at home saves time and money by avoiding roadside assistance and allows you to take control of your equipment maintenance.

Following the steps outlined in this guide, you'll be equipped to safely and efficiently change a flat tyre, ensuring minimal downtime and maximising your farm's productivity.
Safety First
When changing a tyre on your farm tractor, it's crucial to park on a firm, level surface. This prevents the tractor from rolling or shifting during the tyre change, reducing the risk of accidents and injuries. Select a flat area without any significant slopes or inclines. Make sure there are no obstacles or obstructions around the tractor that could interfere with the tyre change.
Engage the parking brake to prevent the tractor from moving. A stationary tractor allows for a more controlled and efficient tyre change process. Test the parking brake by attempting to move the tractor. If it doesn't move, the parking brake is engaged properly.
Place wheel chocks before the opposite wheels to prevent the tractor from rolling during maintenance or repairs. When changing a farm tractor tyre, placing wheel chocks in front of the opposite wheels is crucial to ensure stability and prevent accidents. Place wheel chocks in front of the wheels opposite the one being changed. For example, if you change the front left tyre, place wheel chocks in front of the right wheels. Use a sufficient number of wheel chocks to provide adequate stability, depending on the size and weight of your tractor.
Required Tools and Equipment
Step-by-Step Guide
Additional Tips:
If unsure about the process, practice changing a tyre on a spare wheel before attempting it on your tractor. Practising allows you to become comfortable with the tools, techniques, and sequence of steps involved in a tyre change. You can develop the necessary skills and coordination to efficiently and safely complete the task by practising. Practising helps identify potential mistakes or areas where you may need additional guidance, reducing the risk of errors when changing a tractor tyre.
Conduct tyre inspections to identify signs of wear or damage before they become serious problems. By preventing unexpected tyre failures, you can reduce downtime and maintenance costs.
By following these steps and prioritising safety, you can confidently handle a flat tyre on your farm tractor, minimising downtime and ensuring your operations run smoothly.
ceat-speciality:blogs-tags/all,ceat-speciality:blogs-tags/tyre-care
Tyre Maintenance Tips for a Thriving FarmOn a farm, reliable equipment is essential for smooth daily operations. Tractors, harvesters, and other agricultural machinery are vital to ensuring that crops are planted, maintained, and harvested effectively. However, one often overlooked component of this machinery is the tyres. While farmers may focus on engine maintenance or fuel efficiency, tyre care is just as crucial for ensuring safety, productivity, and cost savings.
Agricultural tyres bear the weight of heavy equipment, handle challenging terrains, and navigate everything from muddy fields to rocky roads. Over time, improper maintenance can lead to premature tyre wear, reduced performance, and increased fuel consumption.
To ensure your tractor tyres last longer and perform optimally, here are some essential maintenance tips that will keep your equipment running smoothly and your farm thriving.
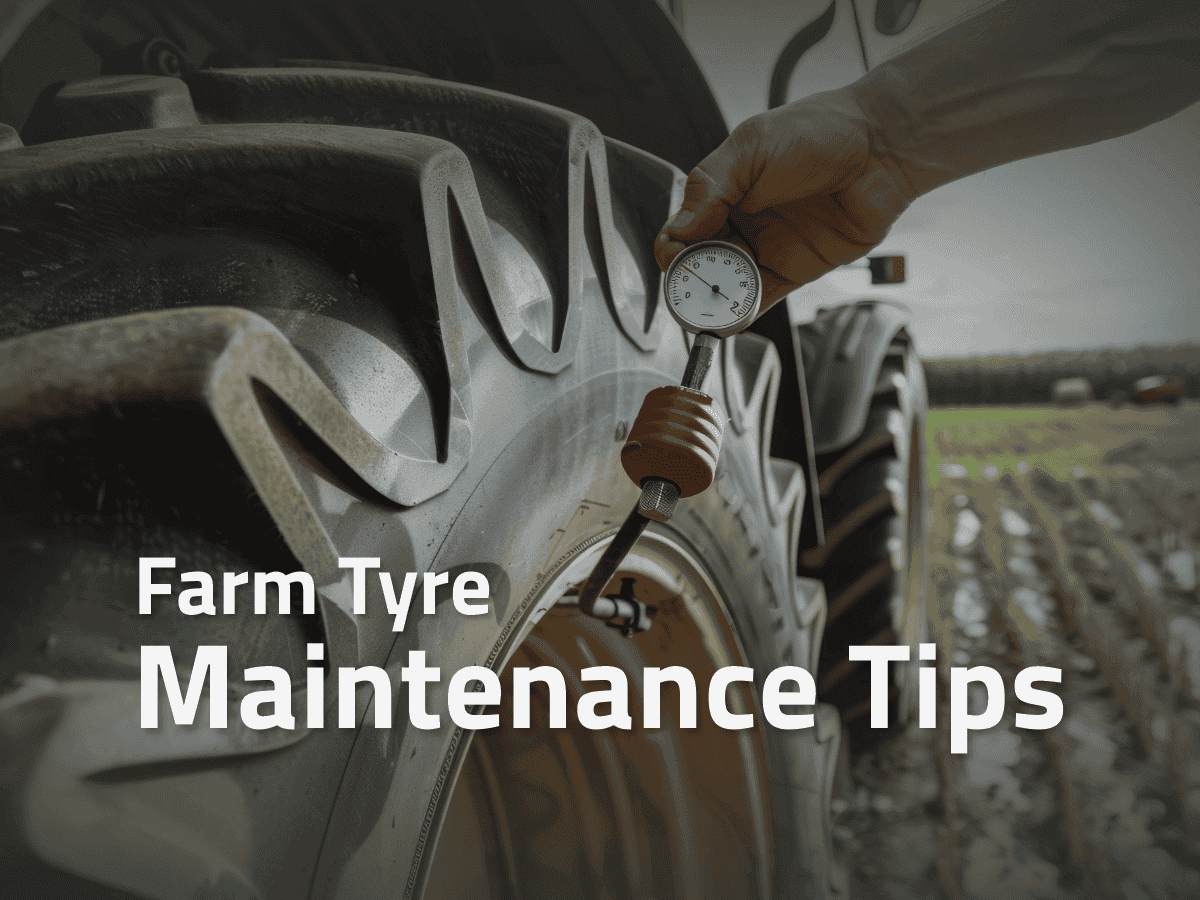
1. Regularly Check Tyre Pressure
One of the simplest yet most important aspects of tyre maintenance is checking tyre pressure regularly. Over- or under-inflated tyres can lead to inefficient performance, uneven wear, and reduced fuel efficiency. Too much air can result in a harsh ride and increase the chances of tyre blowouts, while too little air causes the tyres to wear unevenly and increases rolling resistance, leading to higher fuel consumption.
To maintain proper tyre pressure, use a reliable air pressure gauge to check the pressure at least once a week, especially during peak seasons when your machinery is being used intensively. Be sure to adjust the pressure based on the load your equipment is carrying. Always follow the manufacturer’s recommended tyre pressure, which can typically be found in the vehicle’s manual or on the sidewall of the tyre.
2. Inspect Tyres for Damage Regularly
Farm machinery operates in challenging environments. Tyres are exposed to sharp rocks, debris, uneven terrain, and even chemicals like fertilisers and pesticides. Regular inspections are essential to identify cuts, punctures, bulges, or any other damage that may compromise tyre integrity. A damaged tyre can lead to unsafe working conditions, costly repairs, and lost time during crucial planting or harvest periods.
Take the time to visually inspect your tyres daily or weekly, especially before and after intense use. Look for embedded objects, such as nails or glass, which could lead to slow punctures. Check for cracks or bulges on the sidewalls, as these indicate internal damage that could cause the tyre to fail unexpectedly. If you spot any damage, replace or repair the tyre promptly to avoid more significant problems.
3. Rotate Tyres to Ensure Even Wear
Just like car tyres, farm tyres benefit from regular rotation. Uneven wear can result from consistently using the same tyre position on a vehicle, leading to imbalanced performance. For example, front and rear tyres on tractors may wear differently due to varying loads, steering forces, or road conditions.
Rotating tyres is a simple task that ensures even wear, maximizes tyre life, and enhances the overall efficiency of your equipment. Depending on the type of machinery, rotating tyres can be done every 100 to 150 hours of use or every season. If you are unsure about when to rotate your tyres, consult your vehicle’s owner manual or seek advice from a professional.
4. Maintain Proper Wheel Alignment and Balancing
Just like a car, ensuring that your farm equipment's wheels are aligned and balanced properly is key to efficient tyre maintenance. Misalignment and improper balancing can cause tyres to wear unevenly and prematurely, affecting not just tyre longevity but also the overall performance of the machinery.
In addition to uneven tyre wear, improper alignment can cause vibrations and reduce comfort during operation. Misalignment can also put additional strain on your equipment, increasing fuel consumption and reducing overall efficiency. Be sure to have your equipment’s alignment checked and adjusted regularly by a professional to avoid long-term damage.
5. Monitor Tyre Tread Depth
The tread on agricultural tyres is essential for providing grip and traction in various field conditions. As tyres wear down, the tread depth decreases, resulting in less traction, particularly on wet or muddy surfaces. This can lead to slippage, reduced stability, and even accidents.
For optimal safety and performance, check the tread depth regularly, especially if your machinery is used frequently in muddy or slippery conditions. If the tread is worn down to the minimum depth recommended by the manufacturer, it is time to replace the tyres. Keeping an eye on tread depth not only ensures better safety but also boosts productivity by maintaining excellent traction.
6. Choose the Right Tyres for Your Operations
Selecting the right tyres for your farming needs is crucial. Different farming operations require different types of tyres. For example, if you operate heavy machinery on soft, muddy ground, you may need tyres designed for better flotation to prevent sinking. Alternatively, if you work on rocky or uneven terrain, you might want tyres that offer reinforced sidewalls for added durability.
Make sure to select tyres that are designed to meet the specific requirements of your farm's conditions. Consult with a tyre expert to ensure you choose the best tyres for your machinery’s tasks, from planting to harvest. Investing in the right tyres will not only improve performance but also reduce wear and tear on both the tyres and the equipment.
7. Proper Storage of Spare Tyres
Tyres that are not in use should be stored properly to prevent degradation. Exposure to direct sunlight, extreme temperatures, or moisture can cause rubber to crack and weaken over time. To maintain the condition of your spare tyres, store them in a cool, dry place, away from direct sunlight and chemicals. If possible, keep them off the ground and elevate them to avoid moisture accumulation.
Conclusion
Effective tyre maintenance is a crucial element in ensuring the longevity and efficiency of your farm machinery. Remember, investing time and resources in tyre maintenance today will save you money and stress in the future, allowing your farm to thrive year after year.
At CEAT Specialty, we understand the unique demands of farming operations and offer high-quality tyres tailored for agricultural machinery. Our tyre solutions keep your farm run smoothly!
Read the full blogMon, 17 Feb 2025 ceat-speciality:blogs-tags/all,ceat-speciality:blogs-tags/tyre-care


ceat-speciality:blogs-tags/all,ceat-speciality:blogs-tags/tyre-care
Farm tyre recycling: What happens after their lifespan?Like any product, farm tyres have a finite lifespan. Once a tyre reaches the end of its useful life, proper disposal becomes essential to avoid environmental harm. Fortunately, tyre recycling offers a sustainable solution, giving old tyres a second life while minimising waste.
The Environmental Impact of Discarded Tyres
Discarded tyres, if not disposed of responsibly, can pose significant environmental challenges:
The Tyre Recycling Process
Tyre recycling involves several stages, each designed to break down tyres into reusable materials:
Old tyres are collected from various sources, including garages, dealerships, and recycling centres. They are then transported to processing facilities.
At the facility, tyres are shredded into smaller pieces. The rubber, steel, and textile components are separated for further processing.
The shredded tyre material is separated into components, such as steel, rubber, and textile fibres. Steel and textile fibres are recycled into new products, while rubber is processed further.
The rubber component is processed to extract valuable materials like carbon black and rubber powder. These materials can be used to manufacture new farm tyres.
Benefits of Tyre Recycling
Challenges and Future Outlook
While tyre recycling has made significant strides, challenges remain:
Despite these challenges, the future of tyre recycling looks promising. Innovations in material science and sustainable practices are driving the industry forward, and governments and organizations are also promoting recycling through regulations and incentives.
CEAT Specialty's Commitment to Sustainability
At CEAT Specialty, we are committed to sustainable practices and environmental responsibility. To minimise the environmental impact of our products, we actively support tyre recycling initiatives.
By recycling tyres, we contribute to a greener future and ensure that our products have a minimal footprint on the planet.
Conclusion
Tyre recycling is a vital component of sustainable waste management, transforming old tyres into valuable resources. As technology advances and awareness grows, tyre recycling will continue to play a crucial role in environmental conservation and resource efficiency.
By choosing sustainable practices, such as recycling and supporting eco-friendly products, we can all contribute to a cleaner, greener future. CEAT Specialty is committed to promoting sustainability and responsible tyre disposal. Let’s work together to make tyre recycling a standard practice in every household and industry. We promote sustainable practices and ensure a greener tomorrow.
Read the full blogSun, 15 Dec 2024 ceat-speciality:blogs-tags/all,ceat-speciality:blogs-tags/tyre-care
ceat-speciality:blogs-tags/all,ceat-speciality:blogs-tags/tyre-care
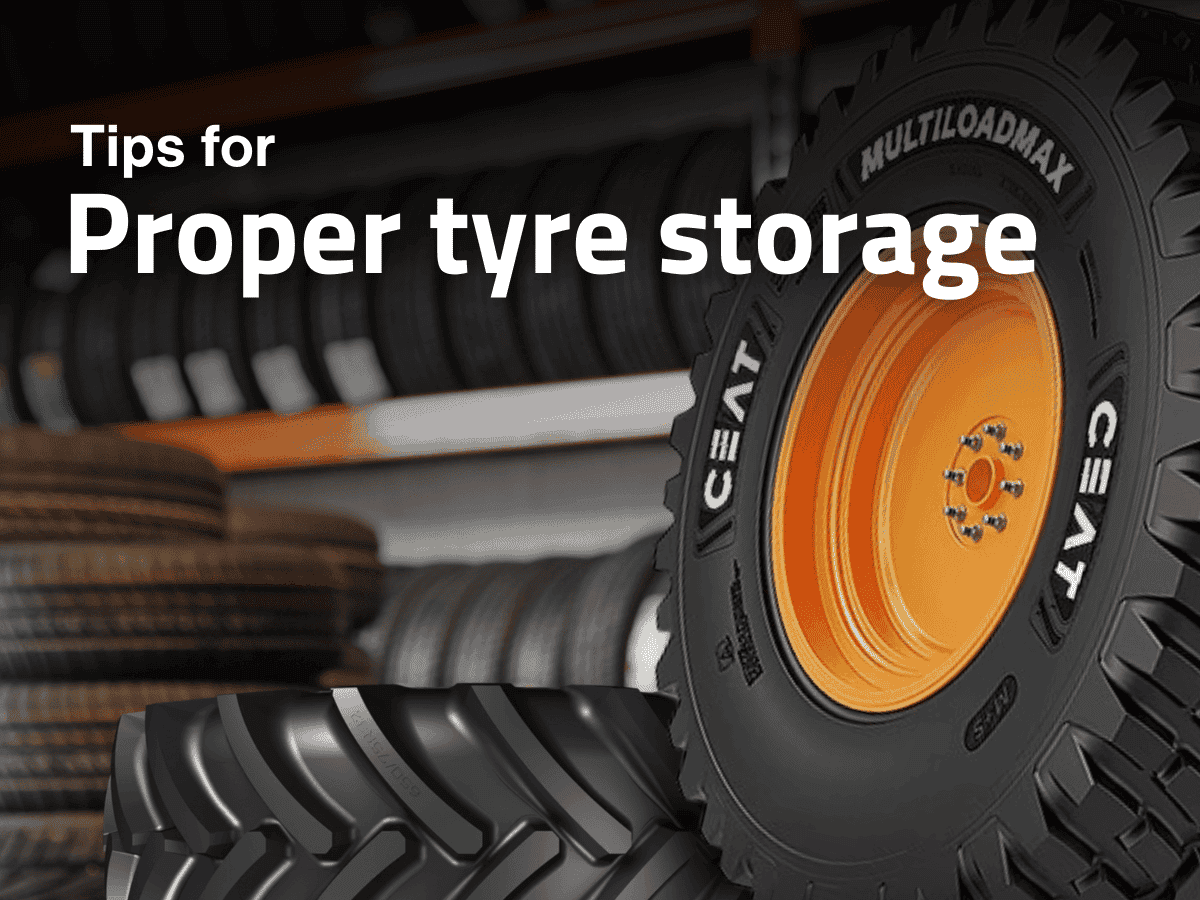
Proper tyre storage: 10 essential tipsTyres are a significant investment and play a crucial role in ensuring the safety and performance of your agricultural equipment. Proper storage is essential to maintain their quality and lifespan, whether you're storing off-season tyres or spares. Incorrect storage can lead to damage, cracks, or decreased performance.
Here are 10 essential tips to help you safely store your agricultural tyres.
1. Clean the Tyres Before Storage
Before storing your agriculture tyres, thoroughly clean them with water and mild soap to remove dirt, grime, and brake dust. Leftover debris can degrade the rubber over time. Allow the tyres to dry completely to prevent moisture from causing mould or mildew during storage.
2. Avoid Direct Sunlight
Tyres are made of rubber compounds that can degrade when exposed to ultraviolet (UV) rays. Store your tyres in a cool, dark place to prevent cracking and hardening caused by prolonged exposure to sunlight. UV rays can also weaken the structural integrity of the tyres, reducing their effectiveness.
3. Choose a Cool, Dry Storage Location
Temperature fluctuations and humidity can negatively impact tyres. Store them in a temperature-controlled environment, such as a garage or basement, to avoid extreme heat or cold. Humidity can cause the steel belts within the tyres to corrode, so keeping the storage area dry is equally essential.
4. Use Tyre Bags or Covers
Protect your tyres by storing them in dedicated tyre bags or covers. These prevent dust and debris from accumulating and shield the tyres from direct exposure to air, which can cause oxidation. Heavy-duty plastic bags sealed tightly can be an alternative if tyre bags are unavailable.
5. Store Vertically When Possible
If you’re storing tyres without rims, it’s best to store them vertically. Stacking tyres on top of one another can lead to deformation, especially over long periods. Storing them upright helps maintain their shape and reduces stress on the sidewalls. Use a tyre rack or wooden pallet to keep them off the floor.
6. Avoid Stacking Tyres with Rims
If your tyres are mounted on rims, avoid stacking them vertically. Instead, store them flat and stack them no more than four high to prevent rim damage. Place a protective layer, such as cardboard or cloth, between each tyre to avoid scratches or marks.
7. Keep Away From Chemicals
Rubber is sensitive to chemicals like oil, gasoline, and solvents. Ensure your storage area is free of these substances, as they can degrade the rubber and compromise the tyre’s performance. Avoid storing tyres near appliances like furnaces or motors that may emit ozone, which accelerates rubber deterioration.
8. Maintain Proper Inflation for Mounted Tyres
If your tyres are stored with rims, ensure they are inflated to the recommended pressure. Under-inflated tyres can develop flat spots, while over-inflation can lead to stress on the rubber. Regularly check the pressure during storage to maintain their condition.
9. Rotate Tyres Periodically
For tyres stored for an extended period, rotate their position periodically to avoid flat spots or uneven wear. For vertically stored tyres, turn them slightly every few months, and for stacked tyres, rearrange the stack. This ensures even pressure distribution and maintains their shape.
10. Label Your Tyres
If you’re storing multiple sets of tyres, label them based on their position (e.g., front left, rear right). This will make it easier to reinstall them in the correct position, maintaining the tyre rotation pattern and ensuring even wear.
Why Proper Tyre Storage Matters?
Storing tyres correctly preserves their quality and enhances their longevity and performance. Improper storage can lead to:
Take the time to store your tyres correctly—your safety and investment depend on it!
CEAT Specialty: Supporting Your Tyre Needs
At CEAT Specialty, we understand the importance of maintaining your tyres in peak condition. Our high-quality Agri tyres are built to withstand harsh conditions, but proper storage maximises their lifespan. Whether you need tyres for farm equipment, industrial vehicles, or other applications, CEAT Specialty offers durable solutions that deliver top performance.
Read the full blogThu, 12 Dec 2024 ceat-speciality:blogs-tags/all,ceat-speciality:blogs-tags/tyre-care
ceat-speciality:blogs-tags/all,ceat-speciality:blogs-tags/tyre-care
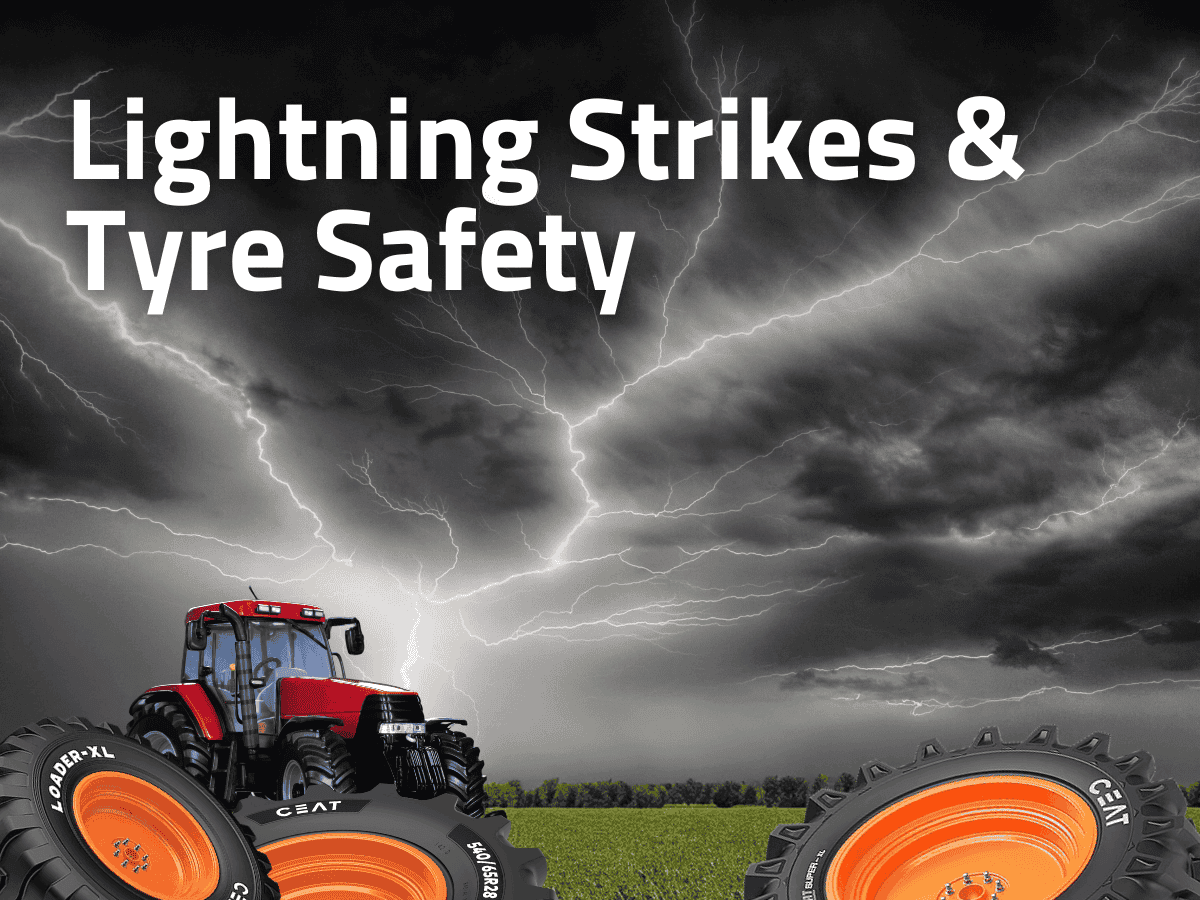
Lightning strikes & tyre safety: What you need to know?Farmers rely heavily on their tractors for daily operations, whether ploughing fields, transporting goods, or managing livestock. However, operating farm machinery during extreme weather, especially thunderstorms, poses significant risks. One of the lesser-known but critical safety concerns during storms is lightning strikes and their impact on tractor tyres. Here’s what you need to know to stay safe and protect your equipment.
Understanding the Risks of Lightning Strikes
Lightning is a powerful force of nature, with temperatures hotter than the sun’s surface and enough energy to cause severe damage. While tractors, due to their size and metal construction, may not be direct targets, they are at risk when operating in open fields during a thunderstorm. The tractor's height and metal components make it a potential path for lightning, especially when surrounded by tall crops or on flat terrains.
This surge of electricity can damage various tractor components, including the tyres, which are often mistakenly thought to be insulators against lightning.
The Impact of Lightning Strikes on Tractor Tyres
Many believe that rubber tyres protect vehicles from lightning strikes. While it’s true that rubber is an insulator, the sheer power of a lightning bolt renders this protection ineffective. Here’s why:
Safety Tips for Farmers During Thunderstorms to Protect Your Tractor Tyres
Farmers must protect themselves, their equipment, and their farm tractor tyres during thunderstorms. Here are some essential safety measures:
The safest option is to postpone fieldwork if a storm is approaching. Monitor weather forecasts and use mobile apps to track thunderstorm activity in your area.
If you’re caught in a storm while using your tractor, stop operations immediately and seek shelter in a sturdy building. Avoid parking under tall, isolated structures like trees, as these can attract lightning.
After a thunderstorm, inspect your tractor tyres for signs of damage, such as burns, cracks, or bulges. Even minor damage can compromise the tyre’s performance and safety.
Consider equipping your tractor with grounding chains or devices designed to dissipate electrical charges safely into the ground. This added precaution can reduce the risk of severe damage during a strike.
If your farm tractor tyre shows signs of lightning-related damage, replace it immediately. Compromised tyres can lead to reduced traction, increased wear, and a higher risk of blowouts, especially under heavy loads. Invest in high-quality tyres from reputable brands like CEAT Specialty. Our tyres are designed to withstand harsh conditions and are built to last.
CEAT Specialty: Your Partner in Protecting Your Investment
CEAT Specialty offers a range of high-quality tractor tyres designed to withstand the rigours of agricultural operations. Our farm tractor tyres are engineered to provide:
By choosing CEAT Specialty tyres, you can protect your investment and ensure the longevity of your tractor.
Remember, while lightning strikes are unpredictable, taking preventive measures and investing in high-quality tyres can significantly reduce the risk of damage and ensure the continued performance of your tractor.
Read the full blogMon, 9 Dec 2024 ceat-speciality:blogs-tags/all,ceat-speciality:blogs-tags/tyre-care
ceat-speciality:blogs-tags/all,ceat-speciality:blogs-tags/tyre-care
DIY tyre change: A farmer's guideChanging a flat tyre on your farm tractor might seem daunting. Nevertheless, with the right tools and a bit of know-how, you can handle the task yourself.
Read the full blogWed, 4 Sep 2024 ceat-speciality:blogs-tags/all,ceat-speciality:blogs-tags/tyre-care
ceat-speciality:blogs-tags/all,ceat-speciality:blogs-tags/tyre-care
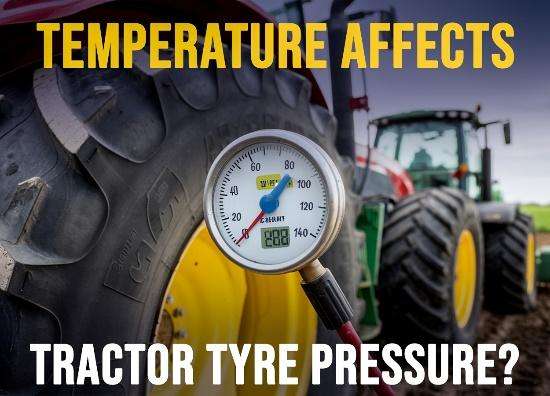
How does temperature affect tractor tyre pressure?When it comes to maintaining a tractor’s performance, one often overlooked yet vital aspect is the impact of temperature on tyre pressure. While many of us may focus on routine checks and maintenance, the influence of temperature on tractor tyre pressure can significantly affect the safety and efficiency of your machinery. As temperatures fluctuate throughout the day and across different seasons, they can cause changes in tyre pressure that might go unnoticed if not adequately monitored.
Understanding how temperature impacts tyre pressure is essential for any tractor operator who wants to ensure their equipment is operating at its best. Overinflated or underinflated tyres can lead to decreased performance, increased wear and tear, and potentially hazardous driving conditions. By keeping a close eye on tyre pressure and making necessary adjustments based on temperature changes, you can maintain optimal tractor performance, improve safety, and extend the life of your tyres.
This blog will explore how temperature fluctuations influence tyre pressure, the signs of improper tyre inflation, and practical tips for managing tyre pressure in varying conditions. If you're a seasoned farmer, understanding this aspect of tractor maintenance will help you keep your equipment running smoothly and safely throughout all seasons.
The Science Behind It
As temperatures fluctuate throughout the day and across seasons, the air pressure in tractor tyre undergoes significant changes that can directly impact their performance. When temperatures rise, the air within the tyres heats up and expands. This expansion increases tyre pressure, which can cause the tyres to become overinflated if not adjusted accordingly. Overinflation can lead to a harsher ride, reduced traction, and uneven tyre wear, ultimately affecting the tractor's efficiency and safety.
Conversely, as temperatures drop, the air inside the tyres contracts, leading to a decrease in pressure. Underinflated tyres can cause various issues, including poor handling, increased rolling resistance, and accelerated wear. Low pressure can also compromise the tractor's stability and fuel efficiency, making it harder to achieve optimal performance.
The interplay between temperature and tyre pressure is crucial in maintaining your tractor’s operational efficiency. For instance, if you’re working in the early morning when temperatures are cooler, your tyres may have lower pressure than they would later in the day when the temperature rises. Without adjusting for these changes, you could be driving with tyres that are not performing at their best, potentially leading to safety hazards and increased maintenance costs.
Maintaining the correct tyre pressure is critical for your tractor's optimal performance, and any deviations from the recommended levels can have several adverse effects.
Tyre pressure has a direct impact on the traction your tractor achieves. When underinflated tyres tend to flatten out more, increasing the contact area with the ground. While this might seem beneficial for grip, it can reduce traction in certain conditions, as the tyres may deform excessively and lose their designed grip. On the other hand, overinflated tyres have a reduced contact area, which can lead to diminished traction, especially on uneven or soft terrain. Properly inflated tyres maintain an optimal contact patch, ensuring that your tractor maintains good grip and stability on various surfaces, from wet fields to rough terrain.
Tyre pressure heavily influences the lifespan of your tractor tyres. Underinflation causes increased flexing and heat buildup, accelerating tyre wear and leading to structural damage or blowouts. Conversely, overinflation can cause the centre of the tread to wear out more quickly than the edges, leading to uneven wear and a reduced overall lifespan. By keeping your tyres properly inflated, you distribute wear more evenly and reduce the risk of premature tyre failure, ensuring that your tyres last longer and perform more reliably.
Key Considerations:
Tips for Maintaining Optimal Tyre Pressure:
By understanding how temperature affects tyre pressure and taking proactive steps to maintain optimal levels, you can ensure your tractor's safe and efficient operation.
Read the full blogTue, 3 Sep 2024 ceat-speciality:blogs-tags/all,ceat-speciality:blogs-tags/tyre-care
ceat-speciality:blogs-tags/all,ceat-speciality:blogs-tags/tyre-care
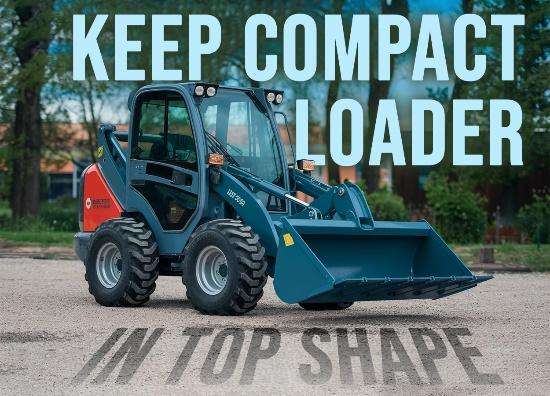
How do you keep your compact loader in top shape?A well-maintained compact loader is a valuable asset that can significantly enhance efficiency and productivity on your farm or construction site. Regular maintenance ensures optimal performance, minimises downtime, and extends the lifespan of your equipment.
Following the tips outlined in this guide, you can take proactive steps to keep your compact loader in top shape and avoid costly repairs or replacements.
Regular Maintenance Checks
Conducting daily inspections is a fundamental aspect of compact loader maintenance. By carefully examining your loader before each use, you can promptly identify and address potential issues, preventing more significant problems and ensuring safe and efficient operation.
In addition to daily inspections, weekly checks are essential for maintaining your compact loader's optimal performance. Here's a breakdown of critical areas to focus on:
By conducting weekly maintenance checks, you can identify and address potential issues before they escalate into more severe problems, ensuring your compact loader's long-term health and performance.
Monthly maintenance checks ensure your compact loader's long-term health and performance. By addressing potential issues early on, you can prevent more significant problems and minimise downtime.
Proper Operation
Overloading your compact loader can have serious consequences, including:
To avoid overloading your compact loader:
You can ensure long-term health, safety, and optimal performance by avoiding overloading your compact loader.
Tyre Care
Fluid Maintenance
Component Care
Storage
By following these tips, you can significantly extend the lifespan of your compact loader and ensure it operates at peak performance.
Read the full blogSun, 1 Sep 2024 ceat-speciality:blogs-tags/all,ceat-speciality:blogs-tags/tyre-care

ceat-speciality:blogs-tags/all,ceat-speciality:blogs-tags/tyre-care
Agriculture Tyre Safety: What to Do and What to Avoid?Whether you’re working with tractors, harvesters, or other agricultural machinery, the safety of your operations heavily depends on the condition of your tyres. Ensuring the tyre health guarantees better performance and contributes to overall safety in the field. In this blog post, we’ll delve into the crucial aspects of tyre safety in agriculture, exploring what you should do to ensure a safe and productive farming experience while highlighting what you should avoid.
CEAT Specialty understands the unique needs of the agriculture industry. That’s why we offer a wide range of specialized agriculture tyres to deliver safety and performance. Our tyres withstand the rigors of farm work, providing excellent traction, durability, and load-bearing capacity.
Tyre safety is paramount in agriculture, as it directly impacts both your farm’s productivity and your operations’ safety. By following best practices like regular inspections, proper inflation, and weight distribution and avoiding common pitfalls like overloading and underinflation, you can ensure that your agriculture tyres serve you well for years. CEAT’s specialized agriculture tyres support your farming needs, providing the safety and performance you can rely on.
Read the full blogWed, 27 Sep 2023 ceat-speciality:blogs-tags/all,ceat-speciality:blogs-tags/tyre-care

ceat-speciality:blogs-tags/all,ceat-speciality:blogs-tags/tyre-care
How is intensive agriculture different from horticulture?In the world of agriculture, two prominent cultivation practices stand out: intensive agriculture and horticulture. While they contribute to the food production system, they have distinct differences. Let’s explore intensive agriculture and horticulture’s characteristics and unique aspects, shedding light on their approaches and benefits.
Intensive agriculture is a highly efficient and technology-driven cultivation practice focused on maximizing crop yields within limited land areas. It involves the extensive use of machinery, advanced irrigation systems, synthetic fertilizers, and pesticides.
Key features of intensive agriculture include:
Horticulture, on the other hand, focuses on the cultivation of plants for ornamental purposes, as well as the production of fruits, vegetables, and medicinal plants. Unlike intensive agriculture, horticulture emphasizes quality over quantity and promotes sustainable farming practices.
Key features of horticulture include:
Both intensive agriculture and horticulture play significant roles in the agricultural industry, albeit with different approaches and objectives. Intensive agriculture focuses on high yields and efficient resource utilization, while horticulture emphasizes diversity, sustainability, and quality. Understanding the distinctions between these cultivation practices allows us to appreciate the diverse strategies employed to meet the demands of a growing population and ensure a sustainable future for agriculture.
At CEAT Specialty, we recognize the importance of agriculture and strive to provide specialized tyres for various farming practices. Whether it’s supporting intensive agriculture or facilitating horticulture, our range of agricultural tyres is designed to meet the specific needs of farmers, enhance productivity, and contribute to a thriving farming journey.
Remember, choosing the right agriculture tyre for your farming equipment is crucial for optimizing performance and ensuring smooth operations in the field. Connect with our expert team to explore our comprehensive range of agricultural tyres. And find the perfect Agri tyre for your farming needs.
Together, let’s cultivate a prosperous future in agriculture!
Note: The information provided in this blog is based on general agricultural practices. It is recommended to consult with local agricultural experts and professionals for specific guidance tailored to your region and farming requirements.
Read the full blogFri, 14 Jul 2023 ceat-speciality:blogs-tags/all,ceat-speciality:blogs-tags/tyre-care

ceat-speciality:blogs-tags/all,ceat-speciality:blogs-tags/tyre-care
Worn Tractor Tyres: When Do They Become a Risk?Tractor tyres are the lifeline of farming operations, providing the necessary traction and stability for various agricultural tasks. Over time, however, these farm tractor tyres can become worn and pose a potential risk to the operator and the equipment. Let’s explore the critical factors when evaluating worn tractor tyres and understand when they become a safety hazard.
One of the primary indicators of a worn tractor tyre is the depth of its treads. As tyres wear down, the tread depth decreases, compromising their ability to grip the terrain effectively. Reduced traction can decrease stability, especially in challenging conditions such as wet or muddy fields. Regularly inspecting the tread depth and replacing tyres when they fall below the recommended levels is essential for maintaining optimal performance and safety.
Apart from tread depth, inspect agricultural tyre for any visible signs of damage or cracks. Prolonged exposure to rough terrains, sharp objects, and excessive loads can cause wear and tear, weakening tyre structures. These damages can result in sudden blowouts or even complete tyre failure, posing significant risks to the operator and nearby equipment. Regular visual inspections can help identify such issues early on and prompt the necessary tyre replacements.
Uneven wear patterns on farm tyre are a common indication of potential problems. Improper tyre inflation, misalignment, or overloading can contribute to uneven tyre wear. This affects the tractor’s overall performance, increases the likelihood of accidents and decreases fuel efficiency. Monitoring the wear patterns and taking corrective measures, such as realigning the tyres or adjusting inflation pressure, can help prevent further damage and ensure safer operations.
While visual inspections and tread depth measurements are essential, the age and usage of tractor tyres are equally critical factors to consider. Over time, even with proper maintenance, tyres naturally degrade due to exposure to the elements, UV radiation, and chemical interactions. Additionally, heavy usage and prolonged storage periods can further deteriorate tyre quality. It’s recommended to establish a regular replacement schedule based on the manufacturer’s guidelines and consult with tyre experts to accurately assess the condition of ageing tyres.
As responsible farmers and equipment operators, it’s crucial to prioritize safety by regularly inspecting tractor tyres and identifying signs of wear and tear. Worn tractor tyres can significantly compromise performance, stability, and, ultimately the safety of your operations. By monitoring tread depth, checking for visible damage, addressing uneven wear patterns, and considering age and usage, you can mitigate risks and ensure the longevity of your tractor tyres. Remember, maintaining optimal tyre condition is about productivity and safeguarding the well-being of yourself and those around you.
Read the full blogFri, 14 Jul 2023 ceat-speciality:blogs-tags/all,ceat-speciality:blogs-tags/tyre-care

ceat-speciality:blogs-tags/all,ceat-speciality:blogs-tags/tyre-care
Choosing the Right Trailer: Articulated vs. Rigid HaulersWhen hauling heavy loads, selecting the right trailer ensures efficiency and safety. Two popular options in the market are articulated and rigid haulers, each offering unique features and benefits. In this blog, we will explore the differences between these two types of trailers and provide insights to help you make an informed decision based on your specific requirements.
Articulated haulers are known for their flexibility. They consist of a tractor unit and a separate trailer connected through a pivot joint. This design allows the trailer to articulate, providing better stability and traction, especially on rough or uneven terrain. Articulated haulers excel in off-road applications and are commonly used in construction, mining, and forestry industries.
Rigid haulers, on the other hand, feature an integrated design with a single chassis for both the tractor and trailer. Unlike articulated haulers, they do not have a pivot joint, which makes them more suitable for smooth or well-maintained roads. Rigid haulers are known for their higher load capacity, excellent speed, and efficiency, making them a preferred choice for long-haul transportation and on-road applications.
No matter which type of hauler you choose, selecting the right trailer tyres is essential for optimal performance and safety. CEAT Specialty offers a range of tyres designed specifically for haulers. These tyres provide excellent traction, stability, and durability, ensuring enhanced efficiency and reduced downtime.
Choosing the right trailer, whether an articulated or rigid hauler, depends on various factors such as load capacity, terrain conditions, and operational requirements. Assessing these factors carefully and considering the specific needs will guide you in making an informed decision. Remember, partnering with a trusted tractor tyre manufacturer like CEAT Specialty ensures your hauler is equipped with high-quality, reliable tyres that enhance performance and safety.
Read the full blogFri, 14 Jul 2023 ceat-speciality:blogs-tags/all,ceat-speciality:blogs-tags/tyre-care

ceat-speciality:blogs-tags/all,ceat-speciality:blogs-tags/tyre-care
What is the Importance of the Tread Depth on an Agriculture Tyre?Being deeply rooted in the agricultural industry, farmers have an innate understanding of each component’s pivotal role in driving our operations’ success. From choosing the right equipment to implementing effective techniques, our decisions directly impact our productivity and profitability. But one crucial factor often goes unnoticed but holds tremendous importance. It is the tread depth of an agricultural tyre.
In this blog, we invite you to embark on a journey where we unveil the hidden secrets of tread depth and explore its profound impact on the performance, safety, and longevity of agriculture tyres. Get ready to discover how this seemingly small detail can make a difference in optimizing your farming endeavors.
Tread depth directly impacts the traction and grip of an ag tyre. The deeper the tread, the more effectively the tyre can grip the ground, providing enhanced traction. This becomes particularly vital in challenging terrains like muddy fields or uneven surfaces. Adequate tread depth allows the tyre to dig into the soil, reducing slippage and ensuring optimal power transfer from the vehicle to the ground.
Agricultural activities often involve working in environments with high moisture content, such as wet fields or damp soil. In such conditions, tread depth plays a crucial role in self-cleaning. The grooves and channels in the tread pattern help evacuate mud, stones, and debris, preventing them from getting lodged in the tyre. Sufficient tread depth ensures effective self-cleaning, maintaining Ag tyre performance and minimizing the risk of traction loss due to clogging.
Tread depth directly correlates with tyre lifespan and wear patterns. The tread gradually wears down as agriculture tyres endure heavy loads, rough terrains, and various weather conditions. Optimal tread depth allows for even wear distribution, prolonging agriculture tyre life and maximizing the return on investment. Monitoring and maintaining the tread depth of agricultural tyres is crucial to ensure safe and efficient operation.
In agricultural applications, where irrigation and rainfall are common, the risk of hydroplaning cannot be overlooked. Hydroplaning occurs when a layer of water separates the tyre from the ground, leading to loss of control and traction. Sufficient tread depth facilitates efficient water dispersion, reducing the chances of hydroplaning. The deeper grooves and channels in the tread pattern helps evacuate water and maintain contact with the ground, ensuring better control and enhanced safety.
Agriculture tyres are subjected to heavy loads due to the nature of farming equipment and operations. Adequate tread depth is vital for maintaining the load-bearing capacity of the tyres. As the tread wears down, the tyre’s ability to distribute the load evenly across its surface diminishes, increasing the risk of uneven wear, structural damage, and potential failure. Monitoring and maintaining proper tread depth ensures optimal load-bearing capabilities and enhance overall safety.
The significance of tread depth on agriculture tyres cannot be emphasized enough. It directly impacts traction, self-cleaning ability, wear patterns, hydroplaning resistance, and load-bearing capacity. Farmers and agricultural professionals must prioritize regular inspections and maintenance of tread depth to ensure optimal performance, longevity, and safety of their agriculture tyres. By understanding and addressing the importance of tread depth, you can make informed decisions when selecting and caring for your agriculture tyres, maximizing productivity and minimizing downtime in your farming operations.
Read the full blogFri, 23 Jun 2023 ceat-speciality:blogs-tags/all,ceat-speciality:blogs-tags/tyre-care

ceat-speciality:blogs-tags/all,ceat-speciality:blogs-tags/tyre-care
What are Effective Strategies to Address the Wear and Tear of Tractor Tyres?Tractor tyres are the unsung heroes of the farming world, enduring harsh conditions and heavy workloads daily. However, the wear and tear they experience can significantly impact your agricultural operations’ performance, efficiency, and safety. Implement effective strategies to ensure your farm tractor tyres remain in optimal condition and maximize their lifespan. Let’s explore actionable tips to address wear and tear, helping you keep your equipment rolling smoothly and your farm running seamlessly.
Routine inspections play a vital role in identifying potential issues before they escalate. Make it a habit to inspect your tractor tyres regularly, checking for signs of wear, punctures, bulges, or any other abnormalities. Additionally, ensure proper tractor tyre inflation according to the manufacturer’s recommendations. Maintaining adequate tyre pressure enhances traction and minimizes the risk of excessive wear caused by underinflation or overinflation.
Proper ballasting, adding weight to your tractor, is crucial for reducing tyre wear. Balancing the weight distribution between the front and rear tyres helps alleviate excessive strain on specific tyres. Consult your tractor’s manual or seek expert advice to determine the optimal ballasting techniques for your particular machine and intended applications. By distributing weight evenly, you can mitigate uneven wear and extend the lifespan of your tyres.
Like your car’s tyres, regular tyre rotation can help achieve even wear across all four corners of your tractor. Uneven wear patterns can result from varied torque distribution or turning on different surfaces. By periodically swapping the front and rear tyres, you can equalize wear and prolong the overall life of your tyre set. Consult with your tyre manufacturer or trusted mechanics to determine the ideal rotation intervals for your tyres and usage patterns.
Overloading your tractor beyond its recommended capacity can subject the tyres to excessive stress and strain, leading to accelerated wear. Similarly, excessive speed, especially on rough terrains, can increase farm tyre wear due to increased friction and impact forces. Adhere to the manufacturer’s load capacity guidelines, and exercise caution by maintaining reasonable speeds. These practices will help reduce wear and tear on your tractor tyres, ensuring their longevity and performance.
One of the most effective strategies to combat wear and tear is investing in high-quality tractor tyres from reputable manufacturers like CEAT Specialty. Premium tyres withstand the demanding conditions of agriculture, offering superior durability, puncture resistance, and optimal traction. By choosing engineered tyres for agricultural use, you equip your tractor with the best possible foundation for long-lasting performance and reduced wear.
Addressing wear and tear of tractor tyres requires a proactive approach, encompassing regular inspections, proper maintenance, weight distribution, tyre rotation, responsible loading, and investing in quality tyres. By implementing these strategies, you can extend the lifespan of your tractor tyres, optimize their performance, and ultimately improve your overall farming efficiency. Remember, well-maintained tyres save you money in the long run and contribute to a safer and more productive agricultural environment.
Read the full blogThu, 22 Jun 2023 ceat-speciality:blogs-tags/all,ceat-speciality:blogs-tags/tyre-care

ceat-speciality:blogs-tags/all,ceat-speciality:blogs-tags/tyre-care
How CEAT Spraymax Tyres Provide Safe and Reliable Performance?Having the right farm tractor tyres can make all the difference. That is why CEAT Specialty has developed Spraymax tyre – to provide farmers with the safety and reliability they need. In this post, we will explore the features and benefits of CEAT Spraymax tractor tyre, and why they are the ideal choice for farmers in the UK.
CEAT Spraymax tyres are designed with an advanced tread pattern that provides a superior grip, ensuring you can maintain control of your tractor. The tread pattern features deep grooves, reducing the risk of aquaplaning and improving traction. The result is a tractor tyre with exceptional handling and braking performance.
In addition to their superior grip, CEAT Spraymax tyres are also built to last. They feature a robust construction that can withstand the demands of everyday farming. The agricultural tyre is designed with a reinforced shoulder that provides extra protection against punctures and cuts. At the same time, the durable rubber compound ensures long-lasting performance. Additionally, the tyres are designed to have a long tread life, which helps to reduce the need for frequent replacements and improves overall safety and reliability.
Spraymax Tyres are made with a specialized rubber compound that enhances grip on surfaces. This compound improves the tyre’s traction, reducing the risk of skidding or slipping. It is designed to provide excellent performance in a variety of conditions, including extreme temperatures and heavy loads. Its use helps to ensure that the tyres remain stable and reliable even in the most challenging farming conditions.
When a sprayer brakes, the tyres are responsible for bringing the vehicle to a stop. The braking performance of a sprayer depends on various factors, including the quality of the tyres. CEAT Spraymax Tyres are designed to provide a safe and reliable farming experience. One important feature of these tyres is their efficient braking system. CEAT Spraymax Tyres are designed with a special tread pattern that provides excellent grip and traction on the field. This allows for shorter stopping distances, which is essential in emergency situations. When a sprayer needs to stop quickly, the efficient braking system of CEAT Spraymax Tyres reduces the stopping distance, allowing the farmer to come to a complete stop more quickly and safely.
CEAT Spraymax tyres are the perfect choice for UK farmers, offering greater grip and long-lasting performance.
The CEAT Spraymax farm tyre is designed to handle 40% more load than a regular radial one. Alternatively, it can support the same load as a standard radial tyre while maintaining 40% lower pressure. The components of the Spraymax VF design incorporate the following features:
CEAT Spraymax tyres are the ultimate choice for UK farmers looking for safe and reliable performance. With their advanced tread pattern, robust construction, and long-lasting performance, these tyres offer the perfect combination of safety and durability. So, if you’re looking for an Agri tyre that can handle whatever the UK weather throws at you, look no further than CEAT Spraymax.
Read the full blogWed, 24 May 2023 ceat-speciality:blogs-tags/all,ceat-speciality:blogs-tags/tyre-care

ceat-speciality:blogs-tags/all,ceat-speciality:blogs-tags/tyre-care
Farmax R65 vs. HPT: Which CEAT Agriculture Tyre is Right for You?If you’re a farmer or a farm equipment operator, you know how important it is to have the right tyres. CEAT Specialty is a well-known brand in the agriculture tyre market. We offer a range of farm tractor tyres that cater to different requirements. In this blog post, we will compare two of CEAT Specialty’s popular agricultural tyres – the Farmax R65 and the HPT, and help you decide which is right for you.
The CEAT Specialty’s Farmax R65 is a tyre for tractors and other farm equipment. Its deep tread design offers excellent traction and reduces slippage on wet or soft soil. The tractor tyre’s robust carcass construction provides durability and stability while handling heavy loads, making it suitable for large farms and heavy-duty applications.
Fuel expenses are a significant concern for farms, and we understand the importance of finding solutions to minimize costs. That’s why we have engineered the CEAT Farmax R65 tyre with the aim of reducing fuel consumption. Our innovative design and advanced technology can potentially help farmers achieve fuel savings up to some extent. By choosing the CEAT Farmax R65 tyre, farmers can optimize their operational efficiency and reduce overall fuel expenses, leading to improved profitability and sustainable agricultural practices. It also has a longer life span than traditional tyres, which reduces the need for frequent replacements.
The CEAT HPT is a bias tyre designed for small and medium tractors, harvesters, and other agricultural machinery. It features a lug pattern that offers excellent traction on dry and hard soil surfaces. The tyre’s robust construction provides stability and load-carrying capacity, making it suitable for rough terrain and heavy-duty applications.
The HPT is also known for its excellent puncture resistance. Its tough rubber compound resists cuts and abrasions, reducing the risk of tyre damage and the need for repairs. This feature is handy in fields with sharp stones and debris.
The CEAT Farmax HPT tyre is specifically crafted to increase yield by enhancing traction and minimizing soil compaction. By enabling better traction, the tyre enables your tractor to pull heavier loads and work efficiently in wet conditions. Additionally, reduced soil compaction results in better access to water and nutrients for your crops, resulting in increased yields.
The choice between the Farmax R65 and the HPT depends on your specific needs and the equipment you operate. If you have large farms or heavy-duty equipment that require high load-carrying capacity and durability, the Farmax R65 tyre is the better option. Its fuel efficiency makes it a cost-effective and reliable choice for long-term use.
On the other hand, if you have small or medium-sized farms or operate equipment on rough terrain with sharp debris, the Farmax HPT tyre is the better choice. Its puncture resistance provides excellent stability and protection, reducing the risk of tyre damage and downtime.
CEAT Farmax R65 and HPT tyres are engineered to be durable and long-lasting. The Farmax R65 tractor tyre is constructed to provide high mileage, allowing you to maximize the usage of each tyre. On the other hand, the Farmax HPT tractor tyre is made with a unique compound that makes it resistant to cuts and punctures, ensuring that it can withstand even the toughest conditions.
CEAT Specialty offers a range of farm tractor tyres that cater to different requirements. The Farmax R65 and HPT are two of their popular products, each with its unique features and advantages. By considering the specific needs of your farm and equipment, you can choose the tyre that offers the best performance, durability, and cost-effectiveness for your operations.
Read the full blogTue, 23 May 2023 ceat-speciality:blogs-tags/all,ceat-speciality:blogs-tags/tyre-care

ceat-speciality:blogs-tags/all,ceat-speciality:blogs-tags/tyre-care
How to Choose the Right Tractor Tyres?Tractors are an essential piece of machinery for farmers across the world. They help to simplify and speed up various farming processes such as ploughing, planting, and harvesting. To ensure that tractors function efficiently, it is essential to choose the right tyres. Let’s provide a comprehensive guide on choosing the right tractor tyre for your agricultural needs.
The first step in choosing the right agricultural tyre is determining the size. Tractor tyres are available in a variety of sizes and designs. It is crucial to select the appropriate size based on the weight and power of the tractor. An incorrect size may cause the tractor to lose traction, reduce fuel efficiency, and cause severe damage to the tyre.
The soil type is another essential factor when choosing the right farm tyre Different soil types require different tyre designs. For instance, heavy and wet soils need tyres with deep treads and narrow spacing between the treads. These tyres help to prevent the tractor from getting stuck in the mud. On the other hand, soils that are lighter and drier require tyres with shallow treads and wider spacing between the treads.
The load capacity is the maximum weight that an Ag tyre can carry. The ply rating of the tyre determines the load capacity. Ply rating refers to the number of layers of material used to construct the tyre. Tyres with a higher ply rating can carry heavier loads than those with a lower rating.
The tread design is another critical factor when choosing farm tractor tyres. Tread design refers to the pattern on the surface of the tyre. The tread design determines the traction and flotation of the tractor. The choice of tread design depends on the soil type, weather conditions, and the intended use of the tractor. For example, a tractor used for heavy tillage requires tyres with deep and aggressive treads to provide traction and reduce slippage.
Weather conditions are also essential to consider when choosing the right Ag tyre. Tractor tyres are available in different designs for different weather conditions. For instance, tyres designed for snowy conditions have a different tread pattern than those intended for wet conditions.
Identify the specific tasks and conditions your tractor will be used for and select tyres that are suitable for those tasks. For example, if you use your tractor primarily for ploughing and cultivating, you will need tyres with good traction and grip to ensure your tractor can work efficiently in wet or muddy conditions. On the other hand, if you use your tractor mainly for transportation, you should focus on selecting tyres with a higher load capacity to ensure the safe and efficient transport of heavy loads. By considering the specific needs of your farm and the tasks your tractor will be performing, you can select tyres that will perform well and offer optimal performance for your particular requirements.
Choosing the right tyres is crucial for the efficient functioning of your tractor. It is essential to consider factors such as tyre size, soil type, load capacity, tread design, and weather conditions when choosing the right tractor tyre. By selecting the appropriate tyre, you can improve traction, reduce fuel consumption, and increase the tyre’s lifespan. CEAT Specialty offers many tractor tyres suitable for different soil types, weather conditions, and farming applications. Contact our customer service team to learn more about farm tractor tyres
Read the full blogMon, 22 May 2023 ceat-speciality:blogs-tags/all,ceat-speciality:blogs-tags/tyre-care

ceat-speciality:blogs-tags/all,ceat-speciality:blogs-tags/tyre-care
What Do You Need To Know About Carbon Neutral Farming?In recent years, there has been growing concern about the impact of agriculture on the environment. Many farmers are now seeking ways to reduce their agriculture carbon footprint. Thus, they can implement zero carbon farms. This is where carbon neutral farming comes into play. Let’s discuss what you need to know about carbon neutral farming.
Carbon neutral agriculture is a farming practice that balances carbon emissions with carbon sequestration. Farmers seek to reduce or eliminate their greenhouse gas emissions and offset any remaining emissions through carbon sequestration practices such as planting trees, restoring wetlands, and improving soil health.
The agricultural sector significantly contributes to greenhouse gas emissions, accounting for around 10% of total emissions globally. Carbon negative farming can help to mitigate these emissions and reduce the impact of agriculture on the environment. In addition, carbon neutral farming practices can also improve soil health, reduce the use of synthetic fertilizers and pesticides, and increase biodiversity on farms.
There are many ways that farmers can implement carbon neutral farming practices, including:
Renewable Energy: Farmers can reduce their agriculture carbon footprint by using renewable energy sources such as solar or wind power to power their operations.
Regenerative Agriculture: Regenerative agriculture practices such as cover cropping, reduced tillage, and crop rotation can improve soil health, reduce erosion, and sequester carbon.
Livestock Management: Livestock management practices such as rotational grazing can reduce greenhouse gas emissions from animal waste and improve soil health.
Carbon Sequestration: Carbon sequestration practices such as planting trees, restoring wetlands, and improving soil health can help to offset carbon emissions from farming operations.
There are many benefits to implementing carbon neutral farming practices, including:
Reduced Carbon Footprint: Carbon neutral agriculture can help to reduce the carbon footprint of farming operations, mitigating the impact of agriculture on the environment.
Improved Soil Health: Carbon neutral farming practices such as regenerative agriculture can improve soil health, reducing the need for synthetic fertilizers and pesticides.
Increased Biodiversity: Carbon neutral farming practices can increase farm biodiversity, providing wildlife habitat and promoting ecosystem health.
Cost Savings: Carbon neutral farming practices such as renewable energy and reduced tillage can help reduce farm operational costs.
Carbon neutral farming is essential for farmers looking to reduce agriculture carbon footprint and implement sustainable practices in their operations. By implementing practices such as renewable energy, regenerative agriculture, livestock management, and carbon sequestration, farmers can mitigate the impact of agriculture on the environment while improving soil health and promoting biodiversity.
Selecting the right farm tyre is an integral part of achieving carbon neutrality. By choosing high-quality farm tyres that are designed for optimal performance and fuel efficiency, farmers can reduce their carbon footprint and enhance their bottom line. CEAT Specialty offers a wide range of farm tyres engineered to meet the unique needs of the farming community. Our tyres deliver superior performance, durability, and fuel efficiency, making them ideal for farmers committed to sustainable and profitable agriculture. Contact us today to learn how our farm tyres can help you achieve carbon neutrality and enhance your farming operations.
Read the full blogMon, 15 May 2023 ceat-speciality:blogs-tags/all,ceat-speciality:blogs-tags/tyre-care

ceat-speciality:blogs-tags/all,ceat-speciality:blogs-tags/tyre-care
How to Extend the Life of Your Farm Tractor Tyres?As a farmer, you rely on your tractor to keep your farm running smoothly. However, replacing tyres can quickly add up, and premature wear can significantly strain your budget. By properly caring for your tractor tyres, you can extend their lifespan and save money in the long run. Here are some tips on how to extend the life of your farm tractor tyres.
One of the simplest and most effective ways to extend the life of your agriculture tyre is to maintain the correct tyre pressure. Underinflated tyres can cause excess wear and damage to the sidewalls. In contrast, overinflated tyres can cause a rough ride and increased tread wear. Check the tyre pressure regularly, at least once weekly, and adjust as needed.
Rotating your farm tractor tyres regularly can help ensure even wear and extend their lifespan. The front tyres tend to wear out more quickly than the rear tyres, so rotating them can help distribute the wear more evenly. Consult your tractor’s owner’s manual for recommended rotation intervals and patterns.
Proper storage is essential for extending the life of your farm tyre. Store tyres in a cool, dry place away from direct sunlight, moisture, and heat sources. Avoid storing tyres near chemicals, solvents, or fuels, which can cause damage to the rubber. Cover the tyres with a tarp or protective covering if you need to keep tyres outside.
Choosing the right farm tractor tyres for your terrain can help prevent premature wear and damage. If you work on rough or uneven terrain, consider using tyres with deeper treads or broader footprints. If you work on hard surfaces such as roads or pavements, consider using harder compound tyres that are less likely to wear out quickly.
Regular maintenance of your Agri tyre can help prevent premature wear and damage. Check the tyres for signs of wear, such as cracks, bulges, or cuts. Replace tyres that show signs of damage immediately. Clean the tyres regularly with a mild soap and water solution to remove dirt and debris, which can cause damage to the rubber.
Overloading your tractor can put undue stress on your tyres, causing them to wear out more quickly. Ensure you know your tractor’s maximum load capacity and avoid exceeding it. Distribute the load evenly across the tractor, preventing sharp turns or sudden stops and starts.
Taking proper care of your farm tractor tyres can help extend their lifespan and save you money in the long run. Regularly checking tyre pressure, avoiding overloading, rotating tyres, proper storage, choosing the right tyres for your terrain, and regular maintenance can all help prevent premature wear and damage. Follow these tips to keep your tractor tyres in good condition and ensure your farm runs smoothly.
It is advisable to seek professional assistance when choosing the best tractor tyre for your needs. CEAT Specialty has a team of expert technicians who can evaluate your requirements and provide suitable recommendations.
Read the full blogFri, 12 May 2023 ceat-speciality:blogs-tags/all,ceat-speciality:blogs-tags/tyre-care

ceat-speciality:blogs-tags/all,ceat-speciality:blogs-tags/tyre-care
What are the manufacturing secrets behind a quality agriculture tyre?As the backbone of agriculture, tractors and other farming equipment are essential in maintaining the world’s food supply. And like any other vehicle, tyres play a crucial role in their performance. That’s why farmers rely on quality agriculture tyres to ensure their work is done efficiently and effectively.
However, have you ever wondered what goes into manufacturing high-quality agriculture tyres? Let’s uncover some of the manufacturing secrets behind a quality agriculture tyre.
The first step in manufacturing a quality tractor tyre is designing it. Manufacturers consider the agricultural industry’s specific needs, including different terrains, loads, and speeds. This process involves assessing the tyre’s construction, dimensions, and tread pattern.
After designing the farm tyre, the next step is selecting the appropriate raw materials. High-quality agriculture tyres are made from durable and reliable materials, such as rubber, steel, and synthetic fibres. Manufacturers use natural rubber to give the tyre flexibility. In contrast, synthetic rubber is used for increased durability and improved resistance to wear and tear.
Once the materials are selected, they are mixed in a giant machine. The rubber compound is mixed according to a specific recipe to ensure consistency in each batch. This step is crucial in ensuring the Ag tyre is strong, durable, and puncture-resistant.
After the rubber has been mixed, it is moulded into the shape of an Agri tyre. This process involves heating the rubber, pressing it into shape, and cooling it. The tyre is then trimmed to the correct size and shape before moving on to the next step.
The next step is adding the tread pattern to the tractor tyre. This step is essential in ensuring the tyre has the necessary traction to perform efficiently in different terrains. The tread pattern is added using a specially designed machine that rolls over the tyre, adding the pattern as it moves.
After adding the tread pattern, the agriculture tyre is placed in a curing chamber. The curing process involves heating the tyre to a high temperature for a specific time. This process ensures that the tyre is properly cured and the rubber is bonded, making it strong and durable.
Finally, the farm tyre undergoes strict quality control measures to meet the necessary standards. The tyre is inspected for defects, and any issues are corrected before it is shipped out to the customer. Quality control measures ensure that the customer receives a quality product that is reliable, safe, and durable.
Manufacturing a quality Ag tyre involves carefully considering the design, selecting raw materials, mixing the rubber, moulding the tyre, adding the tread pattern, curing the tyre, and strict quality control measures. By following these steps, manufacturers can produce high-quality farm tractor tyres that are durable, reliable, and perform efficiently in different terrains.
CEAT Specialty has a team of skilled technicians who are accountable for assessing your requirements and giving recommendations on the ideal agriculture tyre to choose. With an extensive selection of accessible tyre options, making a choice can be daunting. However, it is advisable to seek professional assistance. No inquiry is deemed inappropriate when selecting the most suitable tyre for your farming needs.
Read the full blogThu, 27 Apr 2023 ceat-speciality:blogs-tags/all,ceat-speciality:blogs-tags/tyre-care

ceat-speciality:blogs-tags/all,ceat-speciality:blogs-tags/tyre-care
What do I need to know about water ballasting my tractor tyre?Water ballasting is a widely used method to enhance the grip and stability of farm tractor tyres by adding weight. This process involves filling the tyres with water, which can improve your tractor’s performance and productivity in various farming applications. However, a few critical factors must be considered before water ballasting your tractor tyres. Let’s discuss what you need to know about water ballasting your tractor tyres in the UK.
Water ballasting adds weight to the tyres, which can increase the load-carrying capacity of your tractor. However, it can also cause increased wear and tear on your tyres, especially if you don’t maintain the correct pressure levels. Overloading your tyres can lead to overheating, deformation, and even tyre failure. Therefore, follow the manufacturer’s guidelines on water ballasting and agriculture tyre pressure.
Adding water to your farm tyre can increase fuel consumption due to the added weight. Do you add weight to your tractor’s tyres using water ballasting? Well, it will become heavier and harder to move. It causes the engine to work harder. Ultimately, it leads to increased fuel consumption. However, the added traction and stability provided by water ballasting can help improve your tractor’s efficiency in specific farming applications, such as ploughing and tilling.
To achieve optimal performance and avoid Ag tyre damage, perform water ballasting correctly. Use clean water and fill the tyres to the recommended pressure level. Overfilling the tyres can cause the tyre beads to break. At the same time, underfilling can lead to uneven weight distribution and affect your tractor’s stability. It’s best to consult your tyre manufacturer or local tyre dealer for water ballasting your specific tractor model.
Water ballasting can significantly improve your tractor’s performance in various farming applications. The added weight can provide better traction and stability, making it easier to manoeuvre your tractor on steep slopes and wet or slippery surfaces. Water ballasting can help reduce soil compaction, improving crop yield and soil health.
Before water ballasting, it’s crucial to consider specific radial and bias tyres details. Refer to the manufacturer’s guidelines for compatibility with this inflation process. To fill up your tractor tyre with water, follow these steps:
Water ballasting is a valuable technique that can help improve your tractor’s performance and productivity in various farming applications. However, follow the manufacturer’s guidelines and consult your tyre dealer to ensure proper filling techniques and pressure levels. Water ballasting can affect tyre life, fuel efficiency, and tractor stability, so it’s essential to maintain the correct pressure levels and regularly check your tyre condition.
Professional guidance is recommended when selecting the optimal tractor tyre. CEAT Specialty has a team of proficient technicians responsible for evaluating your needs and offering suggestions.
Read the full blogSun, 23 Apr 2023 ceat-speciality:blogs-tags/all,ceat-speciality:blogs-tags/tyre-care

ceat-speciality:blogs-tags/all,ceat-speciality:blogs-tags/tyre-care
What are the golden rules on the choice and impact of the agricultural tyre?Agricultural tyres play a critical role in the farming industry. They are responsible for supporting the heavy loads of farm machinery, providing traction and grip on different terrains, and ensuring farming operations’ overall efficiency and productivity. However, choosing the right agricultural tyre can be challenging, and its impact on farming operations can be significant. Let’s discuss the golden rules on the choice and impact of agricultural tyres.
One of the most critical factors in choosing the right Ag tyre is understanding the terrain you will work in. Different landscapes require different types of tyres, with variations in the tread pattern, size, and construction. For example, if you are working on soft soil or muddy terrain, you will need tyres with a deep, aggressive tread pattern to provide the necessary grip and traction.
Choosing the right Agri tyre size is essential for optimal performance and efficiency. Undersized tyres can cause excessive wear and tear, while oversized tyres can increase fuel consumption and reduce speed. To determine the right tractor tyre size, consider the weight of your machinery, the load capacity of your tyres, and the speed at which you will be operating.
Farm tractor tyres are exposed to harsh conditions such as rocks, sharp objects, and rough terrain. Therefore, durability is a crucial factor to consider when choosing agricultural tyres. Look for tyres with solid sidewalls and sturdy construction that can withstand the demands of farming operations.
Soil compaction is a common problem in farming, and it can significantly impact crop yields. Farm tractor tyres with low-pressure ratings can help reduce soil compaction by distributing the weight of the machinery over a larger area. This reduces the pressure on the soil and helps to maintain its structure.
Soil compaction can worsen with every passage during planting, fertilizing, or harvesting, especially in wet conditions. Using mechanical machinery when waterlogged soil is not recommended, as it can lead to deep compaction. Soggy land has a low bearing capacity, causing the tyres to sink until they find more profound resistance. It is best to avoid driving in these conditions as it can increase the risk of soil compaction.
Low-rolling resistance tyres are designed to reduce the energy required to move a vehicle. This results in lower fuel consumption and increased efficiency. In the farming industry, where fuel costs can be high, opting for low rolling resistance tyres can help reduce operating costs and increase profitability.
Selecting the right farm tyre is crucial for the efficiency and productivity of agricultural operations. By following the golden rules outlined in this blog, you can ensure that you select the right tractor tyre for your specific needs. When choosing, consider terrain, tyre size, durability, soil compaction, and rolling resistance. Doing so can help ensure your farming operations are as efficient and productive as possible.
CEAT Specialty’s team of experienced technicians is responsible for evaluating your needs and providing guidance on selecting the most suitable agriculture tyre. With a wide range of tyre options available, choosing the right one can be overwhelming, but you are encouraged to seek expert advice. No question is considered wrong when selecting the best farm tyre for your specific requirements.
Read the full blogThu, 20 Apr 2023 ceat-speciality:blogs-tags/all,ceat-speciality:blogs-tags/tyre-care

ceat-speciality:blogs-tags/all,ceat-speciality:blogs-tags/tyre-care
Enhancing Agricultural Efficiency and Yield with CEAT Farmax R65 and HPT Tyres Advanced TechnologyAs the world’s population grows, the demand for food and agricultural products also increases. In the UK, the farm industry is vital in feeding the population and contributing to the country’s economy. However, with the challenges of climate change and the need for sustainable agriculture practices, farmers face new challenges in improving efficiency and yield while minimizing their environmental impact.
At CEAT Specialty, we understand the importance of technology and innovation in enhancing agricultural efficiency and yield. That’s why we have developed the CEAT Farmax R65 tyre and Farmax HPT Tyre, which utilize advanced technology to improve performance and reduce downtime.
The CEAT Farmax R65 Tractor Tyre is designed for high-speed applications on the road and in the field. Its unique tread design provides excellent traction and stability, while the durable compound ensures long-lasting performance. The best Farmax R65 tractor tyre’s optimized carcass construction minimizes soil compaction, crucial for maintaining healthy soil and maximizing yield.
The Farmax HPT tyre, on the other hand, is designed for heavy-duty applications, such as plowing and cultivation. Its innovative lug design and reinforced sidewalls provide excellent traction and protection against cuts and punctures. The Farmax HPT tractor tyre’s advanced carcass construction reduces heat buildup, which improves fuel efficiency and extends the tyre’s lifespan.
By utilizing these advanced farm tractor tyres, farmers can enhance their agricultural efficiency and yield in several ways. Firstly, the improved traction and stability of the CEAT Farmax R65 Tyre mean that farmers can work more efficiently and safely, reducing the risk of accidents and downtime. Secondly, the reduced soil compaction and improved fuel efficiency of both farm tractor tyres can lead to higher yields and reduced costs.
Fuel is a significant expense for any farm. To address this, we have developed the CEAT Farmax R65 tractor tyre, which can lower fuel consumption by up to 8%. This is accomplished by combining low rolling resistance and high mileage. The low rolling resistance minimizes the energy needed to move the tractor. At the same time, the high mileage ensures that every drop of fuel is utilized efficiently.
The CEAT Farmax HPT tyre is tailored to increase agricultural yield by enhancing traction and minimizing soil compaction. Its improved traction allows tractors to haul heavier loads and operate efficiently even in wet conditions. Furthermore, the reduced soil compaction ensures that crops receive sufficient water and nutrients, leading to higher yields.
Additionally, the durability and longevity of these farm tractor tyres mean that farmers can reduce their environmental impact by minimizing waste and maximizing the use of their equipment. Having a reliable companion in the field is essential for agricultural growth. The Farmax R65 tractor tyre is an excellent ally for all your farming requirements. It is rugged enough to withstand the harsh conditions on the farm while also being gentle enough to preserve the soil and crops. The Farmax R65 is thoughtfully designed to ensure its durability, protect the tractor, and, most importantly, nurture the farm.
The CEAT Farmax R65 and HPT Tyres are innovative solutions that can help farmers enhance their agricultural efficiency and yield while minimizing their environmental impact. By utilizing these advanced technologies, farmers can meet the challenges of modern agriculture and contribute to a sustainable future for the UK’s agricultural industry.
Read the full blogMon, 17 Apr 2023 ceat-speciality:blogs-tags/all,ceat-speciality:blogs-tags/tyre-care

ceat-speciality:blogs-tags/all,ceat-speciality:blogs-tags/tyre-care
Why CEAT Spraymax Tyres Are the Best Choice for Your Equipment?If you’re in the market for new tyres, you’ve probably come across a dizzying array of options. With so many brands and models available, knowing which is best for your needs can take time. But fear not because we’ve got you covered. In this blog post, we’ll explore why CEAT Spraymax tyre is the top choice for your equipment and how they can help you get the job done right. So, buckle up, and get ready to discover the many benefits of these exceptional tyres.
CEAT Specialty is a leading global tyre manufacturer with a wide range of products designed to meet the needs of various industries. One of their latest innovations is the CEAT Spraymax tractor tyre, a specialized tyre for agricultural equipment, sprayers, and harvesters.
Here are some reasons why CEAT Specialty provides the best Sraymax tractor tyre:
Exceptional Traction: CEAT Spraymax tyres offer excellent traction, even on wet or muddy surfaces. The unique tread pattern of these tyres ensures that your equipment maintains its grip on the ground, reducing the risk of slippage and increasing productivity.
Durability: Agricultural equipment is subjected to harsh working conditions that can cause premature tyre wear and tear. CEAT Spraymax tyres are engineered with a rigid casing that can withstand heavy loads, impact, and punctures, ensuring longer tyre life and reducing downtime.
Fuel Efficiency: CEAT Spraymax tyres are designed to reduce rolling resistance, which can result in significant fuel savings. This can be particularly important for agricultural operations where fuel costs are high.
Comfort: CEAT Spraymax tyres are designed to provide a smooth ride for operators, reducing operator fatigue and increasing safety. The tyres’ design ensures that the equipment’s weight is evenly distributed, providing a stable and comfortable ride.
Versatility: CEAT Spraymax tyres are available in various sizes and designs, making them suitable for a wide range of agricultural equipment, sprayers, and harvesters. This versatility lets you choose the right tyre for your needs, ensuring optimal performance and productivity.
Outstanding Quality: To ensure that its customers receive the best products, CEAT Specialty strongly emphasizes research and development and continually invests in its manufacturing plants. One way CEAT Specialty stands out is its unwavering commitment to Total Quality Management (TQM) principles, which have earned it recognition through the prestigious Deming Prize for TQM excellence. CEAT Specialty is the sole tyre company outside of Japan to have received this prestigious award, which was granted in 2017.
No Hassle Warranty: Investing in farm tractor tyres is a significant decision, and having a reliable warranty can help put your mind at ease. CEAT Specialty’s Ag tyre comes with a 7-year manufacturer’s and 3-year field hazard warranties, providing added protection and peace of mind. In addition, it’s worth noting that the warranty is seldom needed due to the high quality of CEAT Specialty tyres. If you encounter any issues, however, CEAT Specialty is known for its hassle-free warranty process, a valuable consideration for tyre dealers. By opting for CEAT Specialty, you can rest assured that you’re choosing a company that is easy to work with and stands behind its products.
CEAT Spraymax tyres are an excellent choice for agricultural equipment, sprayers, and harvesters. With exceptional traction, durability, fuel efficiency, comfort, and versatility, these tyres can improve your equipment’s performance and productivity while reducing downtime and maintenance costs. Contact CEAT Specialty today to learn more about these innovative tyres and how they can benefit your operation.
Read the full blogFri, 14 Apr 2023 ceat-speciality:blogs-tags/all,ceat-speciality:blogs-tags/tyre-care

ceat-speciality:blogs-tags/all,ceat-speciality:blogs-tags/tyre-care
Boosting Your Farm’s Bottom Line with CEAT Farmax R65 and HPT TyresAlthough CEAT is a relatively new player in the European agricultural and tractor tyre market, it has a global presence in over 120 countries. With an annual tyre production of approximately 15 million units, CEAT serves various markets, including industrial equipment such as agriculture tyre. In 2016, CEAT expanded its product range into the agricultural market by establishing CEAT Specialty, which produces and markets farm tractor tyres and other tyres for agricultural use.
Some of the biggest names in the tractor industry, including CNH Industrial’s New Holland, Case IH, Steyr brands, AGCO’s Massey Ferguson, Valtra, Fendt businesses, John Deere, and JCB, fit CEAT Specialty tyres as original equipment. Furthermore, CEAT Specialty is not limited to agriculture, as it also supplies construction equipment OEMs like Caterpillar and Wirtgen Group.
As a farmer, you know the key to success is maximizing your yields while minimizing expenses. This is where CEAT Farmax R65 and HPT tyres come in. We designed these tyres to help boost your farm’s bottom line by reducing fuel consumption and improving yield.
Let’s take a closer look at how CEAT Specialty tyres can benefit your farm.
Fuel costs can be a major concern for farms. That’s why we developed the CEAT Farmax R65 tyre, specifically designed to help you save on fuel expenses. With our tyre’s advanced features like low rolling resistance and high mileage, you can achieve a reduction in fuel consumption. By reducing energy requirements and maximizing mileage, our tyre ensures that you make the most out of every drop of fuel, ultimately saving you money in the long run.
We designed the CEAT Farmax HPT tyre to improve yield by providing better traction and reducing soil compaction. The improved traction ensures your tractor can pull heavier loads and operate in wet conditions. The reduced soil compaction ensures that your crops have better access to water and nutrients, resulting in higher yields.
We built CEAT Farmax R65 and HPT tyres to last. The Farmax R65 tractor tyre is designed for high mileage, ensuring you get the most out of every tyre. We invented the Farmax HPT tractor tyre with a special compound that resists cuts and punctures, ensuring your tyres can withstand the most challenging conditions.
By reducing your fuel consumption and improving your yield, CEAT Farmax R65 and HPT tyres provide a cost-effective solution for your farm. These tyres pay for themselves over time, making them a smart investment for any farmer looking to boost their bottom line.
We designed CEAT Farmax R65 and HPT tyres to help you boost your farm’s bottom line by reducing fuel consumption and improving your yield. We built these tyres to last and provide a cost-effective solution for your farm. Switch to CEAT Specialty tyres today and start reaping the benefits of increased efficiency and profitability.
CEAT Specialty has emerged as a significant player in the Agri tyre industry, mainly producing tractor tyres. If you are searching for tractor tyres, the vast online options can be overwhelming. However, consider checking out what CEAT Specialty offers before diving into tractor tyre price lists. With a wide variety of products, you will likely find the exact tyre that meets your farm’s requirements.
Read the full blogWed, 29 Mar 2023 ceat-speciality:blogs-tags/all,ceat-speciality:blogs-tags/tyre-care

ceat-speciality:blogs-tags/all,ceat-speciality:blogs-tags/tyre-care
CEAT Spraymax Tyres: The Ideal Solution for UK Agricultural SprayersAgricultural sprayers are an essential part of modern farming practices. They allow farmers to effectively manage and control pests and weeds while minimizing the use of harmful chemicals. However, have the right equipment, including the right agriculture tyre, to get the most out of your sprayer.
CEAT Specialty, one of the world’s leading tyre manufacturers, launched Spraymax Tyre. It is designed specifically for agricultural sprayers in the UK. CEAT engineers the Spraymax tyre to offer superior performance and durability in the harsh conditions where agricultural sprayers operate.
Here are the key features and benefits of the best Spraymax tractor tyre:
Unique tread pattern: CEAT Spraymax Tyres have a unique tread pattern designed to provide excellent traction and stability on wet and muddy fields. This helps to minimize slippage and ensures that the sprayer can operate smoothly and efficiently, even in rugged terrain.
Maximized sprayer tyre life: As farms expand, self-propelled sprayers spend more time traveling between fields and farms. This has made on-road capabilities almost as critical as in-field performance. To address this concern, CEAT Spraymax tyres are designed with a center tie bar that smooths out unevenness on the road, allowing optimal speeds. Additionally, the farm tractor tyres have a high non-skid depth, which enhances their durability and extends their life, ultimately maximizing the lifespan of sprayer tyres.
Rigid construction: CEAT Specialty manufactures Spraymax Tyre using high-quality materials with exceptional durability and resistance to punctures and cuts. This helps to minimize downtime and ensures that your sprayer can keep operating, even in challenging conditions.
Optimal load-carrying capacity: CEAT Specialty designs the best Spraymax tractor tyre to bear heavy loads effortlessly. This makes it an ideal option for agricultural sprayers requiring substantial liquids and chemicals.
Boost productivity: Another advantage of using very high flexion (VF) tyre technology, especially for improving your sprayer’s performance, is its increased load-carrying capacity. CEAT Specialty designs the Spraymax tyre with robust and flexible sidewalls, empowering them to bear 40% more weight than a standard radial tyre of the same size, operating at the same pressure. For farmers and contractors looking to enhance operational efficiency by upgrading to a sprayer with a larger tank capacity, sprayer tyres can increase productivity by reducing non-spraying time through fewer refills.
Comfortable ride: CEAT Spraymax Tyres feature a unique construction that helps to absorb shocks and vibrations, providing a smooth and comfortable ride for the operator.
Fuel-efficient: CEAT Specialty’s best Spraymax tractor tyre is fuel-efficient. It helps to reduce the overall operating costs of your agricultural sprayer.
Minimized soil compaction: CEAT Spraymax VF, classified as a very high flexion tyre, can transport an equivalent weight with 40% less pressure than standard tyres of the exact dimensions. This results in an extended and broader tyre footprint that distributes the sprayer’s weight across a greater contact patch, lowering ground pressure and decreasing soil compaction. This, in turn, facilitates plant growth by improving root development while reducing the amount of fuel and steel required to fix any compaction issues before the next crop.
In addition to these features, CEAT Spraymax Tyres are also easy to install and maintain, making them a cost-effective choice for farmers and agricultural contractors across the UK.
Overall, CEAT Spraymax Tyres are the ideal solution for UK agricultural sprayers that need reliable and durable tyres that can perform in various challenging conditions. With their unique design and exceptional performance, CEAT Spraymax Tyres are an excellent investment for anyone looking to get the most out of their agricultural sprayer.
Read the full blogMon, 27 Mar 2023 ceat-speciality:blogs-tags/all,ceat-speciality:blogs-tags/tyre-care

ceat-speciality:blogs-tags/all,ceat-speciality:blogs-tags/tyre-care
How can I achieve optimal performance from my agricultural tyre?Agricultural tyres are one of the most critical components of farming equipment, yet they are often overlooked. They can have a significant impact on the yield and efficiency of agricultural operations.
To achieve optimal performance from your agriculture tyre, follow these tips:
Choosing the right tyre for your farming equipment is crucial. Different agricultural activities require different types of tyres. So, select tyres specifically designed for your intended use. CEAT Specialty offers a wide range of farm tractor tyres designed to handle a variety of terrains and weather conditions.
Proper tyre pressure ensures optimal performance from your agricultural tyres. Overinflated or underinflated tyres can cause uneven wear and tear, reducing the lifespan of your tyres and impacting their performance.
The tread on your tyres is critical in providing traction and grip on various surfaces. Check the tread depth regularly to ensure your tyres are not worn out and provide adequate grip.
Rotating your tyres regularly can help to ensure even wear and tear and extend the lifespan of your tyres. This is especially important for front tyres, which wear out faster than rear tyres due to their extra weight.
Proper storage of your Agri tyre can help to prevent damage and extend their lifespan. It is essential to store your tyres in a cool, dry place away from direct sunlight and moisture.
Managing wheel slip is crucial for maximizing the performance of farm tractor tyres, especially in primary or secondary cultivations where the conversion of power to grip is critical. Excessive wheel slip leads to fuel wastage, accelerated tractor tyre wear, soil damage through compaction and smearing, and lower work rates. However, controlled wheel slip is necessary for optimal performance from the tyres and tractors they are attached to.
As the lugs of tractor tyres grip the ground through the force transmitted from the tractor’s transmission to the wheel, they compress the soil until they encounter sufficient resistance to propel the tractor forward. This compression varies based on soil type, condition, composition, and moisture content. An ideal wheel slip range is 12-15%, which can be at the higher end of this bracket in loose/cultivated or wet soil. If soil moisture is an issue, it’s best to halt work until conditions improve. If the soil structure is the problem, consolidating the ground with a front-mounted press after making a second pass on cultivated soil could be a viable option.
If your tractor does not have a wheel slip management system, measuring a set distance in the field and counting the revolutions of the tyre made over this distance while the tractor is at work can help assess slip levels. Calculate the total distance covered by the circumference of the agriculture tyre revolutions and compare it against the measured distance worked to determine the slip percentage.
Numerous contemporary tractors are furnished with wheel slip monitors that utilize radar to gauge the distance traveled by tractor and contrast it with the revolutions of the wheels or tyres. If your tractor is equipped with wheel slip monitoring, set it to the most effective amount of wheel slip that suits the task at hand and the existing soil conditions.
As you gear up your tractor and tyres for work, keep in mind some tips to ensure optimal performance. Use your tractor’s wheel slip monitor for primary or secondary tillage tasks to maintain slip in the ideal range, typically between 12-15%. This allows for slight slippage that aids in transferring tractive force from the tyres while protecting the topsoil.
When driving on the road, ensure smooth acceleration and braking to maximize the wear life of your tractor tyre. Additionally, when driving on tarmac or concrete surfaces, minimizing tight turns can help reduce scrubbing and prolong the life of the tyres.
By following these tips, you can ensure your agricultural tyres are in optimal condition and perform at their best, providing better traction, fuel efficiency, and yield for your farming operations. Contact CEAT Specialty to find the perfect agricultural tyres for your needs.
Read the full blogThu, 23 Mar 2023 ceat-speciality:blogs-tags/all,ceat-speciality:blogs-tags/tyre-care

ceat-speciality:blogs-tags/all,ceat-speciality:blogs-tags/tyre-care
How can I maintain soil health with agriculture tyres?Agricultural systems that are profitable, productive, and environmentally sound rely on a foundation of healthy soil. Agricultural tyres are crucial in maintaining soil health, as they carry the weight of the farm equipment and machinery that work in the fields. Soil degradation and compaction are two common problems affecting crop yields. However, proper agricultural tyre maintenance can help mitigate these issues.
Here are some essential tips to help you maintain soil health with agriculture tyre.
Different farm operations require different types of agricultural tyres. For instance, using tyres with deeper treads can help prevent slippage and soil damage if you are working on wet or soft ground. On the other hand, if you are working on more complex surfaces, using farm tractor tyres with shallower treads can help reduce soil compaction.
To optimize traction capacity while preserving soil health, opt for very supple tyres if you primarily work in the fields. Among the various models available, IF tyres are an excellent choice as they have an innovative design with reinforced sidewalls and can operate at very low inflation pressures. This feature allows for a larger soil footprint and maximizes your tractor’s pulling capacity.
Keeping your tractor tyre clean can help prevent soil contamination. Soil and other debris can stick to the tyres, which can then be transported to other parts of the farm, potentially spreading diseases and pests. Regularly cleaning your tyres can help prevent this.
The type of farm tyre you choose can significantly impact soil health. Tyres with lower inflation pressures exert less pressure on the soil, reducing the risk of soil compaction. Additionally, tyres with wider treads offer better traction and distribute weight more evenly, reducing the likelihood of soil damage.
Regularly checking and maintaining the correct tyre pressure is essential for optimal agricultural tyre performance. Underinflated tyres can cause excessive soil compaction, while overinflated tyres can reduce traction and increase the risk of soil erosion.
Regularly rotating your Agri tyre can help distribute the wear and tear more evenly. This extends the life of your tyres and helps maintain optimal soil health. When tyres wear unevenly, it can cause soil compaction and increase the risk of crop damage.
Maintaining soil health is crucial for sustainable farming practices. And ag tyre plays a significant role in achieving this goal. By following these essential tips, you can help preserve your soil and increase your crop yields. CEAT Specialty tyres offer a wide range of high-quality agricultural tyres specifically designed to meet the needs of farmers. From low-pressure tyres that reduce soil compaction to tyres with wider treads that offer better traction, CEAT Specialty has a solution for all your agricultural tyre needs. Investing in CEAT Specialty tyres is not only an investment in your farming operation but also in the health and longevity of your soil.
Read the full blogWed, 22 Mar 2023 ceat-speciality:blogs-tags/all,ceat-speciality:blogs-tags/tyre-care

ceat-speciality:blogs-tags/all,ceat-speciality:blogs-tags/tyre-care
What are the benefits of VF agriculture tyres?When it comes to agricultural machinery, tyres are a crucial component. They are responsible for carrying heavy loads, providing traction, and ensuring the stability and safety of the equipment. Agriculture tyre has come a long way in recent years, with the introduction of VF (Very High Flexion) tyres revolutionizing the industry. In this blog post, we’ll explore the hidden benefits of VF agricultural tyres and why they are becoming increasingly popular among farmers in the UK.
VF agricultural tyres offer a significant advantage in terms of efficiency improvement. They can carry heavier loads at the same inflation pressure as standard agricultural tyres. This means fewer trips are required to complete the same amount of work. This saves time. This also reduces fuel consumption and wear and tear on the machinery.
VF tractor tyre has the potential to increase crop yield. VF tyres have a broader surface area that enables them to distribute the weight of the machinery more evenly, decreasing soil compaction. This allows the soil to retain more water and nutrients, providing the ideal crop-growing conditions. Additionally, the improved flotation of VF tyres enables farmers to access their fields earlier, resulting in a longer growing season and potentially higher yields.
Safety is always a top priority when it comes to agricultural machinery. VF farm tyre provides improved stability and traction, reducing the risk of accidents and crop damage. Moreover, the wider contact area of VF tyres lowers ground pressure. This helps in preventing tyre slippage and reduces the possibility of getting stuck in wet or muddy terrain.
The designers have developed VF Ag tyre to endure heavy loads and offer outstanding durability, resulting in a longer tyre lifespan than standard agricultural tyres. This can significantly reduce the cost of replacing tyres and the downtime required for maintenance and repairs.
VF Agri tyre has environmental benefits. Reducing the number of trips required to complete work can help reduce greenhouse gas emissions from machinery. The reduced soil compaction and improved soil health can also lead to better carbon sequestration in the soil, helping to combat climate change.
The VF technology has a positive impact on soil health. Since VF farm tractor tyres require lower inflation pressure, they create a larger tyre footprint that minimizes soil compaction.
VF agricultural tyres offer a range of hidden benefits to farmers in the UK. From improving efficiency and increasing yield to enhancing safety and environmental sustainability, VF tyres are a valuable investment for farmers looking to optimize their agricultural machinery.
CEAT Specialty’s experienced technicians are responsible for assessing your requirements and guiding you in choosing the optimal tyre, including determining whether a VF tyre is the most appropriate and effective option for your needs. With a vast selection of tyres available, selecting the appropriate one can be daunting, but feel free to seek expert advice. When choosing the best tyre, no questions are considered wrong.
Read the full blogTue, 21 Mar 2023 ceat-speciality:blogs-tags/all,ceat-speciality:blogs-tags/tyre-care

ceat-speciality:blogs-tags/all,ceat-speciality:blogs-tags/tyre-care
Why used tractor tyres are damaging your soil?Are you using used tractor tyre on your farm equipment in the hope of saving costs? While it may seem like a cost-effective solution, it could actually cause severe damage to your soil and ultimately impact your overall farm productivity. In this blog, we’ll explore the reasons why using used tractor tyres can harm your soil and the potential impact on your farm’s productivity. We’ll also provide you with some valuable insights into how you can protect your soil and ensure optimal farm performance by choosing the right tyres for your agricultural equipment.
Used tyres have less tread depth than new farm tractor tyres, reducing traction and performance on your farm equipment. This can cause your equipment to slip and slide on wet or uneven surfaces, causing soil compaction and damage to your soil structure. This can result in a decrease in crop yields and overall farm productivity.
As mentioned, used tractor tyres can cause soil compaction due to reduced traction and performance. Used tyres with reduced tread depth and heavy equipment weight can cause high soil pressure, limiting water and air movement and reducing pore space. This can cause long-term damage to your soil structure and negatively impact soil health.
Used tractor tyres may be contaminated with weed seeds or diseases, which can spread to your farmland and cause significant damage to your crops. Using new agriculture tyre can help prevent these harmful contaminants’ spread, keeping your soil and crops healthy.
When you use used tyres on your farm equipment, you may notice that your fuel efficiency decreases. This is because used tyres have treads that are already worn down and provide a different level of traction than new tyres. As a result, your equipment must work harder to move across the same distance, requiring more fuel to power it. This can result in increased fuel costs and a decrease in overall farm profitability. Additionally, used tyres are often more prone to punctures and other damage, further impacting fuel efficiency. If a farm tyre is damaged or has a slow leak, it can cause your equipment to work harder to move, resulting in increased fuel consumption.
Change your old Ag tyre when the tread depth reaches 2 mm or less. This is the minimum tread depth required to safely and efficiently use the tractor tyre. If you notice any signs of cracking, bulging, or other visible damage to the tyres, replace them immediately. Regularly inspecting your tyres and replacing them, when necessary, will ensure optimal performance and safety on the road.
No, tractor tyre does not release any harmful chemicals. CEAT Specialty Tires manufactures the best tractor tyre using high-quality materials that comply with all relevant regulations and are safe for the environment. We provide eco-friendly solutions for farmers. We design all our products with sustainability in mind. You can rest assured that our tyres are a safe and reliable choice for your agricultural equipment.
Using used tractor tyres is a cost-effective solution. However, it can cause severe damage to your soil structure and overall farm productivity. Investing in new Ag tyre can improve traction and performance, prevent soil compaction, reduce the spread of weeds and diseases, and improve fuel efficiency. Contact us at CEAT Specialty Tires for more information on our range of high-quality Agri tyre and how they can help improve your farm productivity.
Read the full blogTue, 14 Mar 2023 ceat-speciality:blogs-tags/all,ceat-speciality:blogs-tags/tyre-care

ceat-speciality:blogs-tags/all,ceat-speciality:blogs-tags/tyre-care
The Importance of Properly Inflated Agri TyresTo guarantee that agricultural machinery operations run smoothly, proper maintenance and upkeep are essential. Ensuring that the tyre pressure is appropriate is a critical element of maintenance. Properly inflated Agri tyre provides optimal performance and improves safety and fuel efficiency while reducing operating costs.
Let’s discuss the importance of adequately inflated Agri tyres and how they can impact agricultural operations.
Properly inflated agriculture tyre provides better traction, reduces slippage and prevents crop damage. They also help achieve better fuel efficiency, resulting in lower operating costs. Under-inflated tyres cause excess rolling resistance, increasing fuel consumption and reducing efficiency.
Properly inflated Agri tyres improve safety by reducing the risk of tyre blowouts and other tyre-related accidents. Over-inflated Agri tyre can cause tyre blowouts, while under-inflated tyres can lead to premature wear and tear, affecting the vehicle’s stability.
Under-inflated Ag tyre can cause excessive wear and tear on the tyre shoulder and sidewalls. This reduces tyre life; you may need to replace the tyres earlier than expected. Properly inflated tyres reduce wear and tear, leading to longer tyre life and less frequent replacement.
Properly inflated Agri tyre helps in maintaining the correct load capacity. Under-inflated tyres lead to reduced load capacity and can cause the tyre to wear out quickly, leading to frequent replacements. Overinflated tyres can cause the tyre to burst under load, leading to significant safety hazards.
Properly inflated agriculture tyre can help reduce the environmental impact of operations. With reduced fuel consumption, there is a decrease in greenhouse gas emissions, making your operations eco-friendlier.
Under-inflated farm tyre can cause excess rolling resistance, increasing fuel consumption by up to 5%. Higher fuel consumption results in increased operating costs and has a harmful impact on the environment. On the other hand, over-inflated Agri tyre can also negatively affect fuel economy. They reduce traction, leading to more slippage and energy required to move the machinery.
By maintaining the correct tyre pressure in your Agri tyres, you can achieve better fuel efficiency, resulting in lower operating costs and reduced environmental impact. You can find the recommended tyre pressure in the owner’s manual or on the tyre’s sidewall. Check your tyre pressure regularly and inflate them to the recommended levels to ensure optimal performance and fuel efficiency.
Under-inflated tractor tyre can have a significant impact on your agricultural operations. One of the major impacts of under-inflated Agri tyres is reduced load capacity. The under-inflated tyre significantly reduces the ability to carry weight, resulting in increased wear and tear on the tyre and the agricultural machinery. This can ultimately decrease productivity and efficiency, as the machinery must operate at its full potential.
Under-inflated Ag tyre can also lead to decreased fuel efficiency. The increased rolling resistance caused by under-inflated tyres can lead to more fuel consumption, increasing operating costs and reducing overall profitability.
Another impact of under-inflated tyres is decreased stability and handling. Under-inflated tyres deflect more under load, leading to a less stable ride. This can make it harder to control the machinery and increase the risk of accidents.
Keep a close eye on your tyre pressure and inflate them to the recommended levels for optimal results. At CEAT Specialty, we understand the importance of maintaining your farm tractor tyres. Contact us today to learn more about our tractor tyre range.
Read the full blogTue, 14 Mar 2023 ceat-speciality:blogs-tags/all,ceat-speciality:blogs-tags/tyre-care

ceat-speciality:blogs-tags/all,ceat-speciality:blogs-tags/tyre-care
How to measure your farmland’s soil compaction?Are you tired of dealing with poor crop yields, limited water infiltration, and unhealthy soil on your farmland? Soil compaction may be the culprit. As a common issue that farmers face, soil compaction can significantly impact crop productivity and overall soil health. But don’t worry – there are ways to combat this problem. Let’s explore the importance of measuring and monitoring soil compaction on your farmland. We’ll also check out how you can use the best tractor tyre options to fix heavily compacted soil. So, let’s dive in and learn how to maintain healthy soil and maximize your crop productivity!
When pressed together, soil particles reduce pore space and limit air and water movement through the soil, causing soil compaction. This can lead to many problems, including decreased crop growth, increased runoff and erosion, and reduced soil fertility. Soil compaction can also increase the risk of soil-borne diseases and pests, further impacting crop yields.
Different methods to measure soil compaction include penetrometers, shear vane testers, and cone penetrometers. Penetrometers measure the resistance of soil to penetration, while shear vane testers measure the shear strength of the soil. Cone penetrometers measure the depth and density of soil layers. These tools can provide valuable information about soil compaction. However, they can be expensive and require specialized training to use properly.
A simpler way to measure soil compaction is to use a handheld penetrometer. A handheld penetrometer is a small, portable device that measures the resistance of soil to penetration. To use a penetrometer, insert the device into the soil and measure the depth at which it encounters resistance. Repeat this process at several locations throughout the field to get an accurate picture of soil compaction.
Once you have measured your soil compaction, monitor it over time to track changes and identify trends. Regular soil sampling and testing can help you identify areas of the field that may be experiencing increased compaction. Keeping detailed records of soil moisture, rainfall, and other environmental factors can also help you track changes in soil compaction over time.
CEAT Specialty specifically designed tyres to alleviate soil compaction in agricultural fields. Here are the steps you can take to fix heavily compacted soil using our Agri tyres:
Using our Ag tyre and reducing soil compaction can improve soil health and increase crop yields in heavily compacted field areas.
Read the full blogTue, 14 Mar 2023 ceat-speciality:blogs-tags/all,ceat-speciality:blogs-tags/tyre-care

ceat-speciality:blogs-tags/all,ceat-speciality:blogs-tags/tyre-care
Why is load distribution vital for agricultural tyres?It’s easy to focus solely on the tread pattern or the durability of the rubber. But one crucial aspect that is often overlooked is the load distribution of your agricultural tyres. While it may seem like a small detail, it can significantly impact the performance of your equipment and the efficiency of your farm operations.
Read on to explore why load distribution is crucial for farm tyres.
By evenly distributing weight, all tyres will wear at a similar rate, reducing the need for frequent replacements and cutting down on maintenance costs. This can also minimize equipment downtime, allowing you to stay on top of your operations and keep your bottom line strong.
By making sure that load distribution is balanced across all agricultural tyres, you can improve the handling of your equipment. With equal weight distribution, your equipment will be more stable and easier to control, reducing the risk of accidents and damage. This can also help to lower the overall strain on your machinery, improving its longevity and reducing the need for costly repairs.
By properly distributing the weight of your farm equipment, you can improve fuel efficiency and reduce costs. When your agricultural tyres and wheels carry an equal load, they do not have to work as hard to maintain stability and traction, leading to lower fuel consumption. This results in improved fuel efficiency and a more budget-friendly operation.
Stable equipment makes for a safer work environment and enhances performance. When your equipment is stable, you can handle it more effectively, increasing efficiency and productivity.
By making sure that your equipment’s weight is evenly distributed, you’re enabling it to operate at its full potential. This ensures efficient fuel use and extends the life of your agricultural tyres. This, in turn, helps you get the best value for your investment in the long run. With proper load distribution, you’ll enjoy a smooth, safe, efficient farming operation.
Optimizing the load distribution in your agricultural tyres can reduce the cost of maintenance and fuel expenses. With the right balance, you can save money in the long run and make the most out of your investment in your farm equipment.
So, why is load distribution so crucial for an Agri tyre? It all comes down to getting the most out of your equipment. At CEAT Specialty, we understand the importance of load distribution in agricultural tyres. That’s why we’ve designed our farm tyres to provide optimal load distribution, helping you minimize the risk of problems down the road. Whether you need new agricultural tyres or want to upgrade your current set, trust CEAT Specialty to deliver the best products and performance. Invest in your future with CEAT Specialty and experience the many benefits of proper load distribution in agricultural tyres. Enjoy the peace of mind that comes with knowing your equipment is in good hands.
Read the full blogWed, 22 Feb 2023 ceat-speciality:blogs-tags/all,ceat-speciality:blogs-tags/tyre-care

ceat-speciality:blogs-tags/all,ceat-speciality:blogs-tags/tyre-care
4 Damning Effects of Using Old Agri TyresYour equipment is the backbone of your livelihood. Isn’t it? From plowing fields to harvesting crops, your tractors, plows, and harvesters are essential to your success. But have you ever stopped considering the impact of your farm tyres on their performance? It’s a common misconception that tyres are simply a means of getting equipment from point A to point B. However, the truth is that your equipment’s performance is only as good as its tyres. Unfortunately, many farmers continue to make the mistake of using old, worn-out agricultural tyres without fully understanding the consequences that come with them.
Think about it – your Agri tyres are the only thing connecting your equipment to the ground. They are responsible for providing traction, stability, and support. But what happens when those tyres are worn out and can no longer perform at their best? Your equipment becomes more prone to slipping, getting stuck, and breaking down. This impedes your ability to get the job done efficiently and puts you and your equipment at risk.
It’s a sobering thought, but the reality is that many farmers are still using outdated, worn-out tyres, utterly unaware of their impact on their operations. Let’s highlight the hidden dangers of old Agri tyres and get ready to learn how CEAT Specialty sets the industry’s standard for innovation.
One of the most significant dangers of using old Agri tyres is the increased risk of tyre failure. With time and use, the rubber on a tyre becomes worn and degraded, making it more likely to puncture or blow out. This can be especially dangerous for farmers who use heavy machinery, as a tyre failure can cause the machine to lose stability and tip over. In extreme cases, this can even result in severe injury or death.
Another damaging effect of using old Agri tyres is reduced efficiency. Over time, the tread on an agriculture tyre becomes worn, making it less effective at providing traction and stability. This can make it harder for farmers to get their work done, as they will need to work harder to keep their machines moving in a straight line. Additionally, old tyres can also increase fuel consumption, making it more expensive to run their machinery.
Old Agri tyres can also have a damaging impact on the soil. When an ag tyre is worn, it becomes flatter and wider, increasing the pressure it exerts on the soil. This can lead to soil compaction, which can make it harder for crops to grow. This can be especially damaging for farmers who need healthy, productive soil to grow crops.
Finally, using old farm tyres can also harm the environment. Wearing or damaged tyres can release harmful chemicals into the soil and water, contaminating the land and the local water supply. This can have severe consequences for both wildlife and human health. Additionally, old tyres can take a long time to decompose, contributing to the growing waste and pollution problem.
Using old Agri tyres is dangerous and can have far-reaching consequences. From increased risk of tyre failure and reduced efficiency to soil compaction and environmental damage, you cannot ignore the dangers of using old tyres. To avoid these risks, farmers should replace their old tyres with new, high-quality products from CEAT Specialty.
Unleash the full potential of your farming operations with CEAT agricultural tyres. Our commitment to quality and focus on innovation make us the premier choice for farmers looking to invest in a better future. Our specially designed agricultural tyres are conveniently available online. Take the first step towards a brighter farming future and order your agricultural tyres online from CEAT Specialty today.
Read the full blogWed, 22 Feb 2023 ceat-speciality:blogs-tags/all,ceat-speciality:blogs-tags/tyre-care

ceat-speciality:blogs-tags/all,ceat-speciality:blogs-tags/tyre-care
The best trailers demand the best tyres: why your trailers need FLOTATION PLUSOver recent years, agricultural trailers have become much more than the trundling transporters of goods they were just a few decades ago, when few tractors were capable of exceeding 20mph/30kph. Modern farm trailers are capable of handling much greater loads and weights, at higher speeds, and trailer tyres have had to evolve as a result, particularly as the impact on field soils of hauling heavier weights has also come under scrutiny. The next time you need new trailer tyres and find yourself searching trailer tyres price lists and typing ‘trailer tyres for sale’ or ‘trailer tyres near me’ into a search engine, consider what trailer tyres designed to combine safety, speed and soil protection could do for your farm.
Modern agricultural trailers designed for haulage of heavy weights at high speeds require the fitment of the best possible trailer tyres if they are to perform at their best, allowing swift travel with minimum shock transfer to the tractor and its operator, while also leaving minimal soil impact while in the field. Other attributes are, of course, just as essential for productivity – good levels of puncture resistance, for example – if those trailer tyres are to contribute fully to farming productivity.
It is this blend of attributes that has been designed into the Flotation Plus range of trailer tyres from CEAT Specialty. From the outset, Flotation Plus tyres were designed in response to customer demand for trailer tyres that would help to minimise the soil compaction effects of heavy trailer loads, without compromising the need for smooth handling on the road and high standards of durability.
So what are the features that make Flotation Plus a key contributor to productivity when fitted to your trailer? Firstly it is designed with a high-strength cross-ply/bias construction, which is the ideal design for high-demand, high-weight transport applications where carcase strength is paramount. When hauling at speed and making turns with heavy loads on board, this is a crucial attribute.
In the field, meanwhile, crop and soil protection characteristics are paramount. Here, rounded shoulders of CEAT Flotation Plus trailer tyres have been created with a curvature designed to minimise their effect as they pass over and past growing crops.
But one of the most important characteristics of CEAT Flotation Plus trailer tyres is their high volume and consequent large footprint means they have a particularly large contact patch. This spreads the trailer load over the maximum possible area, meaning the lowest possible pressure is exerted by the trailer tyres on each square centimetre of soil, ensuring that rainfall infiltration is maintained, plant root growth is sustained, and rutting is minimised. Minimal compaction also means the use of fuel and cultivation steel is minimised during any subsequent field cultivations.
These are just a few of the features of CEAT Specialty flotation trailer tyres that make them the ideal choice for many demanding agricultural trailer operations. Next time you need new trailer tyres and find yourself searching trailer tyres price lists and typing ‘trailer tyres for sale’ or ‘trailer tyres near me’ into a search engine, consider what this combination of safety, speed and soil protection attributes could mean for your trailer and its contribution to your business.
Read the full blogWed, 8 Feb 2023 ceat-speciality:blogs-tags/all,ceat-speciality:blogs-tags/tyre-care

ceat-speciality:blogs-tags/all,ceat-speciality:blogs-tags/tyre-care
How to choose the right front tractor tyres for your farm workloadFrom smaller tractors that spend their lives working on concrete livestock or storage yards to larger arable-focused models expected to pull primary cultivation implements, there are obviously a range of different requirements for a set of tractor tyres, and selecting the right front tractor tyres in particular for your tractor’s workload can have a significant bearing on its efficiency. Before making that pre-purchase search for ‘tractor tyres for sale’ or ‘tractor tyres near me’, and then the process of scrolling through tractor tyres’ price lists, consider this advice:
They may not have the tractive workload of a rear tractor tyre, but because front tractor tyres perform more functions – not just rotating as the tractor moves, but also steering and, on a 4wd tractor, sharing the job of propelling the machine – front tractor tyres are the multi-taskers of the tractor tyre world. As such, it is essential to ensure you choose the best ones for the tractor’s workload when replacing the front tractor tyres on your machine. Size, construction and design will all have a bearing on the performance of your tractor tyres and the tractor to which they are fitted.
Before even considering its workload, this is perhaps the most crucial of the critical factors in choosing the right front tractor tyres for your machine – and it applies particularly if that tractor is a 4wd model with a driven front axle. This is because the tractor’s transmission, whatever its type, will have been designed on the basis of a certain ratio of rotation between the front and rear tractor wheels. If you change the front tractor tyres for a new set of a different size – perhaps with a larger diameter or profile in an attempt to get a longer tyre footprint onto the ground for more traction and increased flotation – you will alter this ratio. This can potentially cause serious damage to the tractor’s transmission, whatever its type. When you are choosing your tractor tyres, before you make a purchase ensure you understand exactly the sizes of front tractor tyre your make and model of tractor can be fitted with. You must consult your tractor’s operator’s manual – and if this does not provide the required information, your tractor’s dealer or manufacturer – if you are unsure of the sizes of front tractor tyre you can fit to your tractor.
Radial tractor tyres are the more modern design, and offer a number of advantages over traditional cross-ply tractor tyres including their greater sidewall flexibility and the smoother ride they provide to the tractor. In most circumstances, if your tractor is expected to perform mostly field-working tasks and/or spend a good deal of time travelling on the road, radial tyres will be the best option all-round.
However, the greater rigidity of tractor tyres manufactured using a cross-ply design does have its advantages. For example, if your tractor is used primarily for work with a loader, you may wish to consider cross-ply/bias tractor tyres – which come, of course, under considerable stress on the front axle when working with a front loader. These can be fitted all-round or on the front axle alone – but you must never mix cross-ply and radial tractor tyres on the same axle.
Like rear tractor tyres, many sizes of front tractor tyre in ranges such as the CEAT Torquemax are available in increased flexion (IF) and very high flexion (VF) format. This enables the tyres to bear 20% (IF) or 40% (VF) more weight at the same pressure than a tyre of the same size made using the standard construction format. Alternatively, they can be operated at pressures 20% (IF) or 40% (VF) lower than the standard tractor tyres of the same size, helping create a longer and slightly wider footprint for reduced ground pressure and greater traction. If you have chosen IF or VF tractor tyres for the rear of your tractor, you should fit tractor tyres of the same design to the front axle if you seek to benefit fully from the capabilities and advantages of this technology.
Before searching the web for ‘tractor tyres for sale’ or ‘tractor tyres near me’, and searching tractor tyres’ price lists, consider the workload of your tractor and the points above. This will help ensure you pick the best possible front tractor tyres for your machine.
Read the full blogFri, 20 Jan 2023 ceat-speciality:blogs-tags/all,ceat-speciality:blogs-tags/tyre-care

ceat-speciality:blogs-tags/all,ceat-speciality:blogs-tags/tyre-care
How can good tractor tyre management help improve tractor fuel economy?There are many areas to which you should give close attention if you are seeking to minimise your tractor’s fuel use and maximise efficiency, but with a new set of tractor tyres likely to be the biggest investment you make in your tractor over its lifetime on your farm, it makes sense to focus here in the first instance. Follow the points below to ensure that, when looking through tractor tyres price lists and scouring the internet for ‘tractor tyres for sale’ and ‘tractor tyres near me’, you then get the best from your tractor and tractor tyres once they are matched together.
This point comes up in many different tractor management posts, because of its relevance to everything from tractor tyre wear to tractor tyre safety. Unsurprisingly, it is also relevant to tractor fuel economy. If your tractor’s tyres are operating below the pressures for which they are designed, their footprint will be longer and wider than it is intended to be. This will increase their rolling resistance, and hence make the tractor harder to move for a given amount of fuel, in turn increasing the tractor’s fuel consumption as either the operator or the machine itself makes alterations to increase engine speed in order to compensate.
Tractor tyre pressures that are higher than those recommended by the manufacturer – perhaps because the tyres have been inflated incorrectly, or have been inflated excessively in the mistaken notion that this will provide a tractive benefit – will also detrimentally affect the tractor’s fuel consumption. This is primarily because the tractor tyre footprint will be reduced, and hence its ability to grip the ground will also be lessened.
Aside from the tractor tyre pressure checks inferred above, good management to maximise tractor fuel economy should include regular examination of each tractor tyre carcase. By monitoring the depth of tread available on the tractor’s tyres, particularly towards the end of their life, tractor fuel economy can be maximised by adjusting wheelslip management accordingly. Your tractor’s wheelslip levels will increase and its fuel economy will fall correspondingly if it is expected to perform high draft tasks with tractor tyres that have less than 10% tread remaining on them. As your tractor’s tyres become older, try to make checks more regularly to ensure that they are still capable of transferring your tractor’s power to the ground efficiently, for the best possible fuel economy.
Many modern 4wd tractors are equipped with wheelslip management systems designed to ensure tractor wheelslip does not exceed a set amount without the tractor automatically taking corrective action such as engaging the diff lock. For the ideal blend of traction, fuel economy and good transmission management, a wheeled tractor’s wheelslip level should be around 10-15%, allowing the tractor tyres to move sufficiently against the ground to bite in to the soil and provide the pull required by the implement behind. If performing such tasks, set you tractor’s wheelslip monitor for this bracket and you will maximise its fuel economy. For lighter tasks working shallowly or above the ground, a lower wheelslip threshold can be set.
Ensuring that ballast weights on the front end of the tractor, or on its wheels, are removed when not required will not only reduce tractor tyre wear, but also maximise fuel economy, as the tractor will not be carrying excess weight. If performing on-road tasks where ballast is not required, take time to remove front weights beforehand.
Each of these points of good tractor tyre management can play a part in helping improve tractor fuel economy. With a new set of tractor tyres representing the significant investment in your tractor, focus on them to ensure your tractor tyres play their part in maximising fuel economy of your tractor. That way, the time invested in researching tractor tyres price lists and searching the web for ‘tractor tyres for sale’ and ‘tractor tyres near me’ will be well spent.
Read the full blogWed, 18 Jan 2023 ceat-speciality:blogs-tags/all,ceat-speciality:blogs-tags/tyre-care

ceat-speciality:blogs-tags/all,ceat-speciality:blogs-tags/tyre-care
How the right tractor tyres can boost your yieldsIf they are wisely purchased, installed and looked after, carefully-chosen tractor tyres can play a part in helping to enhance the yields of your crops. How is this possible? Read on to find out before your begin looking through tractor tyres price lists and internet-searching for ‘tractor tyres for sale’ and ‘tractor tyres near me’.
This is crucial in helping fieldwork tractors play their part in maximising crop yields. As an example, CEAT Torquemax tyres feature a lower angle at the shoulder, which enhances traction, thereby minimising the risk of wheelslip that can cause soil smearing, which affects drainage and plant growth. A further design feature is rounded shoulders, which help minimise damage both to the soil and the crop growing in it. A wide tread and large inner volume also aid flotation and hence reduce soil compaction.
Cross-ply or bias tractor tyres are less complicated to manufacture than radial tractor tyres, and are therefore cheaper to produce – and so less expensive to buy. However, their advantages beyond these are limited if the tractor they are to be fitted to is expected to do a lot of high-traction work such as ploughing and cultivations, and/or work on land where the ground may often be soft. This is because of their very limited levels of carcase flexibility, which tends to increase their impact on the land. The right tractor tyres for working on the land to any great extent are radial tractor tyres. Their greater carcase flexibility will help minimise compaction, and therefore minimise the impact on plant root development and soil water drainage. These factors will help maximise your yields.
IF and VF tyre technology is a method of tractor tyre design and manufacturing that allows the tractor tyre to bear 20% (IF) or 40% (VF) more weight than a standard tractor tyre of the same size. Alternatively, it allows the tractor tyre pressures to be lowered by 20% (IF) or 40% (VF) for the same load-bearing capability as a standard tractor tyre of the same size is specified for. Being able to bear more load may help to increase crop yields by reducing the number of passes (and hence wheelings) a tractor and implement such as a plough is requires to make across a field. Alternatively – and perhaps more importantly – being able to reduce tractor tyre pressures for the same load spreads that load over a longer and slightly wider tractor tyre contact patch, reducing overall tyre pressure per square centimetre. This helps reduce soil compaction, impeded drainage and rooting problems, hence enhancing your crops’ yields.
These points illustrate how choosing your replacement tractor tyres carefully, with due regard for the features and benefits of their design, as well as their price, can bring significant benefits in terms of reducing the impact of your tractor on your soils and maximising the contribution your tractor tyres can bring to your business. A carefully-considered purchase of a set of tractor tyres, supported by careful installation and maintenance, can have a significant role in helping enhance your crops’ yields. Bear these points in mind before your begin looking through tractor tyres price lists and internet-searching for ‘tractor tyres for sale’ and ‘tractor tyres near me’.
Read the full blogTue, 17 Jan 2023 ceat-speciality:blogs-tags/all,ceat-speciality:blogs-tags/tyre-care

ceat-speciality:blogs-tags/all,ceat-speciality:blogs-tags/tyre-care
What is the maximum load my tractor tyres can bear?When investing in new tractor tyres, it’s essential you understand their capabilities, including the maximum load they are designed to carry. Before you next replace your tractor tyres – ‘tractor tyres for sale’ and ‘tractor tyres near me’ are often the most fruitful search terms if looking online at your options – ensure you have matched your selection to your workload before starting to consult tractor tyres’ price lists.
Ensuring the maximum rated load for your tractor’s tyres is not exceeded is critical to both performance and safety. Effective transfer of power to the ground – and therefore the efficient use of fuel – is achievable only with tractor tyres that are not compromised by overloading, which could result in field compaction, bogging of the tractor, tractor tyre slippage on the wheel rim and, potentially, detachment of the tractor tyre from the rim, leading to inconvenience and safety implications in the field, and potentially very dangerous consequences on the road. Whether trailed, semi-mounted or fully-mounted, any implement attached to your tractor will have a direct impact on the loading of the tractor tyres on both rear and front axles. Remember also that the combination of a heavy trailer or implement and the weight of your tractor itself could exceed legal limits.
As part of the coding on the sidewalls of every tractor tyre, a load index code formed of a number (the load index) and a letter (which denotes the maximum speed rating) is clearly displayed. This indicates the maximum load capacity at the maximum speed for which the tractor tyre is rated. This is generally given at a standard pressure of 1.6 bar (23psi). As an example, a figure/letter combination of 173 D would indicate that the tractor tyre is designed to bear a maximum load of 6,500kg at 65km/hr. Load index tables that enable easy identification of the load ratings of individual tractor tyre types and sizes are available from tractor tyre manufacturers.
Newer tractor tyre designs such as increased flexion (IF) and very high flexion (IF) have carcases with greater sidewall flexibility that allows them to bear 20% (IF) or 40% (VF) more weight than the same size standard tractor tyre operating at the same pressure. Consider making the slight additional investment necessary in these types if this additional weight-bearing flexibility would be valuable to your tractor’s typical tasks. Bear in mind that, for tasks where maximum contact area minimum ground pressure are more important, IF and VF tyres alternatively allow the tractor tyre pressures to be lowered by 20% or 40% respectively at the standard load ratings, to lengthen and slightly widen the tyre footprint, without compromising road travel.
Many tractor tyres in the CEAT Specialty range or radial designs are available in IF and VF specification, particularly the flagship Torquemax tractor tyres. When next making an internet search for ‘tractor tyres for sale’ or ‘tractor tyres near me’, or browsing tractor tyres’ price lists, ensure you take into account the load rating of the tractor tyres you select, bearing in mind the typical tasks your tractor will be performing.
Read the full blogFri, 30 Dec 2022 ceat-speciality:blogs-tags/all,ceat-speciality:blogs-tags/tyre-care

ceat-speciality:blogs-tags/all,ceat-speciality:blogs-tags/tyre-care
Four factors that can affect trailer tyre performanceMultiple factors can cause poor trailer tyre performance, from wrongly-adjusted trailer brakes to incorrectly-torqued wheel nuts. Poor performance means a shortened lifetime and makes it necessary sooner than intended to sit down at the computer and search for ‘tractor tyres for sale’ and ‘tractor tyres near me’, and look through trailer tyres price lists. These four factors are among the key ones that affect trailer tyre performance.
This is possibly the most important criteria when it comes to compromised or maximised trailer tyre performance. If your trailer tyres have received excess air when inflated, whether by intention because it was thought to be a good idea (it never is) or by mistake, their performance will be compromised under braking. Over-inflation means a reduced ground contact patch, lessening the ability to transfer brake power to the trailer tyres, significantly increasing the stopping distance of the tractor and trailer combination.
Conversely, the key performance issue with under-inflation is that because the trailer tyre – and potentially all of the trailer’s tyres – has less air in it than it was designed to hold, the trailer tyre shape will be affected, with a flat base. This makes the trailer much harder to pull, and therefore the fuel consumption of the tractor pulling it will increase.
If the trailer wheel nuts are not checked regularly for tightness and are not tightened to the correct torque, the wheel and trailer tyre will not run true. As a result, wear will be uneven, and this will affect characteristics ranging from the trailer tyre’s ability to channel away mud and water to its braking performance.
Trailer brakes require regular maintenance and adjustment. If they activate too tightly, the brakes may lock up and cause the trailer tyres to skid, with consequent trailer tyre wear problems. If they do not activate as quickly and tightly as they should, the trailer tyres will fail to brake the trailer properly, causing excessive heat build-up in both the brakes and the trailer tyres.
This particularly relates to late braking. When needing to slow a tractor and trailer combination on the approach to a road junction, using the tractor transmission in the proper manner as much as possible to slow the combination will reduce stress on the trailer brakes, which will in turn reduce the heat build-up and wear in the trailer tyres and ensure their on-road performance is maintained.
All these factors can result in your trailer tyres performing poorly. Keeping your driving technique on form, ensuring your trailer brakes are adjusted correctly, making regular checks of wheel nut tightness and ensuring your trailer tyre pressures are always spot-on will both maximise trailer tyre performance, keeping running costs down, and ensure the longest possible trailer tyre life, maximising the time before you next have to search for ‘tractor tyres for sale’ and ‘tractor tyres near me’, and look through trailer tyres price lists.
Read the full blogFri, 30 Dec 2022 ceat-speciality:blogs-tags/all,ceat-speciality:blogs-tags/tyre-care

ceat-speciality:blogs-tags/all,ceat-speciality:blogs-tags/tyre-care
Cross-ply/bias or radial tractor tyres: which should I choose?Cross-ply/bias tyre construction is as old as tyres themselves, but has almost totally been replaced by radial tyre construction technology in the automotive/car tyre sector, due to the performance and safety benefits offered at high speed by radial design. However, tractors work across a far broader set of conditions and surfaces than cars, and at slower speeds. While higher-cost radials are the more advanced design, there are circumstances where cross ply tractor tyres offer advantages. Before you start searching for ‘tractor tyres for sale’ and ‘tractor tyres near me’ on the internet, and perusing tractor tyres prices lists, consider the points below.
For a tractor that works largely on concrete at low speeds – one that is used to operate a feeder on a dairy unit, for example, or a straw chopper on a pig farm – and which undertakes little or no field work or road travel, cross-ply/bias tractor tyres will likely suffice, and the additional cost of upgrading to a radial tractor tyre design will be unlikely to be returned over the tyres’ lifetime. Cross-ply/bias tractor tyres may also suit operations where field work is relatively simple, such as harrowing and fertilising permanent grassland.
If, however, your tractor is more commonly used in the field for draft work such as pulling a plough, cultivator or drill, then radial tractor tyres will be a far better proposition. They provide much greater traction and reduced compaction, thanks to their greater carcase flexibility.
Lower-cost cross-ply tractor tyres are perfectly adequate for short journeys travelling between yards, farms and fields at speeds of no more than 30-40km/hr. However, if road travel between farms and fields is a regular feature of your tractor’s work, and your tractor is capable of 40, 50 or even 60km/hr, then radial tractor tyres will be much the better option. Their enhanced sidewall flexibility means they provide a more comfortable ride for the operator. They also provide a greater degree of road-holding at speed, particularly when steering/cornering.
Cross-ply tractor tyres are simpler to manufacture than radial types, and that means they cost less to buy when comparing the two versions size for size. If your tractors workload is relatively light and it carries out only a few hundred hours’ work per year, cross-ply/bias tractor tyres are likely to be the better option for budgetary reasons. If, however, you are keen to invest in your machine and get the most out of it, consider the extra investment of purchasing radial tractor tyres, particularly if your tractor does perform high levels of field and road work as described above.
The remaining life your tractor has with you may also have a bearing on the type of tractor tyres you choose to purchase – although this can work for and against you. If you have a high-horsepower machine, the next buyer when you choose to trade in or sell on the tractor may not value the machine as highly if it has been equipped with replacement cross-ply/bias tractor tyres rather than radials. However, the greater cost of radial tractor tyres may not add up in terms of the value you believe you will achieve for the tractor overall given the remaining value/tread on the tyres when you finally sell on the machine. The general rule described above again works here, though – the higher the value and the higher the power of the tractor, particularly one likely to have a high in-field and on-road workload, the more it will be beneficial at sale time to have radial tractor tyres on the tractor, as they are likely to increase its overall value if there is 30% or more tread remaining.
The cross-ply/bias or radial tractor tyre decision is therefore not quite always as easy as it may initially seem. Before you start searching for ‘tractor tyres for sale’ and ‘tractor tyres near me’ on the internet, and looking through tractor tyres prices lists, take these points into account – they will help ensure you choose the ideal tractor tyres for your situation.
Read the full blogWed, 28 Dec 2022 ceat-speciality:blogs-tags/all,ceat-speciality:blogs-tags/tyre-care

ceat-speciality:blogs-tags/all,ceat-speciality:blogs-tags/tyre-care
The effect on performance of sprayer tyres with the wrong pressureWhether there is too much air in them or too little, if you do not make regular checks of the pressure in your sprayer tyres, the consequent problems can vary from irritating to expensive to dangerous and potentially life-threatening. And that’s before even considering the increase in sprayer tyre wear. So if you want to avoid having to counter the problems caused by improper sprayer tyre pressures – particularly the need before it’s necessary to look through sprayer tyres price lists or search the internet for ‘sprayer tyres for sale’ or ‘sprayer tyres near me’ – read on…
Where it arguably matters most, in the field, protecting your crops and travelling across your most valuable asset, your soil, high sprayer tyre pressures can cause significant damage and reduce your field’s performance and that of the subsequent operations performed in it and crops grown on it. Higher-than-recommended pressures means a reduced footprint for each sprayer tyre, increasing the machine weight each bears on that diminished contact patch. That will impact negatively on the drainage in the crop tramlines, the root growth of crops growing adjacent to them, and the cost performance of your enterprise, as more steel and fuel will be required to rectify the situation the following season.
Operating your sprayer tyres at below their recommended pressures will result in lower road speeds, due to the flattening of the sprayer tyre carcase profile and the increased contact patch. This will result in a slowing of the machine relative to the intended travel speed as the machine’s transmission fails to makes the wheels rotate fast enough because of the additional sprayer tyre resistance, and greater fuel consumption should operator increase the engine speed to try to overcome the additional resistance and achieve the required speed.
Operating your sprayer tyres at above their recommended pressures will reduce the manufacturer’s intended contact patch of sprayer tyre tread with the road. As a result, more weight will be carried by a reduced tread area, and so wear will be increased. The heat generated by running at high speeds on tarmac will rapidly increase tread wear and shorten sprayer tyre life. Lower pressure – increased wear on tyre sidewalls and bead
When sprayer tyres are run at less than their intended pressures, there is a high chance of the additional carcase flexibility create causing the sprayer tyre bead to move on the wheel rim. In the field, this can put the safety of the operator and the load at risk. On the road, other highway users are also put in danger by the threat of a loose sprayer tyre and/or out-of-control machine.
In addition to higher wear caused by the reduced contact patch, sprayer braking performance will be reduced if sprayer tyres are operated above their intended pressures. Because less rubber is in contact with the ground, there will be less sprayer tyre ‘bite’ in the field on slopes, and less rubber/tarmac contact at speed on the road. Either way, the danger is significant.
Operating sprayer tyres at incorrect pressures – whether higher because of inaccurate inflation or the idea of adding ‘a bit extra just in case’ – or lower because of irregular checking or the idea it will reduce soil impact – can therefore be costly at best and unsafe at worst. To avoid having to look before it’s really necessary through sprayer tyres price lists or search the internet for ‘sprayer tyres for sale’ or ‘sprayer tyres near me’, check your sprayer tyre pressures regularly and ensure they are always operated at the correct pressures.
Read the full blogWed, 28 Dec 2022 ceat-speciality:blogs-tags/all,ceat-speciality:blogs-tags/tyre-care

ceat-speciality:blogs-tags/all,ceat-speciality:blogs-tags/tyre-care
Five things to look out for when purchasing sprayer tyresWhen searching for a new set of sprayer tyres or specifying sprayer tyres on a new machine, it may seem at first that there is little to choose between the makes and types on the market. Take a closer look at the details, though, and you will find there are certain characteristics that can help make your spraying operations more productive, more efficient and safer. Before you start planning a purchase with internet searches for ‘sprayer tyres for sale’ and ‘sprayer tyres near me’, and looking through sprayer tyres price lists, read on to discover five things to look out for.
One of the most important aspects of sprayer tyres is lug design, because this has the most significant impact on grip and traction, helping the sprayer to tackle loose and damp soils and/or climb hills, ensuring the transmission speed the operator selects matches the ultimate forward speed of the machine. That not only means the intended application rate is achieved, but also that minimal fuel is wasted through wheelslip, and – particularly on hills and steep land – operator and machine safety is maximised. Specially designed for self-propelled sprayers, CEAT Spraymax VF sprayer tyres feature a stepped lug design that bites into the soil and squeezes it out from between the treads, maximising grip and traction.
Sprayer tyre manufacturers such as CEAT Specialty understand their market, and so design sprayer tyres that don’t just provide maximum traction, but also protection the two most important assets in the field – the soil and the crop growing in it. As an example, CEAT Spraymax VF sprayer tyres blend this stepped lug design with sprayer tyre should that are rounded to a measured degree, to ensure they produce as little soil and crop impact as possible.
Rowcrop sprayer tyres must be tall and narrow to minimise their impact on the crops in which a sprayer is working, but the compromise for this quality comes often in terms of road comfort when travelling at speed. Look out for features such as a centre tie bar, which helps smooth the sprayer’s ride on the road, minimising shock and wear loads on the sprayer and making life more comfortable for the operator.
CEAT Spraymax VF sprayer tyres are designed and manufactured using very high flexion (VF) construction principles. This carcase design process means the sprayer tyres can either carry 40% more weight than standard sprayer tyres of the same size, or – of even greater value in a spraying situation where minimising soil compaction is important – be operated at 40% lower pressures than standard sprayer tyres of the same size. This latter ability lengthens and slightly widens each sprayer tyre footprint, to spread the sprayer load over the greatest possible area and hence minimise the impact on the soil. This helps reduce ponding in the tramlines after rain, and means those tramlines are easier to pull through when cultivating at the end of the season.
For maximum durability and tyre lifetime, choose a sprayer tyre with a high non-skid depth (NSD). This essentially describes the sprayer tyre tread depth, and so a high NSD will give you maximum life from your sprayer tyres.
When next seeking a new set of sprayer tyres or specifying sprayer tyres on a new machine, bear in mind these five essential qualities. Pick the right sprayer tyres, and you will delay as long as possible the next time you need to search for ‘sprayer tyres for sale’ or ‘sprayer tyres near me’, or scan through lots of sprayer tyres price lists.
Read the full blogTue, 27 Dec 2022 ceat-speciality:blogs-tags/all,ceat-speciality:blogs-tags/tyre-care

ceat-speciality:blogs-tags/all,ceat-speciality:blogs-tags/tyre-care
Tractor Tyre Choices: Expectations vs RealityVery often, scanning through the internet for tractor tyres for sale, perhaps after making a typical search for ‘tractor tyres near me’ and then checking through tractor tyres price lists, results in a shortlist of tractor tyres that are marketed as offering design and construction features that will benefit your business. The reality, though, can sometimes be different. So how can you pick out tractor tyres that really do offer something that will help provide a return on investment?
If your tractor does a lot of road travel and haulage, good road-handling characteristics are essential. Pick tractor tyres that are good in the field but not on the road, and you may regret it. CEAT radial tractor tyres such as the Farmax and flagship Torquemax ranges are designed with ‘roadability’ in mind – that is they are designed specifically to provide both stability and ride comfort at speed. A higher tread angle and broad lug overlap at the centre are the key features that create this ideal handling. And with modern farming involving more road travel as farms grow larger, you should expect your new tractor tyres to offer these qualities. The reality – CEAT integrates them into its radial designs.
Not all tractors work in loose, perhaps wet soils where high levels of tractive performance are important. If, for example, your tractor spends most of its time operating a diet feeder or straw chopper around a concrete yard, tractive characteristics may not be as important as others, such as low cost and hard-wearing tread, and simple, standard tractor tyres – perhaps radial, but possibly lower-cost cross-ply/bias types – may well suffice. If your expectation is tractor tyres that will help your tractor pull soil-engaging implements easily in tough soils, look to radial tractor tyre types and seek features such as a wide angle at the shoulder, which enhances traction, and a rounded shoulder which minimise soil and crop damage. A wide tread and large inner volume will also help reduce soil compaction.
Many of the long-established big names in the international tractor tyre market have changed hands over recent years, and others have licensed their names to other manufacturers. That means you may not get the same type of product from a brand that you did just a few years ago. CEAT has had stable ownership for over 40 years, having become part of India’s RPG Group, one of the country’s biggest businesses, in 1982. Since then it has developed a presence in over 120 countries, and in recent years following its entry into the UK agricultural tyre market has rapidly become a well-recognised name here.
Expectation and reality can be two very different things before and after purchasing tractor tyres. A little research into manufacturers, brands and tractor tyre designs can soon pay off when you are browsing for ‘tractor tyres for sale’ or ‘tractor tyres near me’, and searching tractor tyres price lists.
Read the full blogWed, 14 Dec 2022 ceat-speciality:blogs-tags/all,ceat-speciality:blogs-tags/tyre-care

ceat-speciality:blogs-tags/all,ceat-speciality:blogs-tags/tyre-care
Five Flaws To Watch Out For When Buying Tractor TyresA simple trap to fall into when searching for a new set of tractor tyres – often most easily done today via internet searches for ‘tractor tyres for sale’ or ‘tractor tyres near me’ before comparing tractor tyres’ prices lists – is to make a hurried decision based on price or perceived quality. Not all tractor tyres are the same, though…
For many modern tractor applications, radial designs, which are constructed around the circumference of the tractor tyre, offer the best combination of traction, comfort and flexibility when it comes to selecting new tractor tyres. This is particularly true of your tractor carries out a lot of field operations on the land and is often used on the road. Here, radials such as CEAT Torquemax and Farmax tractor tyres will be your best option, providing long tyre life, good roadability, reduced soil compaction and superior traction. However, there are circumstances where the simpler construction and resulting lower cost of a cross-ply or bias tractor tyre design such as the Farmax R1 or AS R1 will suffice – for example, if your tractor works primarily on yard tasks, such as with a mixer wagon on a cattle enterprise, or a straw chopper on a pig unit.
This is about more than simply ensuring that you pick the same diameter, section width and profile tractor tyres that your tractor was fitted with previously. You do need to ensure your new tractor tyres match the diameter of your tractor’s wheels, but it may well be possible to change the section width and profile of the tractor tyres you are looking to replace, to give you a longer, slightly wider footprint that gives your tractor more traction and enhanced flotation. If you are seeking these attributes, consult your tractor’s operator’s manual, your tractor dealer and your tyre dealer to determine whether a tractor tyre size upgrade may be possible.
The introduction a few years ago of increased flexion (IF) and very high flexion (VF) tractor tyre carcase designs means that one of the biggest mistakes farmers and contractors can make when selecting new tractor tyres is not investigating the potential benefits offered by such designs. With IF tractor tyres, it is possible to carry a 20% greater payload than with the same-sized tractor tyres of standard construction. Alternatively, it is possible to operate at the same payload but at tractor tyre pressures 20% lower than the recommended ones, lengthening and slightly widening the tractor tyre footprint and hence reducing ground pressure. With VF tyres, the 20% figures double to 40%.
Working in wet soils is thankfully not as common a requirement for tractors as it once was, thanks to greater work capacity and more awareness of the need to minimise coil damage, Tractors that work mostly in firm, dry conditions – perhaps those used mostly on summertime grain hauling or hay/silage making, or chiefly on concrete livestock yards – do not have especially complex tractor tyre requirements when it comes to tread design. However, those that work on arable cultivation tasks, or perhaps on root crop or maize silage haulage, for example – have very different needs. In this situation a tractor tyre’s self-cleaning characteristics are important. Look also for a lower angle at shoulder that helps maximise traction, a wide tread and large inner volume to minimise soil compaction. In addition, ensure the tread pattern is designed to squeeze out soil from the profile as the tractor tyre rotates.
The tractor tyre market is changing all the time, with some makers choosing to withdraw, others deciding to sell their ag businesses to other manufacturers, and established firms from other parts of the world making bold moves into new markets for them, such as Europe. It will pay to research and investigate just who is who before you next purchase some tractor tyres, as some brands may now not be owned by the original manufacturer, while other, newer names in the European sector may well be worth investigating, to ensure you make an informed decision and obtain the best products and best price for your needs.
These are five of the common flaws for farmers to fall foul of when buying new tractor tyres. Before you next start searching for ‘tractor tyres for sale’ or ‘tractor tyres near me’ and comparing tractor tyres’ prices lists, ensure you give them some thought, and you should end up with tractor tyres that make a difference to your tractor and your farm business.
Read the full blogTue, 6 Dec 2022 ceat-speciality:blogs-tags/all,ceat-speciality:blogs-tags/tyre-care

ceat-speciality:blogs-tags/all,ceat-speciality:blogs-tags/tyre-care
How to check your trailer tyres for wear and tearTrailer safety has rightly come under closer scrutiny in recent years, as tractor speeds and gross vehicle combined weights have increased, police and the Vehicle Operator Standards Agency have stepped up inspections and, unfortunately, the number of accidents involving tractor/trailer combinations has risen. To ensure you stay safe and on the right side of the law, follow these tips and you will also maximise the time before you next have to replace worn or damaged trailer tyres and make that time-consuming search through trailer tyres price lists and on the internet for ‘trailer tyres for sale’ and ‘trailer tyres near me’.
Whether they rarely go on the road or spend much of their time shuttling between fields and farms, regular checks of your trailers’ tyres is essential to ensure the safety of the tractor operator and other road users, the security of your loads and the protection of your clean insurance and law records – no-one likes to make a claim, and no-one particularly likes to receive a fine or licence points. All of these things can happen, though, if you and your tractor operators do not regularly check trailer tyres for wear and tear.
Tyre pressure checks should be part of any daily pre-work service schedule of tractors and trailers or any other trailed implement. At the same time, this is the opportunity to also make a check of your trailer tyres for wear and tear that could either make an immediate impact through a trailer tyre failure that day, or perhaps may need to be noted as an aid to planning for trailer tyre replacement in the near future.
Firstly you should assess the tread depth of your trailer tyres. While most trailed tyres are not driven – unless, of course, you are dealing with a specialist one that has powered axles – they nevertheless need to be able to squeeze out and channel away mud as they rotate in, for example, wet root crop fields, and they need to disperse water if you find yourself hauling on the road in the rain. This means tread depth is just as important as in a driven machine. Once the tread on your trailer tyres is over 50% worn, regularly use a tread depth gauge to ensure there is more than 25% of the tread depth remaining. At this point the trailer tyres will need replacing. While you are assessing the tread depth, check the tread for any splits or cracks, ensuring you run the trailer forwards half a wheel turn to assess the full circumference. Remove any embedded foreign objects such as stones if it is safe to do so – if something such as a nail or a screw has pierced the inside of the trailer tyre, safety must come first and the tyre should be deflated fully before removal, followed by a professional assessment of whether it is repairable or requires replacement.
Next, examine both the outer and inner sidewalls of each trailer tyre. The outers, of course, are easy to observe with a quick visual check, but you should ensure you also check the inners. Any splits and cracks – caused by flints, or the trailer passing closely against a kerb or foreign object, for example – can easily develop into trailer tyre bulges and lead to dangerous blowouts. If you observe such damage, replace the affected trailer tyre as soon as possible.
With trailer safety in the spotlight due to higher speeds and weights, more accidents and an increase in police and VOSA checks, it is more important than ever to regularly check the conditions of your trailer tyres before work. Use the above pre-work procedures to maximise the time before you next have to replace worn or damaged trailer tyres and browse the internet for ‘trailer tyres for sale’ and ‘trailer tyres near me’ before trawling through trailer tyres price lists.
Read the full blogMon, 5 Dec 2022 ceat-speciality:blogs-tags/all,ceat-speciality:blogs-tags/tyre-care

ceat-speciality:blogs-tags/all,ceat-speciality:blogs-tags/tyre-care
Why farmers need a trusted source for sprayer tyresWhether you are specifying a set of sprayer tyres on a new model or replacing a set of sprayer tyres on an existing one, both outlays represent a significant investment on a valuable machine that carries valuable loads – and can have major impact on the performance of your soils and the crops they produce. Before you start searching the internet for ‘sprayer tyres for sale’ and ‘sprayer tyres near me’ and compiling potential purchases from sprayer tyres’ price lists, it’s worth taking time to investigate the credentials of the sector’s manufacturers.
A self-propelled sprayer offers greater convenience and capacity than an equivalent trailed model, but represents a considerable additional investment. Equipping it with the best possible wearing parts to ensure the maximum performance is extracted from it is therefore a wise move. After all, it carries products that, when added up through the season, are worth thousands of pounds – and, of course, can be hazardous if not handled safely in a well-equipped machine.
That’s why it is essential to ensure that the manufacturer of any new sprayer tyres you select has proven credentials in the sector. Not every well-known name in tractor tyres necessarily has a proven track record in sprayer tyres – but conversely some of the rising names in tractor tyres do have a strong background in sprayer tyres as well.
As an example, CEAT Specialty has a business history of almost a century, having been founded in 1924. Today, with a presence in over 120 countries, CEAT is part of RPG Group, one of the top business conglomerates in India, with a turnover of $3bn. CEAT is one of the world’s fastest-growing manufacturers of tyres for passenger and off-road vehicles, serving the latter category under its CEAT Specialty division. Under this, it manufactures not only tractor tyres, but also specialist sprayer tyres designed purposely for use with self-propelled sprayers,
It is the research and development and the manufacturing precision that goes into creating these sprayer tyres that means they can be regarded as a trusted tyre to fit to your sprayer, protecting its load and your soils and crops. For a start, all CEAT Specialty Spraymax VF sprayer tyres are of a very high flexion (VF) carcase design, meaning they can carry 40% more load at standard pressures or, perhaps more importantly, be operated at 40% lower pressures than standard for the same load. This means that the weight of your self-propelled sprayer can be spread over four longer and slightly wider footprints than would be imposed at standard pressures, reducing the bar pressure exerted per square centimetre, or pounds of pressure per square inch.
But that’s not all. With the benefit of CEAT Specialty research and development you also gain from a tread with a stepped lug design proven to provide greater grip for enhanced traction, a welcome feature especially for those farmers working on hilly land. With rounded shoulders, Spraymax VF sprayer tyres damage less crop and minimise soil compaction. On the road, a high non-skid depth (NSD) ensures a long sprayer tyre life, giving you a tyre that’s durable and built to last, while a centre tie bar provides good road handling, or ‘roadability’, for swift travel back to base or to the next job.
All these sprayer tyre characteristics are found only from a manufacturer established as a trusted source of sprayer tyres. To maximise the life of your sprayer tyres and ensure you minimise the number of times you have to surf for ‘sprayer tyres for sale’ and ‘sprayer tyres near me’, and search sprayer tyres’ price lists, ensure you choose your sprayer tyres from a maker with proven track record in this specialist area.
Read the full blogMon, 5 Dec 2022 ceat-speciality:blogs-tags/all,ceat-speciality:blogs-tags/tyre-care

ceat-speciality:blogs-tags/all,ceat-speciality:blogs-tags/tyre-care
How to know when your sprayer tyres need replacingMost farmers and farm contractors have better things to do than spend more time than necessary searching the internet on the office computer for ‘sprayer tyres for sale’ or ‘sprayer tyres near me’ and looking through sprayer tyres price lists. Knowing exactly when your sprayer tyres really need replacing is essential if you are to get the optimum life, performance and value from them.
Sprayer tyres are, ultimately, what connects your soil and your crops with the investment you make in crop protection products – and in the sprayer that carries and applies them. That means you need to be sure you are getting the best from those sprayer tyres, and you need to know exactly when it is the right time to replace them. Make the choice unnecessarily early and you will incur expenditure before you need to, and waste valuable tyre tread that could have be turned into timely spray applications. Too late, and you risk poor sprayer performance – and potentially unsafe operation, particularly on hilly ground.
Knowing when tractor tyres need replacing is a reasonably easy judgement to make, particularly if your tractor works on steep ground and/or does a lot of primary cultivation – in both cases grip will reduce and wheelslip increase as the tread wears away and its depth decreases. The same, generally speaking, is true of sprayer tyres – but there are some significant differences.
Because they have a narrow footprint in order to fit tramlines without damaging crops, the pressure at which sprayer tyres operate is higher than conventional tyres of a comparable diameter. The amount of land they compact is minimised, but on the road this does mean they can be abraded at a faster rate than a comparable conventional tyre, as they have a harder carcase. If your sprayer spends a lot of time on the road, and particularly if it spends a lot of time running at high speeds which create heat, and then slowing for junctions, the tread may wear faster than you might otherwise expect. If your sprayer tyres have less than 25% of their original tread remaining, it may be time to consider replacing them, especially if you work on a lot of steep or hilly ground.
A tyre’s non-skid depth (NSD) is the technical description for the depth of its tread – or more specifically, in the case of a tractor or sprayer tyre, the height of that tread. If dealing with a vehicle that spends most of its time on the road, such as a car or a truck, the tread pattern’s ability to disperse on a wet road is the relevance of non-skid depth, but on tractor tyres or sprayer tyres with chevron-style tread designed to grip and provide traction primarily on field surfaces, the primary problem is reduced power transfer from the machine’s transmission to the ground. That means traction is reduced, while fuel efficiency falls too.
Most self-propelled sprayers feature oil-powered hydrostatic transmissions, and the combination of this with sprayer tyres that have a much-reduced tread depth can result in a significant fall in performance and increase in danger on slopes.
Sprayer tyres such as CEAT’s Spraymax VF are designed with a high non-skid depth, for maximum life and performance over the period the self-propelled sprayer is owned. Durable, hard-wearing compounds ensure maximum longevity, minimising lifetime sprayer running costs.
Keep a regular eye on the depth of your sprayer tyres’ treads. When it becomes apparent you need new sprayer tyres – probably when they have reached 25% tread depth – then when you start surfing the internet for ‘sprayer tyres for sale’ or ‘sprayer tyres near me’, make non-skid depth a high criteria on the list of characteristics you look for before you begin scanning sprayer tyres’ price lists.
Read the full blogMon, 5 Dec 2022 ceat-speciality:blogs-tags/all,ceat-speciality:blogs-tags/tyre-care

ceat-speciality:blogs-tags/all,ceat-speciality:blogs-tags/tyre-care
How can I adjust wheel alignment to avoid my front tractor tyres wearing unevenly?One of the primary causes of premature wear of front tractor tyres is incorrect wheel alignment that means the tractor tyres wear unevenly, with more wear on one side than the other. To prevent this – and so avoid having to make an early search for replacement ‘tractor tyres for sale’ or ‘tractor tyres near me’ or an unplanned scan of tractor tyres price lists – follow this advice.
One of the most common causes of premature front tyre replacement, particularly on four-wheel drive tractors, is uneven wear caused by incorrect wheel alignment. If the two front wheels on your tractor have not been correctly adjusted on the axle, and their alignment is not regularly checked, the result will be excessive wear on either the left or right side of each front tractor tyre. This will affect each tractor tyre’s grip and its ride, and because these are front tractor tyres, steering will be affected too, particularly at speed on the road, with associated risks for safety of the tractor driver and other road users.
So how can you adjust wheel alignment to avoid your front tractor tyres wearing unevenly? One relatively simple solution, particularly if the problem has been identified when the tyres are at least 50% worn and so at least halfway through their lifetimes, is to swap them, left for right and right for left. However, it is better to identify the cause of the problem and make adjustments to ensure that it does not continue to be an issue.
To do this, you will need to measure the distance between the front wheels at their leading and rear edges. On a correctly-adjusted axle, these distances should be identical, or have a slightly greater distance between the leading edges – what is known as a slight ‘toe-out’ stance.
If the distances are not identical, and therefore the front tractor tyres are not parallel or have a ‘toe-in’ position, it is necessary to adjust the alignment of the front wheels. The operator’s manual for your tractor will explain the correct procedure for this, but the following description gives general guidance of the principles to follow.
Firstly, at each end of the track rod you must undo the locknuts. Usually of the self-locking type, they will require pressure to placed on them to prevent the ball bearing beneath causing the nut to rotate. As this is done, it should be possible to remove the track rod end, and to screw it in or out to either shorten or lengthen it as required to bring the top of the wheel in towards or away from the tractor as required, repositioning it to ensure it sits parallel or has a slight toe-out stance. Its opposite number should have an opposing stance to ensure things are even.
Once this is done on one side, the track rod end can be reinserted and the procedure repeated on the opposite side. The final step is to then re-secure the locking nut which fastens the track control rod. The inside of the self-locking nuts is made from nylon, and the opposing thread chews into this as the nut is tightened, so these nuts cannot be reused and must be replaced at this point. You should therefore ensure you have replacements before you commence the procedure of track rod adjustment.
To prevent premature front tractor tyre wear, the tracking of your front tractor tyres should be checked regularly through the course of the year to ensure they are parallel, adjusting them via this procedure if they are not. By cutting the likelihood of both premature and uneven tractor tyre wear, not only will this mean longer intervals between the internet searches you have to make for ‘tractor tyres for sale’ and ‘tractor tyres near me’, and the times you have to study a tractor tyres price list, but it will also maximise overall tractor tyre performance and safety of your machine as a whole, by ensuring the front tractor tyres pull and steer exactly as designed.
Read the full blogTue, 22 Nov 2022 ceat-speciality:blogs-tags/all,ceat-speciality:blogs-tags/tyre-care

ceat-speciality:blogs-tags/all,ceat-speciality:blogs-tags/tyre-care
Why CEAT Specialty tractor tyres are the right choice for farm needsIf you need new tractor tyres and are searching the internet for ‘tractor tyres for sale’ or ‘tractor tyres near me’, you will not be short of choice in terms of makes and models. So when picking from tractor tyres’ price lists, why should you put CEAT Specialty tractor tyres at the top of your selection?
A proven history
CEAT has well-established credentials in tyres – and in tractor tyres and others for agriculture in particular. The firm that began as Cavi Elettrici e Affini Torino was founded almost a century ago, in 1924. Its products attracted Indian investment, and on 10 March 1958 it was incorporated in Mumbai as CEAT Tyres of India. Today it is part of Mumbai-based RPG Group, one of the country’s fastest-growing businesses, with a US$3bn turnover.
While a relatively recent newcomer to the European agricultural/tractor tyre sector, CEAT has a global footprint that covers over 120 countries. Its annual total tyre production is around 15 million units of all types, with markets spanning cars, motorcycles, trucks, buses and light commercials, plus industrial equipment including agricultural machinery, earthmovers and forklifts. CEAT entered the agricultural market in 2016 via the creation of CEAT Specialty, which manufactures and markets tractor tyres and others for agricultural use.
Researched tread design
The research and development that goes into CEAT Specialty product evolution encompasses all areas of tractor tyre design, a key example being the crucial element that transfers the tractor power and engages with the ground – the tractor tyre tread. CEAT Specialty tractor tyre tread design features on tractor tyres such as the Torquemax include a tilted lug tip that reduces vibration and noise at speed on the road, with handling enhanced by a higher angle and lug overlap at the centre that provides better road handling. In the field, a lower shoulder angle enhances traction, while rounded tractor tyre shoulders help minimise soil and crop damage, and a wider tread and larger inner volume reduce soil compaction. In addition, the R1-W tread depth ensures a long tractor tyre life.
The latest construction technology
Premium tractor tyres in the CEAT Specialty range incorporate some of the very latest tractor tyre technology designed to boost efficiency and enhance soil protection. For example, tractor tyres in the Torquemax line are available not only in standard construction format, but also as IF models, where the construction allows the tractor tyre to bear 20% more load than a standard version, or to be operated at 20% lower pressures than the standard model for the same load, helping spread the load over a broader, longer footprint for more traction and reduced compaction. Many sizes are also available in VF format, which increases these figures to 40%.
A large range, a wide selection
Whether you are seeking standard tractor tyres for a basic tractor that performs simple tasks, or premium tractor tyres to work in the most demanding field conditions on high-horsepower tractors used for primary cultivations, CEAT Specialty has tractor tyres to suit every application, from cross-ply/bias construction Farmax AS R1 units to our flagship Torquemax radial tractor tyres.
The latest manufacturing technology
The CEAT Specialty manufacturing plant at Ambernath, Mumbai, employs a highly-professional tractor tyre manufacturing workforce, working with the very latest manufacturing equipment. It includes an R&D centre focused on developing tomorrow’s tractor tyres.
Trusted by the biggest names in tractor manufacturing
CEAT Specialty tyres are fitted as original equipment by some of the tractor industry’s biggest names, including CNH Industrial’s New Holland, Case IH and Steyr brands, AGCO’s Massey Ferguson, Valtra and Fendt businesses, John Deere and JCB. And the company’s industrial tyre activities are not limited to agriculture – CEAT Specialty also supplies construction equipment OEMs including Caterpillar and Wirtgen Group.
CEAT Specialty is rapidly becoming a bigger and bigger force in agricultural tyres – and in particularly in tractor tyres. When you are next searching the internet for ‘tractor tyres for sale’ or ‘tractor tyres near me’, the choice of makes and models may be confusing. But before you start selecting from tractor tyres’ price lists, take a look at what CEAT Specialty offers. Whatever your farm’s needs, it’s likely you will find they have exactly what you require.
Read the full blogTue, 22 Nov 2022 ceat-speciality:blogs-tags/all,ceat-speciality:blogs-tags/tyre-care

ceat-speciality:blogs-tags/all,ceat-speciality:blogs-tags/tyre-care
Key to working at very low pressures with your tractor tyresModern tractor tyre developments mean that with certain otherwise-standard designs it is possible to work at lower pressures in the field to help maximise traction and minimise compaction. Perhaps you are already operating IF or VF tractor tyres – or perhaps you are searching the internet for ‘tractor tyres for sale’ or ‘tractor tyres near me’, or comparing tractor tyres price lists. Either way, read on for some tips on operating your tractor tyres at low pressures.
Standard tractor tyres must be operated at exactly the pressures recommended by the manufacturer, for reasons of safety, performance, reliability and efficiency. Deflating standard tractor tyres by even a small amount to try to enhance traction and/or flotation poses a significant dangers of the tractor tyre bead becoming detached from the wheel rim, with potential in-field consequences for machine damage and operator safety. If pressures are low when travelling on the road, the dangers extend to the safety of other road users. Conversely, overloading tractor tyres designed to work to certain maximum weights at particular pressures risks damaging tyre stability and integrity, and poses safety risks.
However, the relatively recent development of increased flexion (IF) and very high flexion (VF) tractor tyre carcase designs allows much greater flexibility with tractor tyre pressures. Reducing tractor tyre pressures where possible increases the length and – to a certain extent – the width of tyre tread in contact with the ground. This enhances traction, thereby reducing fuel use, and at the same time, because the tractor’s weight is spread over a greater area, reduces weight imposed per square centimetre, cutting compaction.
Increased flexion tractor tyres can not only bear 20% more weight at the same pressures than standard tractor tyres of the equivalent size, but alternatively can be operated at 20% lower pressures than the equivalent-size standard tractor tyres. With very high flexion tyres, this figure is doubled in both cases to 40%. Only IF and VF-marked tractor tyres possess this capability. Therefore, the key to working at very low pressures with your tractor tyres is relatively simple – you must do this only if you have specified, fitted and are operating a tractor with IF or VF tractor tyres.
The benefit of IF or VF designs is that this flexibility is available without the need to compromise. Whether you are working with your tractor in the field, or moving between jobs on the road, IF or VF tyres can be operated at these respective 20% or 40% lower pressures in both circumstances without the need for adjustment, regardless of surface or of travel speed. There is no need to inflate IF or VF tractor tyres to their standard pressures when on the highway.
So if you want to work at very low pressures with your tractor tyres, the next time you search the internet for ‘tractor tyres for sale’ or ‘tractor tyres near me’, or are scanning through tractor tyres price lists, look for those that are available in IF and VF formats, such as CEAT Specialty’s flagship Torquemax range. This is the key to the benefits of lower pressures, including more ground contact area and reduced compaction – without compromise.
Read the full blogTue, 22 Nov 2022 ceat-speciality:blogs-tags/all,ceat-speciality:blogs-tags/tyre-care

ceat-speciality:blogs-tags/all,ceat-speciality:blogs-tags/tyre-care
Why is lifetime of my tractor tyres shorter than I expected?Selecting and purchasing new tractor tyres can be a long process, and requires considerable investment, so extending as long as possible those intervals between internet searches for ‘tractor tyres for sale’ or ‘tractor tyres near me’ means maximising your tractor tyres’ life – and minimising cost per tractor hour. Before you next start scanning tractor tyres price lists, consider this advice to identify why your last set of tractor tyres may not have worn as well as you hoped.
A significant cause of premature tractor tyre wear is incorrect tractor pressures. The most common issue is underinflated tractor tyres, either because they have gradually lost pressure – perhaps due to a small puncture or a damaged valve – or have been incorrectly inflated upon installation. Either way, insufficiently-regular checking – and, if necessary, adjustment – of your tractor tyre pressures may be a significant cause of shortened life, as under-inflation will result in excessive loading of the sidewalls, compromising their structure.
Over-inflation of tractor tyres – perhaps accidental when inflating them, or deliberate in the mistaken belief that it offers an advantage – will also shorten tractor tyre life. In this instance, the sidewalls come under excessive pressure, potentially causing sidewall cracking, while the tread will also wear faster on hard surfaces. Under- and over-inflation will both cause the tread to wear unevenly, with the former causing more wear on the outer edges, and the latter on the centre of the tread.
On-road driving technique can have a considerable impact on the speed of tractor tyre wear. If your road travel is extensive and involves a lot of slowing and stopping for junctions and roundabouts, the lifetime of your tractor tyres can be compromised if you brake late for these. Try to make as much use as possible of the transmission to slow the tractor ahead of a junction, and to do so smoothly and progressively in plenty of time. Tractor tyre integrity can also be compromised if the tread or sidewalls strike hard objects at speed. To avoid such impacts shortening tractor tyre life, try wherever possible to avoid on-road hazards such as potholes and kerb stones which can damage the tractor tyre carcase if struck at speed. And on concrete surfaces such as cattle yards, try to avoid hard turns that scrub and abrade the tractor tyre tread against the concrete, increasing its wear rate.
How you operate your tractor in the field can also have a significant impact on tractor tyre life, particularly if your tractor is required to perform primary tillage tasks on heavy and/or abrasive soils. The key issue here is wheel slip, caused by the tractor’s suitability for the task in hand and the way it has been set up to match that task. For example, if pulling a subsoiler or other deep-working cultivator, a tractor should be suitably weighted (at the front, and with rear wheel weights if required) to match the task. To provide sufficient traction and minimise slip, you should also ensure the tractor’s four-wheel drive is engaged and its wheel-slip monitor, if fitted, is accurately set. All these factors will minimise slip and therefore also minimise tractor tyre abrasion and damage.
If you find the lifespan of your tractor tyres has been shorter than you expected, it is highly likely to be for one of the above reasons. Pay them a little more attention, and you will hold off for as long as possible the next time you need to search the internet for ‘tractor tyres for sale’ and ‘tractor tyres near me’, or pick through tractor tyres price lists.
Read the full blogTue, 22 Nov 2022 ceat-speciality:blogs-tags/all,ceat-speciality:blogs-tags/tyre-care

ceat-speciality:blogs-tags/all,ceat-speciality:blogs-tags/tyre-care
The Dangers Of Driving With Underinflated Trailer TyresIf you need to replace a set of trailer tyres, there are many maintenance tips that will help you get the most from them once you have searched the internet for ‘trailer tyres for sale’ or ‘trailer tyres near me’, perused trailer tyres price lists and made your selection. With your purchases delivered and fitted, one of the most important points is to ensure they are correctly inflated and regularly monitored for pressure, as there are multiple dangers to driving with underinflated trailer tyres.
Underinflated trailer tyres will affect the handling of your trailer at speed on the road, potentially causing it to become less responsive to the tractor’s steering movements and wallow from side to side rather than following precisely the tractor’s steering movements around bends. There is a high risk of the bead of an underinflated trailer tyre breaking contact with the wheel rim, and becoming detached from it as a result. The dangers posed to other road users by a detached trailer tyre and an unstable trailer are self-evident, with insurance and – potentially – criminal implications.
The safety of the operator of a tractor towing a trailer with underinflated trailer tyres is also at significant risk. As outlined above, trailer tyre underinflation will affect the handling behaviour of the trailer when travelling at speed, and this will be transferred to the towing tractor. As a result, the combination will become unstable. Even if the road is otherwise free of traffic – not uncommon on country roads – an unstable trailer will affect the tractor’s steering and handling, and it may be difficult to correct this, potentially leading to the tractor, trailer or both striking a kerb or ditch, with a significant likelihood of injury – or worse.
Underinflated tractor tyres also pose a risk to the structure of the trailer – and hence the cost to you as its owner. If one side of a trailer happens to have under-inflated trailer tyres, this can affect the even loading of the trailer axle suspension, straining and potentially damaging its components.
Underinflated trailer tyres leading to uneven load can result in greater compaction on the underinflated side of the trailer, and potentially even loss of trailer stability and loss of load from a well-loaded trailer
Beyond the fact that trailer tyre life will be shortened as the risk of carcase damage will increase, there are therefore a number of dangers that result from driving with underinflated trailer tyres. If you are seeking to replace a set of trailer tyres, and have made your internet searches for ‘trailer tyres for sale’ or ‘trailer tyres near me’, and looked at what’s available on trailer tyres price lists remember once your trailer tyres have been delivered and fitted that checking their pressures should be part of your daily tractor and trailer maintenance routine. That way you will minimise the risks of any of the points above occurring.
Read the full blogTue, 15 Nov 2022 ceat-speciality:blogs-tags/all,ceat-speciality:blogs-tags/tyre-care

ceat-speciality:blogs-tags/all,ceat-speciality:blogs-tags/tyre-care
How to choose the right trailer tyres for the loads you haulWhen it comes to sourcing replacement trailer tyres, the array of different makes, models, construction types and descriptions among those on the market can be bewildering. The type of load you work with, its density, the frequency of your haulage activities, the speeds at which you haul and the surfaces on which your trailer predominantly works should all influence your trailer tyre choice. Before you begin searching the internet for ‘trailer tyres near me’ or ‘trailer tyres for sale’ and looking through trailer tyres price lists, use the points below to help you choose the right trailer tyres for the loads you haul.
Because they tend to be operating on bare soils and often at the wettest time of year, trailers used to haul root and vegetable crops from harvesters need flotation tyres that can help cushion the impact of heavy loads on the land, to minimise rutting, compaction and the chance of trailers getting stuck. If you need your trailers to unload root or vegetable crop harvesters on the move in potentially sticky conditions, equipping them with trailer tyres such as the CEAT Floatmax FT will help ease transport and protect your soils.
radial floatation tyres are especially suited to trailers used for root crop haulage as they offer a firm grip on loose surface conditions, with directional lugs that afford superior traction, while a wider and flatter crown ensures better floatation. For operations that also involve a lot of road haulage, a robust centre block offers enhanced stability and roadability.
With a larger footprint and a flatter crown width that minimises compaction, CEAT Floatmax RT radial trailer tyres are especially suited to operations such as maize silage haulage. Rounded shoulders help minimise soil damage, while a steel belted carcase helps protect against potential puncture damage from stubbles such as maize stalks. And for hauling maize from the farm to the farm/clamp, Floatmax RT trailer tyre tread features a pattern of interconnected grooves for enhanced self-cleaning and robust centre blocks that ensure smooth running and generate low noise levels on hard surfaces.
For hauling combinable crops and grass silage, a trailer will be working on a firmer soil surface. While self-cleaning characteristics are perhaps not quite so essential, trailers in this situation nevertheless still require trailer tyres that spread the trailer’s weight across as much as possible of the field surface, helping to minimise compaction. This is particularly important where, for example, the grass is a long-term ley or pasture, and there will be no immediate opportunity to try and rectify any compaction. The rounded shoulders of Floatmax RT trailer tyres lessen the trailer tyre impact on the soil, while the steel belted carcase helps the trailer tyre resist ingress of puncture material such as sharp stones when hauling at speed on field tracks. On the road, meanwhile, the centre blocks of the tread keep the trailer running smoothly and minimise tyre noise, minimising driver fatigue.
If your trailer is most commonly used to haul a general commodity for farm maintenance, such as rubble to make and mend farm tracks, for example, lower-cost cross-ply trailer tyres may be right for the loads you move. As an example, the CEAT T422 Value Pro cross-ply/bias flotation tyre comes at a lower cost while still providing a larger volume and footprint to cushion heavy loads.
These are just a few examples of the right trailer tyres to suit the loads you may have to haul. There are others too, including a number of other cross-ply/bias flotation options. When next surfing the web for ‘trailer tyres near me’ or ‘trailer tyres for sale’ or looking through trailer tyres price lists, bear these points in mind to below to help you choose the right trailer tyres for the loads you haul.
Read the full blogWed, 9 Nov 2022 ceat-speciality:blogs-tags/all,ceat-speciality:blogs-tags/tyre-care

ceat-speciality:blogs-tags/all,ceat-speciality:blogs-tags/tyre-care
The Importance Of Maintaining Sprayer TyresThe sprayer tyres fitted to your self-propelled sprayer are the direct connection between your fields and the considerable investment you make in crop protection products – not to mention your sprayer itself. Ensuring they are afforded proper maintenance is therefore vital, particularly as it also has implications for safety and performance. Following these tips for sprayer tyre maintenance will help minimises wear and damage – and hold off that next internet research for ‘sprayer tyres for sale’ and ‘sprayer tyres near me’ and those hours spent trawling sprayer tyres prices lists for replacements.
Maintaining your sprayer tyres by regularly checking – and if necessary, correcting – their pressures is important in performance terms. If your sprayer’s tyres are operating below their recommended pressures, their footprint will be greater than intended and the sprayer’s transmission will come under strain attempting to attain and maintain the intended spraying speed than it would do if the sprayer tyres were operating at the correct pressures.
If your sprayer’s tyre pressures are not maintained properly and the machine’s performance is affected, then its accuracy will also be affected. Low tyre pressures, as detailed above, can affect forward speed, and this in turn can impact application rates. In addition, underinflated sprayer tyres will affect boom stability and spraying height, with serious impacts on application accuracy.
The effects on performance and accuracy of under-inflated sprayer tyres will have consequent effects for economy. Performance-wise, low sprayer tyre pressures will mean the sprayer will use more fuel, while the oil in the machine’s transmission – most often hydrostatic on a self-propelled sprayer – will degrade faster, potentially leading to quicker component wear. In addition, because the accuracy of application is affected, more product than intended may be applied, increasing application costs and potentially reducing crop output if the crop is affected detrimentally.
It may seem an obvious statement, but inspection of sprayer tyres’ carcases before work is an important element of reliability. By ensuring you are aware of any splits, cracks or bulges caused by stones, flints or foreign objects, they are less likely to cause a nasty surprise with a puncture in the middle of the field or at speed on the road. Cleaning sprayer tyres regularly of dirt and debris is therefore an important element of maintenance.
Maintaining sprayer tyres through regular checks to ensure they are operated at the correct pressures, are cleaned often and have their carcase, sidewalls, tread and bead examined for damage and dirt/foreign object ingress all contributes to ensuring the safety of tyres, wheels, the sprayer and its load. Good sprayer tyre maintenance minimises the risk of tyre damage and punctures, and the associated risk and cost.
As the sprayer tyres fitted to your self-propelled sprayer connect your machine and its loads to your soil and the crops it grows, maintaining them through regular examination and checking of pressures is critical. The advice above should help you extend the time until you next need to search for ‘sprayer tyres for sale’ and ‘sprayer tyres near me’ and invest hours scanning sprayer tyres prices lists for replacements.
Read the full blogWed, 2 Nov 2022 ceat-speciality:blogs-tags/all,ceat-speciality:blogs-tags/tyre-care

ceat-speciality:blogs-tags/all,ceat-speciality:blogs-tags/tyre-care
Five Reasons To Trust CEAT Specialty With Your Sprayer Tyre NeedsSelecting the best possible new tyres for a self-propelled sprayer is not a process to undertake lightly. The wrong choice can affect your soils, your crops and your business’s bottom line. If you’re beginning a search for ‘sprayer tyres for sale’ or ‘sprayer tyres near me’ or leafing through sprayer tyres’ price lists, some names will be very familiar. Whether you have used CEAT Specialty tyres before or are considering the brand for the first time, here are five reasons to trust CEAT Specialty with your sprayer tyre needs.
The origins of CEAT can be traced back to 1924, when the company was founded in Italy as Cavi Elettrici e Affini Torino. Growing quickly to become a successful manufacturer, in 1958 it attracted Indian investment, and in 1958 was incorporated in Mumbai as CEAT Tyres of India. In 1982 it was acquired by RPG Group, one of India’s leading business conglomerates, which today has a turnover of US$3bn. While a relatively recent entrant into the competitive European agricultural sector, CEAT Specialty, which has been producing agricultural tyres for many years, is fast becoming one of the industry’s most recognisable brands.
Relatively few agricultural tyre manufacturers have specialist product offerings beyond general tractor tyres. This is not the case with CEAT Specialty. In addition to its long-established lines of Torquemax and Farmax tractor tyres, as well as trailer and implement tyre products, CEAT Specialty has long invested cash into research and development and manufacturing for self-propelled sprayer tyres in particular. One illustration of this is the extent of the CEAT Specialty Spraymax range, with 14 sizes to suit 42in, 46in, 50in or 54in wheel rims, and section widths of 380mm or 480mm.
Among the characteristics of CEAT Specialty Spraymax VF sprayer tyres that have been developed from our comprehensive R&D programme is a tread pattern with a stepped lug design. This maximises grip, ensuring excellent traction particularly on sloping or hilly ground, with benefits for both output and safety. Rounded shoulders help minimise soil and crop damage, while steel belt incorporation is available with selected specifications for protection from punctures.
A sprayer is only earning money when it is at work in the field, so road travel time needs to be minimised safely. CEAT Specialty helps users ensure this by designing its Spraymax tyres with a high non-skid depth, which ensures good road traction and means they are durable over the long term, minimising cost of ownership. Road travel is also smoothed by a centre tie bar that helps negate the effect of that high pressures at which rowcrop sprayer tyres must operate.
The VF (very high flexion) carcase design of CEAT Specialty Spraymax sprayer tyres means they can be operated at 40% lower pressures than similarly-sized sprayer tyres of standard construction. By helping spread the sprayer load over a greater footprint, that has a significant bearing on minimising soil damage and tramline depth over a season.
Whether you are specifying sprayer tyres on a new sprayer or fitting new ones to an existing machine, you’ll likely soon be searching the web for ‘sprayer tyres for sale’ or ‘sprayer tyres near me’ or leafing through sprayer tyres’ price lists. Among the many manufacturer names, take a close look at the characteristics that will really make a difference too your business. CEAT Specialty Spraymax sprayer tyres offer plenty of them.
Read the full blogWed, 2 Nov 2022 ceat-speciality:blogs-tags/all,ceat-speciality:blogs-tags/tyre-care

ceat-speciality:blogs-tags/all,ceat-speciality:blogs-tags/tyre-care
Five Tips To Get The Most From Your Tractor TyresA new set of tractor tyres represents a considerable investment in your tractor, but choosing carefully and then operating your tractor and its tractor tyres with attention to detail should help mean that investment is soon returned in the form of good tractor performance and maximum tractor tyre life. So once you have invested time in searching for ‘tractor tyres for sale’ or ‘tractor tyres near me’ and scanning tractor tyres’ price lists, follow these tips to get the most from your tractor tyres.
Choose carefully in the first place
It is very difficult get the most from tractor tyres unsuited to the work they are being asked to do, and this means any list of tips of this nature begins with tractor tyre selection. Ensure that, when you choose a new set of tractor tyres, you take into account not only your budget, but also the type of work the tractor is asked to perform and the intensity of its workload. For example, simple and low-cost cross-ply/bias tractor tyres may work well for a tractor that works around a concrete dairy yard with a feeder and/or loader. You will get much better performance from a tractor that works mainly on field tasks if you fit radial tractor tyres.
Operate your tractor tyres at the correct pressures – check them daily
This point appears in every advice feature on tyres of any sort – and with good reason. With tractor tyres, there are not only the usual issues of vehicle safety – too low and the tyre can dismount from the rim; too high and steering and braking will be compromised. In addition, tractor tyres operated below recommended pressures will be subject to unwanted carcase flexing, potentially moving on the rim and damaging the tyre. They will also result in failure of full transfer of power from the wheel to the tractor tyre bead. Conversely, tractor tyres operated at above recommended pressures will wear faster on the road and compact the soil in the field. To get the most from your tractor tyres, operate them at the correct pressures and check them daily.
Examine your tractor tyres before work
Beyond checking the pressures, a quick but thorough examination of your tractor tyres before work will benefit both safety and performance. While the benefits for the former are obvious – early identification of any damage etc – there are also performance gains to be had by ensuring any issue is identified before it can become an issue in the middle of work, halting operations, putting jobs at the mercy of the weather and potentially holding up other tasks. To get the most from your tractor tyres, check their condition as well as their pressures.
Take care with your braking
With modern tractors operating at at least 40 or even as fast as 70km/hr, modern tractor tyres are subject to very different influences than tractor tyres operating on older tractors capable of only 30km/hr. Tractor tyre design has evolved to match these speeds, but the way the driver operates the tractor will have a big influence on getting the most from tractor tyres that are frequently operated on the road. Judging braking becomes much more important, to ensure that it takes place in plenty of time to avoid heavy speed reduction and consequent tractor tyre heat build-up and potential degradation of the tread.
Try to avoid potholes where possible
Tractor tyres are built tough, with companies such as CEAT Specialty investing millions in research, development, design and materials. However, it pays to avoid unnecessary exposure to risk where possible. Roads with poor surfaces and edges can damage tractor tyre treads in extreme situations, particularly if severe potholes are struck at speed. Read the road ahead carefully to protect your tractor tyres.
Following these five points will help you get the greatest return on your investment in new tractor tyres, through the best possible performance of your tractor and its tractor tyres. And all of this will maximise the time before you next have to think about searching for ‘tractor tyres for sale’ or ‘tractor tyres near me’ and scanning tractor tyres’ price lists.
Read the full blogWed, 19 Oct 2022 ceat-speciality:blogs-tags/all,ceat-speciality:blogs-tags/tyre-care

ceat-speciality:blogs-tags/all,ceat-speciality:blogs-tags/tyre-care
How To Maximise The Lifespan Of Your Tractor’s TyresWhether you are purchasing a new tractor, or investing in a new set of tractor tyres for an existing one, taking care to maximise the life of your tractor’s tyres will help you also get the most from your machine. As tractor tyres are the machine’s most significant wearing parts, by maximising their life you put off as long as possible the next replacement time and the need to read through tractor tyres’ price lists or search the web for ‘tractor tyres for sale’ or ‘tractor tyres near me’.
Make pressure checks a part of your daily service routine
One of the key ways in which tractor tyres can wear quickly – or incur carcase damage – is if they are operated at incorrect pressures. If they are too low – if they have not been inflated correctly or have lost pressure over time, for example – the side walls will flex more than intended by the design engineers, which may ultimately cause cracking that can lead to the integrity of the tractor tyre to be compromised. Tractor tyre pressures that have been set too high will also result in potential side wall damage as the excess air causes the side walls to bulge, but in addition this will also result in greater force imposed on the tractor tyre tread, particularly in the centre, resulting in faster abrasion, particularly at speed on the road.
Install and remove tractor ballast weights according to the task
Another of the primary causes of shortened tractor tyre lifespan is incorrect tractor ballasting for the task at hand. A tractor that has insufficient ballast for a task such as primary cultivations, particularly ploughing, will be subject to wheelslip, and on stony and/or abrasive soils this will quickly abrade the tractor tyres. Ensure, therefore, that your tractor is properly weighted for the work in hand, and that its wheelslip monitor is set correctly. It is just as essential, though, to ensure unrequired weight is removed for tasks where it is not required. Front-end and wheel weights left in place on tractors which switch from, for example, primary cultivations to road haulage, will have a detrimental impact on tyre forces, especially at speed and under braking. Ensure they are removed when not needed.
Consider how you drive – especially at speed on roads and hard surfaces
Tractors with faster road speed capability have revolutionised modern farming, slashing the non-productive time that’s necessary to get between fields and farms. However, faster speeds, and the need to slow from them for junctions and traffic, means far higher braking forces are imposed on modern tractor tyres than those of two or three decades ago. If, therefore, you want to get the maximum life from your tractor tyres, try to think about how you drive, particularly if your work involves a lot of busy main roads. Using the transmission as far as possible to slow the tractor when needing to slow for junctions will not only maximise tractor tyre life, but brake life too. And take care also when driving at speed on concrete farm tracks, which can be more abrasive than tarmac roads, with any potholes hit at speed also potentially more damaging to the tractor tyre carcase too.
Whether you are purchasing a new tractor, or investing in a new set of tractor tyres for an existing one, taking care to maximise the life of your tractor’s tyres will help you also get the most from your machine. As tractor tyres are the machine’s most significant wearing parts, by maximising their life you put off as long as possible the next replacement time and the need to read through tractor tyres’ price lists or search the web for ‘tractor tyres for sale’ or ‘tractor tyres near me’.
Read the full blogWed, 19 Oct 2022 ceat-speciality:blogs-tags/all,ceat-speciality:blogs-tags/tyre-care

ceat-speciality:blogs-tags/all,ceat-speciality:blogs-tags/tyre-care
The Importance Of Choosing The Right Tractor TyresTractor tyres can seem on the surface to be largely similar, doing a basic job of transferring engine power via the tractor’s transmission to the ground. But dig a little deeper and there is much more to the intricacies of individual tractor tyre types that makes each particularly appropriate to certain roles and situations. Before you next start searching for a new set of tractor tyres – maybe by typing ‘tractor tyres for sale’ or ‘tractor tyres near me’ into a search engine, or perusing tractor tyres price lists, consider these points to help you make the right choice of tractor tyre.
What’s right for your tractor
Firstly, it’s most important to determine the right size of tractor tyres for your tractor. This is top of any list, and unless this is properly determined, the next point on this list is largely irrelevant. The rim diameters of your tractor’s front and rear wheels will be the key governor of the size of tractor tyres with which it can be fitted. This is not just because of the fact it is obviously impossible to fit a tractor tyre with a small rim aperture onto a large rim, but also because your tractor will have been designed in such a way that its transmission gearing is designed to work with particular wheel rim/tractor tyre diameters. Ensure you understand what these are, or you could damage your tractor’s transmission.
What’s right for your work
Your tractor’s workload will be a significant factor in the right tyres for it. Does it spend much of its times working on concrete, perhaps in a dairy, pig or poultry unit, with little road travel or field work? Then cross-ply/bias tyres are likely to be the best option, particularly if working with a front loader. If your tractor spends much of its time in the field pulling draft implements, though, radial tractor tyres offer multiple advantages, including enhanced traction, reduced soil damage and greater ride comfort.
What’s right for your land type
If you have decided that cross-ply/bias tractor tyres are sufficient for your needs, CEAT Specialty Farmax R1 tyres are well-suited to tough land such as hill and mountain grassland, with a triple angle lug for enhanced traction and a high centre lug overlap and tie bar for improved stability. However, if your land type is more lowland arable or grassland, then radial tractor tyres such as the CEAT Torquemax and Farmax, with their greater carcase flexibility and enhanced soil/crop care tread design, will invariably be more suitable.
What’s right for your budget
There are many different makes and models of tractor tyre on the market. Some are long-established premium makers, others are newer name son the global scene. The right tractor tyres for your needs may not necessarily be the most expensive or the cheapest, and they may not come from a name you know well. Take time to investigate more about a brand you perhaps don’t know so well – their history, commitment to agriculture and product feature and quality may surprise you. If that brand is CEAT Specialty, contact us or your tractor tyre dealer and we will be happy to show you more.
Choosing the right tractor tyres is critical to the performance of your tractor, your farm’s use of fuel, and the production of your crops and livestock, as well as the care of your soils. Before your next searching for ‘tractor tyres for sale’ or ‘tractor tyres near me’ and wading through tractor tyres price lists, bear in mind the points above to help you make the best tractor tyre choice for your farm and situation.
Read the full blogTue, 18 Oct 2022 ceat-speciality:blogs-tags/all,ceat-speciality:blogs-tags/tyre-care

ceat-speciality:blogs-tags/all,ceat-speciality:blogs-tags/tyre-care
Four Factors To Consider To Help You Choose The Right Tractor TyresChoosing the right tractor tyres for your machine depends on multiple factors, but four in particular are especially important. Before searching for ‘tractor tyres for sale’ or ‘tractor tyres near me’, and looking through tractor tyres’ price lists, considering the four points below will help ensure the selection you make will provide your business with the best return.
Work type
Much of the decision-making process surrounding tractor tyre selection should be based on the type of work your tractor is expected to do. If your tractor spends much of its time on fieldwork, and travelling between fields, then radial tractor tyres will likely be the best option. Their greater carcase flexibility means they are kinder to the ground, minimising compaction, and better at absorbing shocks, maximising road comfort. In addition, some radial designs, such as CEAT Torquemax tractor tyres, are available not only in standard format, but also in increased flexion (IF) and very high flexion (VF) designs. With IF tractor tyres, you gain the ability to operate at 20% lower pressures for the same load, so minimising field compaction, or can carry 20% more load at the same pressure, allowing you to boost your productivity. And with VF tractor tyres those figures rise to 40% in each case.
However, there are cases where simpler cross-ply/bias tractor tyres may suffice. Their more rigid carcase makes them well-suited to the front axles of tractors working with front-end loaders, while they also suit applications where the tractor is working mostly on concrete and rarely on the road or in the field, such as operating a cattle diet feeder.
Work frequency
Some tractors are used for intensive but short periods during the year – at hedgecutting time, for example, or ploughing/primary cultivations. Others may work throughout the calendar, but on lighter and less intensive duties. These factors will govern the type of tractor tyres most suited to your tractor and its workload. Tractors used for more hours on field tasks may warrant investment in higher-specification radial tractor tyres of IF or VF specification. The right tractor tyres for less intensive work, though, may be standard radial tractor tyres – or even cross-ply/bias types.
Road travel
Interlinked with the two points above, considering the amount of road travel you do with your tractor will also help you choose the right tractor tyres. If you are doing very few road miles – perhaps just short distances on minor roads between livestock units – then cross-ply/bias tractor tyres may well suffice. Beyond their in-field advantages such as better grip, radial tractor tyres also provide a much more comfortable ride for the operator. And with IF/VF radial designs you gain lower pressure/softer ride advantages, or greater load-bearing ability.
Budget
Cross-ply/bias tractor tyres are cheaper to design and manufacture, and therefore cheaper to buy. If you are working to a budget and seeking tractor tyres that will be particularly price-competitive size for size, then cross-ply types may provide the answer. However, the benefits of radial design – better grip, better comfort, greater fuel efficiency – mean that return on investment can be more beneficial to your business than simple cost saving.
These four factors are not the only ones to consider when buying new tractor tyres, but they are among the most important. To make your ‘tractor tyres for sale’ or ‘tractor tyres near me’ searches more targeted, consider these before beginning your ‘tractor tyre shopping’ and searching tractor tyres price lists.
Read the full blogMon, 10 Oct 2022 ceat-speciality:blogs-tags/all,ceat-speciality:blogs-tags/tyre-care

ceat-speciality:blogs-tags/all,ceat-speciality:blogs-tags/tyre-care
Why You Must Check Your Trailer Tyres Before WorkWhether they have a high workload over a short period of time – such as grass, grain or root harvest – are fitted to trailers used throughout the year, or are called into action only occasionally, trailer tyres require regular checks, not only for safety reasons, but for performance and reliability ones too. Following these points should maximise the life of your trailer tyres and delay as long as possible the need to spend time in the office seek replacements by scanning trailer tyres’ price lists and searching for ‘trailer tyres for sale’ or ‘trailer tyres near me’.
Among the reasons why you should check your trailer tyres before beginning any task, safety is the obvious one that would hopefully head the list of any operator’s list of importance. There are, though, many others that will benefit the farming business, the operator and – if working on the highway – other road users.
Safety
This is perhaps the most obvious reason for checking your trailer tyres. Those not set at the manufacturer’s recommended pressures for the application and load risk becoming detached from the rim in operation. In the field this could mean a damaged, unrepairable trailer tyre and challenging conditions in which to replace it. On the road, it could mean something far worse, with the potential for a deflated trailer tyre to detach from the wheel, causing a serious hazard for other road users and potentially a road-damaging and out-of-control tractor/trailer combination for the operator to deal with. The same goes for checking the tightness of the nuts securing the wheel on which the trailer tyre is mounted.
Reliability
Before you set to work with a trailed or trailed implement, checking the trailer tyres for damage will help insure against potential downtime later. Checking for any problems – carcase damage or embedded foreign objects, for example – will mean they can be dealt with before work begins, and not delay it once they potentially become apparent during work.
Performance
While they are not tractive – except in the case of some specialist trailers with powered axles – and so do not have a direct impact on performance, trailer tyres and those fitted to trailed implements will affect the performance of the trailer/implement to which they are fitted. Those that are operated at the manufacturer-recommended pressures will enable the tractor that pulls the trailer/implement to operate at optimum fuel efficiency and road/field speed, and with the rise in fuel prices this has grown significantly in importance.
Field impact
Implement and trailer tyres which are incorrectly pressured, damaged or poorly-fitted will detrimentally affect the field surface they operate on, whether grassland, combinable crop ground or root crop land. Ensuring they are operated at the correct pressures minimises compaction, while checking for damage before each day’s operation will ensure soil-damaging field-traffic will not be required to repair or replace a trailer tyre in the field.
To delay as long as possible the next time you need to peruse trailer tyres’ price lists and trawl the internet for ‘trailer tyres for sale’ or ‘trailer tyres near me’, ensure your check over your trailer tyres daily before work, and remember the benefits for safety, reliability, performance and field impact – and your business’s costs – that some simple checks have the potential to bring.
Read the full blogMon, 3 Oct 2022 ceat-speciality:blogs-tags/all,ceat-speciality:blogs-tags/tyre-care

ceat-speciality:blogs-tags/all,ceat-speciality:blogs-tags/tyre-care
Why the cross-ply/radial decision is different for trailer tyresAlthough there are some exceptions for simple tractors and those that do mostly yard work rather than operating on the land or the road, radial tyres have largely replaced cross-ply or bias types on agricultural tractors and self-propelled machines, for reasons of comfort, compaction reduction and grip. However, when it comes to trailer tyres, the merits of the two design and manufacturing principles are more evenly matched. Before you next start browsing for ‘trailer tyres for sale’ or ‘trailer tyres near me’ or begin scrutinising trailer tyres’ price lists, bear the following points in mind.
When rubber compound tyres were first introduced over a century ago, they were of cross-ply/bias design, manufactured from side to side across the profile of the tyre. While very robust, the rigidity of this design was also one of its downsides. Radial tyres, introduced in 1946 and manufactured around the circumference of the tyre, overcome this issue with their more flexible sidewalls, but there is still a place for cross-ply tyres in many vehicle sectors, one of which is agricultural trailers.
The construction differences between tyres designed and manufactured using cross-ply/bias and radial techniques give them different attributes that means each type merits a place in the decision-making process when selecting new trailer tyres. Many of the attributes of each are relevant also to tractor tyres and those for other motive vehicles, but there are a number that make each type especially worthy of consideration when it comes to trailer tyres.
Like other radial tyre types, thanks to their more flexible sidewalls radial trailer tyres such as the CEAT Floatmax tyres produce an increased ground contact patch thanks to a greater tyre ‘bulge’ when inflated to the correct pressure. This means radial trailer tyres help to minimise compaction from the trailer in the field, and handle well on the road, cushioning shocks transferred through the trailer to the tractor when the trailer tyres encounter potholes, for example, enhancing trailer stability on rough roads.
The sidewall flexibility also helps to dissipate the heat that naturally builds up when a tyre is rotating at speed on the road, while the circumferential belted construction gives radial trailer tyres greater resistance against punctures caused by penetration of sharp stones and other objects.
However, when it comes to trailer tyres, not all applications would favour the automatic selection of radial types, and cross-ply/bias tyres such as the CEAT Flotation TX and Flotation Plus may be a favourable option in many cases. For example, because the sidewalls of cross-ply trailer tyres are more rigid than those of radial types, the risk of sidewall is reduced, a factor worth considering if your haulage work is on stony soils and rough tracks. On the same basis, cross-ply trailer tyres can help prevent too much sideways movement of the trailer on uneven ground. Then, of course, there is the cheaper manufacturing cost of cross-ply tyres. If price is a key consideration in your trailer tyre selection, this may influence your decision.
So there are a number of factors that mean the decision making process between radial and cross-ply/bias tyres when picking new trailer tyres is not the same as the one for selecting new tractor tyres. When you are next scanning trailer tyres’ price lists and searching the net for ‘trailer tyres near me’ and ‘trailer tyres for sale’, ensure you keep this in mind.
Read the full blogWed, 28 Sep 2022 ceat-speciality:blogs-tags/all,ceat-speciality:blogs-tags/tyre-care

ceat-speciality:blogs-tags/all,ceat-speciality:blogs-tags/tyre-care
Why You Should Never Buy Cheap Sprayer TyresWhen it comes to replacing sprayer tyres on a self-propelled machine, or specifying tyres on a new one, it may be tempting to minimise expenditure by choosing low-cost options, but cheap sprayer tyres can be a false economy. Next time you need new sprayer tyres, and begin searching sprayer tyres price lists or looking on the internet for ‘sprayer tyres for sale’ or sprayer tyres near me’, this is why you should steer clear of cheap sprayer tyres.
Poor quality
Cheaper tyres can suffer from a number of manufacturing quality issues when at work, including carcase cracking – with implications for air retention, integrity and safety – undesirable carcase flexing and even delamination of the tread. Investing a little more in good-quality sprayer tyres will help insure against such issues. Sound carcase quality not only helps assure machine stability, particularly on side-slopes, but also help ensure the sprayer boom and nozzles are cushioned against the forces imposed on the machine in such a situation, helping ensure even, accurate application by ensuring the boom is kept steady and the nozzles stay a consistent height from the crop.
Poor design
Cheaper sprayer tyres are likely to have had less money invested into their design principles, meaning that, while they may to the basics of bearing the weight of the machine to which they are fitted, and helping it to travel from A to B, they may do little else to help protect your soils, your crops, your operator and your bottom line. CEAT Specialty Spraymax VF sprayer tyres, specially designed for self-propelled sprayers, feature a centre tie bar that ensures excellent roadability at speed, and rounded shoulders that help minimise soil and crop damage, plus a high non-skid depth for high durability and maximum lifetime.
Lack of modern technology
Beyond the basics of sprayer tyre design itself, cheaper sprayer tyres are far less likely to incorporate the latest technological developments that can bring considerable benefits to your business. One example is very high flexion (VF) carcase design. This principle, part of the design of CEAT Specialty Spraymax VF sprayer tyres, helps the tyres carry 40% more load than a standard radial of the same size, boosting capacity and efficiency, or the same load at 40% lower pressure, minimising soil damage.
High wear rates
Like cheaper tyres of any sort, cheaper sprayer tyres are likely to wear faster than those which have been designed and manufactured with greater investment from the maker. This may be down to the rubber and chemical compounds used to manufacture the tyres, which may erode faster at speed on the road – when heat builds up in tyres – and when at work on stony and abrasive soils.
The next time you are specifying sprayer tyres for a new self-propelled sprayer, or looking for new sprayer tyres for an existing machine, bear these points in mind when weighing up the investment you are about to make in new sprayer tyres. They could save you considerable time and money and delay for as long as possible that next search through sprayer tyres price lists and those trawls of the internet for ‘sprayer tyres for sale’ and ‘sprayer tyres near me’.
you already own, think about how these principles apply to the sprayer tyres from which you are choosing. Looking through a sprayer tyres price list, or searching the web for ‘sprayer tyres for sale’ or ‘sprayer tyres near me’, will all be made simpler by bearing in mind the attributes of specific sprayer tyre designs.
Read the full blogMon, 26 Sep 2022 ceat-speciality:blogs-tags/all,ceat-speciality:blogs-tags/tyre-care

ceat-speciality:blogs-tags/all,ceat-speciality:blogs-tags/tyre-care
How To Maintain Your Sprayer Tyres Without Breaking the BankSprayer tyres can have a hard life, particularly as farm enterprises grow larger, requiring more sprayer travel time on the road, and as many machines are today required to apply liquid fertilisers as well as crop protection products. Even on smaller farms, though, good maintenance will ensure you get the maximum life from your sprayer tyres. Here are a few simple tips on maintaining your sprayer tyres that should maximise the time before you have to consider replacements and study sprayer tyres’ price lists or search the web for ‘sprayer tyres for sale’ or ‘sprayer tyres near me’.
Regular cleaning
If you farm or work on heavy soils, and particularly if you also have to spray when the land is not completely dry, picking up mud on your sprayer tyres is inevitable. Should your soils also be stony, this can not only potentially lead to dirt ingress around the tyre bead, but also to tyre damage such as splits, especially if those stones are sharp flints. Keeping sprayer tyres brushed clean of mud with aa stiff nylon brush each time you leave the field is a simple way to ensure that they are protected as far as possible from stone damage incurred by mud around the bead and flints being pressed into the rubber between the treads.
Regular checking
Maintenance doesn’t actually have to involve anything more complicated than checking. Casting an eye over the inner and outer sidewalls, the sprayer tyre treads and each area between each tread on a regular basis is the lowest possible cost method of ensuring your sprayer tyres are maintained properly. It will give you the best possible chance of spotting early any issues such as splits, cracks and embedded stones that could go on to cause problems unless addressed. Ensure that you also check the condition of the valve on each sprayer tyre, ensuring it is undamaged.
Regular pressure monitoring
The next cheapest method of maintaining your sprayer tyres after a physical check is a pressure check. There is no better way of maintaining your tyres than to ensure they are operating at the correct pressure, which will ensure the best possible performance and levels of safety, as well as the most efficient operation and the longest possible life. Always ensure the pressures are spot-on – adding an extra little bit of air will simply wear the tyres faster, make the ride harsher and cause greater soil compaction. Conversely, low sprayer tyre pressures will result in poor handling, tyre carcase damage and potential demounting of the sprayer tyre from the wheel rim.
Off-season maintenance
Once the spraying season is over, give your sprayer’s tyres and wheels a thorough pressure washing to remove all traces of soil and chemical, ensuring this takes place either in the field or in an area where the washing water is collected for dealing with. Ensure the insides of each wheel/sprayer tyre are washed as well as the outsides. If you have access to a covered concrete storage area and your sprayer will not be needed for a few months, consider jacking up the machine and placing it on axle stands to relieve the sprayer tyres of the machine’s weight. If this is not possible, try to start the machine and driver forwards or backwards a quarter turn of the wheels every so often to prevent formation of flat spots and keep the sprayer tyres in good shape.
None of these practices will cost very much, if anything at all. Taking care of your sprayer tyres in this way will ensure they are maintained in the best possible condition for as long as possible, meaning your next search for ‘sprayer tyres for sale’ or ‘sprayer tyres near me’, or the next time you have to study sprayer tyres’ price lists, will be as far down the line as possible.
Read the full blogTue, 20 Sep 2022 ceat-speciality:blogs-tags/all,ceat-speciality:blogs-tags/tyre-care

ceat-speciality:blogs-tags/all,ceat-speciality:blogs-tags/tyre-care
How To Find the Right Tractor Tyre For Your FarmJust as farms come in a variety of sizes and types, so do tractors to match their needs – and therefore so do the tractor tyres to fit those tractors. A whole host of factors – including whether your farming enterprise is large or small, predominantly arable or livestock-based, and how you use your tractor – will dictate the best tractor tyres for your machine. Before you sit down to search the internet for ‘tractor tyres for sale’ or ‘tractor tyres near me’, and begin studying tractor tyres’ price lists, the advice below could help you find the right tractor tyres for your farm.
Your tractor’s workload
For many modern farming needs, radial tractor tyres such as the CEAT Torquemax and most of the Farmax range have largely succeeded cross-ply/bias types. They offer multiple advantages, including enhanced grip, improved ride and greater durability. However, there are some applications where cross-ply/bias tractor tyres may better suit your farm’s needs. Firstly, they are cheaper to produce and buy, so if cost is a consideration that’s high-up on your list of priorities, then cross-ply tyres may be the right tyres for you, particularly if you carry out only a limited amount of road travel and primary cultivation work. If your tractor’s work is largely yard-based, working on concrete livestock yards with an implement such as loader, yard scraper or straw chopper, then cross-ply tractor tyres may actually be of benefit, particularly in the case of a loader, where their more rigid construction helps bear the load on the tractor’s front axle.
Your field/enterprise type
If your fields are largely down to grass, and your work does not take you far on the road, then you may wish to consider equipping your tractor with flotation tractor tyres rather than conventional types. This has the potential to significantly reduce compaction, and so protect the sward and maintain grass yields.
Conversely, if your farming is based on specialist bed- or row-grown crops, you may wish to consider equipping your tractor with rowcrop wheels and tractor tyres. These will minimise the footprint created by your tractor, but on the other hand will increased the ground pressure imposed over that smaller area.
However, for the majority of modern agricultural field tasks, radial tractor tyres such as CEAT Torquemax and Farmax types will offer the best blend of capability and cost-effectiveness. Radial construction brings with it the benefits of greater carcase flexibility, particularly in the sidewalls, leading to improved grip, fuel efficiency and comfort.
These key factors should help you determine the right type of tractor tyre for your tractor, its workload and your farm enterprises. By using this advice, and that of your tractor tyre dealer, you will be able to get the best return on the investment you make in new tractor tyres. And that will help prolong the period until you next find yourself browsing for ‘tractor tyres for sale’ or ‘tractor tyres near me’, and searching through tractor tyres’ price lists.
Read the full blogTue, 20 Sep 2022 ceat-speciality:blogs-tags/all,ceat-speciality:blogs-tags/tyre-care

ceat-speciality:blogs-tags/all,ceat-speciality:blogs-tags/tyre-care
Little Known Facts About Tractor Tyres – and Why They MatterBefore beginning a search for a new set of tractor tyres – often today begun by browsing the internet for ‘tractor tyres for sale’ or ‘tractor tyres near me’ before studying tractor tyres’ price lists – it’s worth reminding yourself about some of the basic facts behind tractor tyres. Not all of them are well-known, and while some are simply interesting, others matter a great deal.
Radial tyres possess many advantages over cross-ply/bias tyres – but the latter have their place
Radial tractor tyres are by far the most common type in modern agriculture, with relatively few of today’s agricultural tractors above 40hp equipped from new or later fitted with cross-ply/bias tractor tyres. Radial tractor tyres feature more flexible sidewalls that result in better grip, better traction, and enhanced road-holding, particularly when steering around bends at high speeds. In many cases, radial tractor tyres are also available with the option of upgrading to increased flexion (IF) or very high flexion (VF) specification, offering the ability to carry 20% (IF) or 40% (VF) more weight at the same pressure, or the same weight at 20% or 40% lower pressure than standard.
Less costly cross-ply tractor tyres, though, do retain some advantages. As an example, their more rigid construction makes them ideal for use on the front axles of tractors equipped with front-end loaders. And if your tractor spends little time on the road or performing primary tillage operations in the field, and most of it in a yard pulling a feeder or scraper, for example, cross-ply/bias tractor tyres may well suit your needs.
Tyres of the same construction must match across each axle
Tractor tyres must be replaced in pairs across axles, and cross-ply and radial tractor tyres must not be mixed on the same axle. The primary issues if different tyre types are mixed across an axle include the effects on handling and the tractor’s transmission and diff-lock of different levels of sidewall flexibility – cross-ply tyres have a much stiffer and less-forgiving carcase, particularly in the sidewalls, than radial tractor tyres.
Not everyone understands basic tyre markings
Like any type of tyre, tractor tyres are stamped with a series of numbers and letters which denote their size and specifications.
Most tractor tyres found today on the European market are stamped in accordance with ETRTO (European Tyre and Rim Technical Organisation) standards. As an example, on a CEAT Farmax HPT tractor tyre marked 710/75 R42, 710 is the section width in mm, 75 is the percentage of the 710mm that denotes the profile of the tyre sidewall (946.6mm), and 42 denotes the rim diameter in inches.
What comes after the leading three numbers matters as well
Following these numbers will be the load rating, which denotes the maximum load the tyre can carry at a given speed. The load index covers a range from 100 to 200, and each number/letter matches an exact load that corresponds to the load tables available from the tractor tyre’s manufacturer.
Next is the speed index. This is linked to the load index, and shows the maximum speed at which the tractor tyre can be operated at full load. The index covers the letters A2, which translates as 10km/hr, up to G (90 km/h).
Then comes the production date. This begins with the week of the year (1-52) and the last two numbers indicating the year, an example being 2322 (23rd week of 2022).
Some tractor tyres will also be marked ‘Tubeless’, indicating that fitment of a tube is not necessary.
How you protect and store your tractor will help protect its tyres
While early tyres were made largely of rubber, the compounds that make up modern tyres blend many more ingredients, designed to improve fuel efficiency, minimise wear, ensure flexibility and maximise grip and longevity. Then, of course, there are the steel beads designed to mesh the tractor tyre rim on each side of the tractor tyre with the wheel rim, and the steel belting that goes into manufacturing premium tractor tyres such as the CEAT Torquemax. To ensure these components are maintained in the best possible condition, tractors due to be stored for extended periods (such as high-horsepower models in the winter) should have their tyres cleaned thoroughly before storage to remove stones, chemical residues etc that may affect the rubber and the carcase, and then be moved regularly to prevent tyre deformation/flat-spotting. Alternatively, the tractor should be jacked up and then seated on axle stands. Tyres on tractors intended for long-term storage should also not be exposed to heat, humidity or excessively strong direct sunlight, or chemicals such as solvents, which can affect the composition of the rubber.
Like others, worn tractor tyres must be recycled – and the cost is included in the tyre price
The cost of tyre collection for recycling is now often factored into the cost of new tractor tyres purchased from and fitted by a tractor tyre dealer. Tyre manufacturers and dealers have developed a process to ensure tyres are recycled efficiently and safely, and you should factor in the small charge that is included for recycling old tractor tyres when your dealer replaces them with new ones.
These facts about tractor tyres aren’t always given the attention they deserve. Before beginning browsing for ‘tractor tyres for sale’ or ‘tractor tyres near me’ and studying tractor tyres’ price lists, take time to remind yourself about some of them – they could help you make the best possible decision next time you need to purchase a new set of tractor tyres.
Read the full blogTue, 13 Sep 2022 ceat-speciality:blogs-tags/all,ceat-speciality:blogs-tags/tyre-care

ceat-speciality:blogs-tags/all,ceat-speciality:blogs-tags/tyre-care
What is the life cycle of a tractor tyre?Before you next begin an internet search for ‘tractor tyres for sale’ or ‘tractor tyres near me’, or scrutinising tractor tyres’ price lists, it’s worth assessing how the performance of tractor tyres can change throughout their life cycle – and how particular design attributes can help tractor tyres to perform for you as efficiently as possible for as long as possible.
Tractor tyres featuring carefully-engineered design characteristics that help them to provide fuel-efficient grip off the road and good handling and road-holding on it will provide the link between the investment you make in your machine and the investment you make in your soil, crops and livestock. After all, no matter how simple or complex your tractor, its power and features are worthless if it cannot put that power and those capabilities effectively and efficiently to the ground. The abilities of any tractor tyre change over the course of its life cycle, but well-designed tractor tyres will have capabilities, efficacy and efficiency that is almost as good when they have 10-20% of their tread depth remaining as they did when they were new. The right tractor tyres with well-designed features can help your farming or agricultural contracting business to get the most from your tractor investment over the entire life cycle of the tractor tyre.
As an example, CEAT Torquemax radials, the flagship tractor tyres in the CEAT Specialty range, suited to high power tractors, features a lug design that provides constant and smooth transfer of torque from the tractor to the ground when pulling hard on high torque operations in the field, where a lower angle at the tractor tyre shoulder provides superior traction. At the same time, the rounded shoulders of the tractor tyres’ tread ensure lesser damage to soil and crop. Meanwhile, the rounded shoulders ensure lesser damage to both the soil and the crop growing in it. The tilted lug tip minimises vibration and associated noise at speed on the road, while a higher angle and lug overlap at the centre of the tread provides excellent roadability. A wider tread and larger inner volume reduce soil compaction.
But one of the key attributes that governs and prolongs the life cycle of a well-designed tractor tyre is its tread depth. CEAT Torquemax tractor tyres are designed with an R1-W tread depth for maximum longevity. While R-1 is the common North American standard for agricultural tractor tyres, translating into a tread depth of 32-45mm depending on tyre size, the R1-W rating is more commonly found in Europe. Such tractor tyres – the CEAT Torquemax, for example – feature tread that is approximately 25% deeper than that of an R-1 tractor tyre. This significantly extends the life cycle of the tyre, and helps boost performance later in the cycle. The longer you can dela that five-ten per cent tread left phase, where worn tyres will mean reduced tractor performance in situations demanding high traction, the more productive, efficient and safe your tractor operation will be.
So to maximise the length of your tractor tyre’s life cycle, it pays to do your research when next browsing for ‘tractor tyres for sale’ or ‘tractor tyres near me’, or searching tractor tyres’ price lists. Not all tractor tyres are designed equal, and some may offer features that ensure their performance is as good towards the end of their life cycle as it was at the beginning.
Read the full blogWed, 7 Sep 2022 ceat-speciality:blogs-tags/all,ceat-speciality:blogs-tags/tyre-care

ceat-speciality:blogs-tags/all,ceat-speciality:blogs-tags/tyre-care
How Can Radial Trailer Tyres Improve Load Capacity?The days of slowly hauling heavy loads from field to farm are long gone, with modern farming requiring trailers and associated tyre equipment that can keep pace with the capacity – in terms of both speed and power – of today’s tractors. When you are next searching trailer tyre price lists and looking for ‘trailer tyres for sale’ or ‘trailer tyres near me’, consider the benefits modern radial trailer tyre design can bring to helping you get the maximum from your trailer’s capabilities.
From their inception, pneumatic tyres for all types of vehicle were designed and manufactured on a cross-ply or bias format, with interlocking cords layered across each other at a 45-degree angle, as the basis for the tyre’s outer rubber carcase. This design gives the tyre high sidewall rigidity which, in turn, ensures high strength, but the downside is that the carcase is highly inflexible. Although this characteristic helps protect the tyre sidewalls against damage, it also means a firm ride and an inflexible footprint.
Because radial tyres are designed with their base cords layered around the circumference of the tyre carcase, they possess more flexible sidewalls. This means that, compared with a cross-ply tyre operating at the same pressure, the tyre footprint is wider and longer. As a result, the load of the machine to which the tyres are fitted is more widely distributed. For an agricultural trailer, with tyres of a relatively small diameter, this is particularly important. Your tractor may be equipped with modern radial tyres offering a broad, long footprint, but the benefits of this to the soil of the fields on which you may be working is lost if the trailer it is hauling behind it is fitted with inflexible cross-ply trailer tyres with a small contact patch and a resulting high ground press imposition that compacts your soil.
For the same pressure level, radial tyres offer greater load capacities than cross-ply/bias tyres because of these design attributes. With trailer tyres, this means you can maximise the load capacity of your trailer while spreading the load over the maximum possible ground contact area, to ensure the minimum possible soil compaction and crop damage.
Radial trailer tyres may cost a little more than cross-ply trailer tyres of the same size, but if you study the manufacturer’s design specifications, they may also offer a number of other advantages. For example, the CEAT Specialty Floatmax RT design incorporates a flatter crown width that helps further to deliver a larger footprint and lower compaction. The pattern of interconnected grooves aids self-cleaning to minimise carriage of mud onto the road, where robust centre blocks reduce road noise and ensure smooth running. In the field, meanwhile, the rounded shoulders help minimise soil and crop damage, while steel belted construction minimises puncture risk.
For loose soil surfaces such as those found during root crop harvest, Floatmax FT radial trailer tyres are a further option. These blend radial design with directional lugs that aid traction, while a wider and flatter crown maximises flotation, and a robust centre block enhances ride on the road.
With radial trailer tyres you can therefore spread the load of your trailer across a greater contact area, helping maximise load capacity but without compromising on compaction in the field. When next searching trailer tyre price lists and looking for ‘trailer tyres for sale’ or ‘trailer tyres near me’, investing a little extra in radial trailer tyres can clearly bring benefits to your business by helping you get the maximum from your trailer’s capabilities.
Read the full blogSat, 3 Sep 2022 ceat-speciality:blogs-tags/all,ceat-speciality:blogs-tags/tyre-care

ceat-speciality:blogs-tags/all,ceat-speciality:blogs-tags/tyre-care
Why Is It Important To Ensure Your Tractor Is Fitted With The Correct Size Of Tractor Tyres?Tractor tyres provide the connection that enables a machine’s abilities – its power and precision and technical features – to be put to the ground, where the tractor’s work is to be done, turning fuel into traction to aid the production of food, fuel and more in the most economic way possible. Choose the wrong size tractor tyres for your machine, though, and you will fail to get the most out of it. So next time you need new tractor tyres, before you begin looking through tractor tyres price lists, or searching online for ‘tractor tyres for sale’ or ‘tractor tyres near me’, bear in mind the advice below.
Transmission damage
If the tractor tyres fitted to your machine are not of a size approved by your tractor’s manufacturer, they may not match its gearing. Larger or smaller tractor tyres than the tractor was designed to operate with – the minimum and maximum speeds at which it is intended to work in each gear. This can occur if the tractor tyres are either too small or too large in diameter, regardless of whether they fit the wheel rim diameter.
Correct ratio of front to rear tractor tyre size
Not only is it important to ensure the tractor tyres you fit are compatible with the rims on each axle, and with the tractor manufacturer’s specifications, but you should also ensure that the front/rear tractor tyre size combination is approved by the tractor manufacturer. On a four-wheel drive tractor, a front tractor tyre size that isn’t matched in proportion to the size of tractor tyres used on the rear axle can lead to wind-up of the transmission when 4wd is engaged, potentially causing serious internal damage. Consult your tractor’s operator’s manual or your dealer to ensure you understand the possible front/rear tyre size combinations, should you choose to change them.
Tractor performance
The correct/ideal tractor tyre sizes for your tractor will obviously have a significant impact on its performance. The best possible sizes, formats and combinations for the tractor and its primary work tasks will help to minimise wheelslip (so saving fuel), maximise pulling power (with benefits for work rates, daily output and timeliness of operations) and ultimately reduce operating costs.
Rim size and tyre profile matter – width not so much
Rim diameter, the third (R) figure in a tyre’s sizing code, is the first figure that’s critical in tractor tyre selection, as any new tractor tyres must fit onto the existing wheels. The second figure – the tyre’s profile height as a percentage of the width – is also important, as tyres with a larger profile than those originally fitted – perhaps being considered to put a longer footprint and more tractive power on the ground – may not fit under mudguards. Where there is often scope for greater flexibility is in tractor tyre section width. A tyre with a wider footprint may help you get more power on the ground – although the overall width of the tractor should still be considered.
Next time you need new tractor tyres, take these points into consideration before making your decision. They could help save a lot of that precious time spent searching online for ‘tractor tyres for sale’ or ‘tractor tyres near me’, or studying tractor tyres price lists.
Read the full blogFri, 12 Aug 2022 ceat-speciality:blogs-tags/all,ceat-speciality:blogs-tags/tyre-care

ceat-speciality:blogs-tags/all,ceat-speciality:blogs-tags/tyre-care
Seven Key Reasons To Remember The Importance of Well-Designed Tractor TyresModern tractors have multiple features which enhance their performance, efficiency and ability. Technology from advanced CVT transmissions to comprehensive electronics systems means their capabilities are significantly greater than tractor ranges of just a couple of decades ago. None of their potentials can be realised, though, without well-designed, high-quality tractor tyres to put their power to the ground. A tractor without tyres is incapable of pretty much anything, so good tractor tyre choice is critical to achieving the best possible return from your investment. Bear this in mind next time you settle down to leaf through tractor tyre price lists, or look online for ‘tractor tyres for sale’ or ‘tractor tyres near me’.
1. Only well-designed tractor tyres can make the most of the engine capabilities of your tractor in the field. As an example, CEAT Specialty Torquemax tyres feature a tread pattern with a lower angle at the shoulder, providing superior traction.
2. A thought-through design also minimises damage to soil and crops. Rounded shoulders on the CEAT Specialty Torquemax provide exactly that, ensuring your most important assets are protected.
3. A wider tread and larger inner volume reduce soil compaction. CEAT Torquemax tractor tyres incorporate this design element to ensure that the protection of your most important asset is not compromised by the tractor tyres’ tractive abilities.
4. High tread depth ensures good tractor tyre life. The R1-W tread depth of CEAT Torquemax tractor tyres ensures maximum longevity of the tractor tyres even in highly-demanding applications, such as high-traction draft work in tough, dry soils.
5. Good tractor tyres are more likely provide a trouble-free long life. CEAT Farmax HPT tractor tyres incorporate a high denier textile casing, which is combined with superior quality tread and sidewall rubber compound to minimise the chances of tractor tyre damage.
6. High-quality highly reinforced bead construction with a higher bead-to-bead distance makes it easy to carry a higher load. This is a particular characteristic of CEAT Farmax HPT tyres and one which also enables easy fitment.
7. Carefully-designed lug patterns make the most of the capabilities of modern high-power, high-speed tractors. CEAT Farmax HPT tractor tyres incorporate lug patterns specially designed with characteristic base grooves, which enhance the tractor tyre’s strength. They also feature a tilted lug tip and an increased lug width, a combination that reduces vibration and ensures a longer service life for the tractor tyre. A lower lug angle at the shoulder provides better traction, and rounded shoulders ensure lesser soil disturbance. A wider tread width also helps with lower soil compaction and characterised mud breakers promise great self-cleaning ability. High volume also ensures high load capability and excellent ride comfort.
To extract the full potential of modern tractors and their advanced features, well-designed, high-quality tractor tyres are essential. Take into account these points next time you’re searching tractor tyre price lists or browsing for ‘tractor tyres for sale’ or ‘tractor tyres near me’. They should help define your tractor tyre choice.
Read the full blogFri, 12 Aug 2022 ceat-speciality:blogs-tags/all,ceat-speciality:blogs-tags/tyre-care

ceat-speciality:blogs-tags/all,ceat-speciality:blogs-tags/tyre-care
How to choose the best sprayer tyres for your needsSelecting new sprayer tyres for a self-propelled machine is often not a simple task, with a multitude of makes and types on the market offering different design features. Examining the characteristics of those differences, though, can help point you in the direction of sprayer tyres that will help boost your business’s bottom line. That should ease the path through your web search for ‘sprayer tyres for sale’ or ‘sprayer tyres near me’, and make scanning sprayer tyres price lists that bit simpler.
If you think about the value of the products they carry, and the environmental responsibility of keeping them safe, plus the need to protect both your crops and your soils, the importance of the sprayer tyres that connect your self-propelled sprayer with the soil cannot be underestimated. For all of the abilities of a modern sprayer, and of the crop protection and nutrition liquids it carries and applies, none can be put into practice without the sprayer tyres that provide the link between product, machine and land. Selecting the best sprayer tyres for your needs is therefore a particularly important task when you sit down to search the internet for ‘sprayer tyres for sale’ or ‘sprayer tyres near me’. So how should you select the right sprayer tyres for your workload and tasks?
Different designs, different ground pressures
For larger farms, sprayer capacity and covering large areas when the weather is good is often the priority. However, others may prioritise the minimising of soil and crop damage that is inevitable to a certain extent when passing through a crop with a self-propelled sprayer. With well-chosen sprayer tyres, it is possible to benefit in both ways.
Very high flexion tyres such as the CEAT Spraymax VF can carry the same load at 40% lower pressures than standard tyres of the same size, widening and lengthening the tyre footprint. This spreads the sprayer’s weight over a greater contact patch, and therefore reduces ground pressure, helping minimise soil compaction. In turn, this aids plant growth through better root development, and cuts the fuel and steel resources required to rectify any compaction before the next crop.
Greater load-bearing capability
A further benefit of very high flexion (VF) tyre carcase technology particularly beneficial in improving the performance of your sprayer is their greater load-bearing capability. CEAT Spraymax VF sprayer tyres incorporate sidewalls that are strong yet flexible in a way which means they can bear 40% more load than a comparable standard radial of the same size operating at the same pressure. For farmers and contractors seeking greater efficiencies by upgrading to a sprayer with greater tank capacity, hence cutting the number of times a day they need to refills, such VF sprayer tyres help boost productivity by minimising non-spraying time.
Does tread design make a difference?
Farmers and contractors who work on hilly or steep land should take particular note of tread characteristics designed to promote maximum grip and self-cleaning. The stepped lug in the tread of Spraymax VF sprayer tyres format is designed to bite into the soil surface and give secure traction in all conditions and soils, regardless of land gradient. Spraymax VF sprayer tyres also incorporate rounded shoulders that minimise crop damage.
What about travelling between fields?
With farms growing larger, many self-propelled sprayers spend an increasing amount of time on the road between fields and farms, making on-road characteristics almost as important as in-field ones. A centre tie bar on CEAT Spraymax VF sprayer tyres is designed to ensure lumps and bumps on the road are smoothed out, so full use can be made of maximum speeds. A high non-skid depth, meanwhile, ensures durability and maximises sprayer tyre life.
CEAT Spraymax VF sprayer tyres can be specified in sizes from VF-380/90 R 46 to VF-480/80 R 50 – but cdhoosing the right sprayer tyre is about much more than the correct size. Think about these points when next searching for ‘sprayer tyres for sale’ or ‘sprayer tyres near me’, or scanning a sprayer tyres price list, and they will help you make the best choice of sprayer tyres to suit your workload.
Read the full blogMon, 25 Jul 2022 ceat-speciality:blogs-tags/all,ceat-speciality:blogs-tags/tyre-care

ceat-speciality:blogs-tags/all,ceat-speciality:blogs-tags/tyre-care
How to get the best results from your tractor tyresA new set of tractor tyres represents a considerable investment – probably one of the largest you will make in your tractor over its lifetime. To get the most out of your machine and the fuel you put into it – which itself has risen considerably in price in recent months – there are a few things you can do to get the best results from your tractor tyres. And, of course, getting the most from them will mean you can hold off as long as possible from having to peruse tractor tyre price lists and search the web for ‘tractor tyres for sale’ and ‘tractor tyres near me’.
To get the best performance from your tractor tyres, the first consideration – as with so many areas of tractor tyre upkeep, including safety and longevity – should be the pressures at which they are operated. Transfer of the tractor’s power to the ground will be inefficient if tractor tyres are run above or below their recommended pressure, affecting not only safety but also performance and efficacy, as well as fuel use.
Pressures
Tractor tyres operated at below their recommended pressures will not effectively transfer engine power to the ground, due to greater sidewall flexing than the tyres are designed to provide at their correct pressures. In turn, this affects the point at which the tyre tread resistance moves against the ground. The result? Wasted fuel and a drop in tractor tyre efficacy.
On the other hand, tractor tyres operated at pressures above the maximum recommended by the manufacturer will also produce less than optimal performance, because as they tractor tyre carcase expands with greater than the recommended amount of air, the amount of tread in contact with the field (or other) surface will shrink. On the road, you will also find that braking performance will be reduced due to the reduced tread-to-tarmac ground contact, causing potential issues for the brakes themselves, the tractor tyres and potentially the safety of the operator and other road users.
Ground conditions
Modern tractor tyres are engineered to cope with a wide range of conditions, gripping the ground and self-cleaning regardless of the soil type and moisture level. However, the best results when working with any type of tractor tyre – and any type of implement operated by the tractor – tend to come when the soils on which the tractor is working are in sound condition. Working on soils that are very wet runs the risk of wheelslip, wasting fuel and smearing the ground, causing soil structure damage that can have lasting effects. Conversely, while very dry and hard soil conditions are not in themselves detrimental to tractor and tractor tyre performance, the best results from tractor tyres tend to be achieved in circumstances where there is sufficient moisture in the soil surface that the ground moves slightly against the tractor tyres when the tractor passes over/through its upper profile, ensuring a level of soil resistance that provides sound transfer of power from the engine through the transmission to the ground via the tractor tyres.
Regular checks
Ensure you make a through check of the condition of your tractor’s tyres on a regular basis. Beyond the aforementioned pressure checks, that means examining the tractor tyre carcases around their circumference and on each sidewall for cracks and splits, removing any foreign objects that have embedded in the surface of the rubber before they can do serious damage. This will ensure they give the best results and performance over the long term, and do not become compromised by sustaining serious permanent damage.
Given the serious investment that is a new set of tractor tyres, taking good care of those tractor tyres represents the best way to get the best performance from them, and maximise the return on your tractor tyre investment, as well as the diesel you put into your machine. Follow these few things you can do to get the best results from your tractor tyres will help hold off as long as possible from having to peruse tractor tyre price lists and search the web for ‘tractor tyres for sale’ and ‘tractor tyres near me’.
Read the full blogTue, 19 Jul 2022 ceat-speciality:blogs-tags/all,ceat-speciality:blogs-tags/tyre-care

ceat-speciality:blogs-tags/all,ceat-speciality:blogs-tags/tyre-care
Learn more about the rising power in tractor tyresBefore you re-equip your tractor with new tractor tyres, specify the tractor tyres on a new model, or replace the tyres on any other farm machines and implements, it can pay to do a little research on the ever-changing world of names, brands and backgrounds in the tractor tyre business. A search for ‘tractor tyres for sale’ or ‘tractor tyres near me’, or a trawl through tractor tyres’ price lists, will yield a multitude of results, so equipping yourself with some knowledge about the names rising to the forefront of the sector will help make your decision easier.
CEAT Specialty may be a relatively recent entrant to the European tractor tyre business, but it has a long history in the sector globally, with a track record that should assure anyone considering its tractor tyres for the first time that this is a brand with the experience to match any other in the segment.
CEAT was established by Virginio Bruni Tedeschi in Turin, Italy, almost a century ago, in 1924. He named his firm Cavi Elettrici e Affini Torino, which translates as Electrical Cables and Allied Products of Turin. Having grown into a successful manufacturing business, the company’s products attracted the attention of Indian investment, and on 10 March 1958 it was incorporated in Mumbai as CEAT Tyres of India.
During the following decades the business’s manufacturing and R&D footprint in India was expanded significantly, and in 1982 it was acquired by RPG Group, one of the country’s leading business conglomerates, which today has a turnover of US$3bn. Mumbai-headquartered RPG is the parent of over 15 leading companies, with a strong presence across core business sectors including not only tyres, but also infrastructure, IT and specialty products. RPG was established in 1979, and today is one of India’s fastest growing business groups.
Today, CEAT is one of India’s leading tyre manufacturers, with a global footprint spanning more than 120 countries. CEAT produces over 15 million tyres a year, for vehicles including cars, motorcycles, trucks, buses, light commercials, earthmovers and forklifts, as well as tractors, sprayers, trailers and other farm machines and implements. In 2016 it entered the European car tyre market, and shortly afterwards also established in Europe the CEAT Specialty product line, including tractor tyres and others for agricultural use.
The company’s credentials for product quality are illustrated by awards such as the prestigious Deming Prize, of which CEAT was the first tyre company recipient in the world outside of Japan. One of the world’s oldest and most respected quality awards, the Deming Prize is awarded to businesses that achieve transformation through the business practice of Total Quality Management.
CEAT Specialty tyres are made at a state-of-the-art radial plant in Ambernath, Mumbai, which incorporates advanced manufacturing equipment and is staffed by a highly-experienced team of tractor tyre professionals. It incorporates a dedicated R&D centre to develop the next generation of tractor tyres and those for other agricultural machines. CEAT Specialty products include a wide range of premium radial and standard cross-ply/bias tractor tyres, including the Torquemax flagship radial and the Farmax ranges, plus Spraymax rowcrop tyres and Floatmax flotation tyres, and Loadpro and Liftpro units for forklifts and telescopic handlers.
The high regard in which the company’s tractor tyres are held by global tractor manufacturers is illustrated by the fact CEAT Specialty is an original equipment supplier to names including CNH Industrial with its New Holland, Case IH and Steyr brands, AGCO’s Massey Ferguson, Valtra and Fendt businesses, John Deere and JCB. Beyond agriculture, CEAT Specialty is also active in the construction equipment tyre market, supplying OEMs including Caterpillar and Wirtgen Group.
With credentials that are clearly well-qualified in tyres, and a tractor tyre line that encompasses all sizes, standards and applications, CEAT Specialty is clearly a name that, although a relatively recent entrant into the European tractor tyre market, is one that can be trusted to provide the very best in quality and design. In an ever-changing world of names, brands and backgrounds in the tractor tyre business, we hope you are now a little wiser on exactly why CEAT Specialty can be considered among the leading brands in tractor tyres. Next time you need new tractor tyres and have to make that internet search for ‘tractor tyres for sale’ or ‘tractor tyres near me’, or trawl through tractor tyres’ price lists, that should provide a strong level of reassurance that CEAT Specialty is a name you can trust as one of the leading brands in tractor tyres.
Read the full blogWed, 13 Jul 2022 ceat-speciality:blogs-tags/all,ceat-speciality:blogs-tags/tyre-care

ceat-speciality:blogs-tags/all,ceat-speciality:blogs-tags/tyre-care
Five ways to make sure your tractor tyres are in top conditionWith the busiest time of the year now in full swing for many farms, as harvest begins on combinable crop units, root lifting is underway or around the corner depending on crop type, and many livestock units are making hay or silage, it’s never more important ensure your tractor tyres are kept in top condition. No-one wants to spend money unnecessarily, so a few minutes spent looking after your tractor tyres can delay as long as possible that investment time when you next find yourself having to trawl through tractor tyres’ price lists or make those internet searches for ‘tractor tyres for sale’ or ‘tractor tyres near me’.
If fitting tractor tyres yourself, ensure the bead is seated properly
Although it’s not for every buyer, many farms are prepared to fit their own new tractor tyres. If you choose to do this, you must follow all of the correct installation procedures, ensuring particularly that the bed is seated correctly during the tractor tyre inflation process. If this is not the case, the tractor tyres may quickly lose condition through excessive torsion on the sidewalls as they move on the rim. Ensure you use a safety cage and inflate slowly and carefully.
Check pressures before beginning work each day
The correct tractor tyre operating pressures are arguably the most critical factor in keeping your tractor tyres in top condition. Under-inflated tractor tyres will not only be less capable of transferring the tractor’s power to the ground efficiently, but they will also be subject to potential slippage on the wheel rims and sidewall cracking as the sidewalls take more of the tractor’s weight than they are designed to do. Ensure, therefore, that part of your daily servicing regime, beyond checking tractor service details such as oil levels and the radiator, is a check of all four tractor tyre pressures. Even if they are just a little underinflated, invest the small amount of time it takes to top them up. This way you can be assured that their carcases be maintained in top condition through the supported and preservation provided by the amount of air the manufacturer intended.
Clean you tractor tyres regularly when working in muddy conditions
Few need reminding that farms which grow winter-harvested crops such as sugar beet often have to work in less-than-ideal soil conditions, with mud and stones potentially building up between the cleats of the tractor tyre tread. Well-designed tractor tyres are manufactured with a tread and carcase design that gives them an element of self-cleaning ability, but in wet heavy clay soils even this may be challenged. Where possible, if you are having to work in wet conditions on heavy soils, keep an eye on the treads for soil/mud build-up, particularly if that soil also has a high stone/flint content which could pose a puncture risk if sharp stones a pressed into the carcase rubber.
Use your transmission more than your brakes to slow your tractor at speed on the road
Excessive and/or heavy braking on tarmac or concrete can significantly affect the condition of your tractor tyres ’ tread and quickly cause their condition to deteriorate. Where possible, use the tractor’s transmission to progressively reduce speed when you are nearing a junction. This applies whether you have no load or pulling a fully-weighted trailer or implement.
Keep away from potholes and kerbs where possible
Modern tractors with suspended front axles and cabs are capable of high speeds without affecting driver comfort, but on rough roads this does increase the risk of tractor tyre damage. The higher the impact speed with a harmful object, the more likely damage will occur.
Take these five points on board each day when operating your tractor, and your tractor tyres should remain in top condition for as long as possible, delaying that next time you need to search for ‘tractor tyres for sale’ or ‘tractor tyres near me’, or study tractor tyres’ price lists.
Read the full blogWed, 13 Jul 2022 ceat-speciality:blogs-tags/all,ceat-speciality:blogs-tags/tyre-care

ceat-speciality:blogs-tags/all,ceat-speciality:blogs-tags/tyre-care
The importance of the right tractor tyres for your machine and its workFrom the simplest machines to the most sophisticated, modern tractors possess many features and design elements that make them capable of bringing high levels of efficiency to agricultural, municipal and forestry tasks, ranging from the engine to the transmission and beyond. However, even the most advanced machine is only as good as its ability to transfer engine power via the transmission to the ground, and for this it depends completely upon the tractor tyres with which it is fitted. When replacing your tractor’s tyres, considering the best option for your machine and its work is important preparation ahead of your search for ‘tractor tyres for sale’ and ‘tractor tyres near me’ on the internet, and should come before studying tractor tyres price lists.
What are your tractor’s primary tasks?
The key factor on which to base your choice of tractor tyres should be the primary type of work your tractor is expected to do. If its workload rarely takes it onto the fields and is largely yard-based and low-speed in nature – pulling and operating a cattle diet feeder, for example, or operating a straw chopper on a pig or poultry unit – then characteristics such as increased or very high flexion sidewalls are unlikely to be advantageous. Indeed, a lower-cost cross-ply/bias carcase design is likely to be sufficient for the workload, as opposed to the higher-cost radial type. CEAT Farmax R1 bias tractor tyres, for example, feature a reinforced carcase that provides maximise service life and enhanced stability, aided by high centre-lug overlaps and a tie bar. But for those jobs that do require high levels of traction, such as operating a loader around a silage bale stack on muddy ground through winter, they are still capable of good traction thanks to triple-angle lugs that also aid smooth travel when travelling on tracks and roads.
However, for tractors whose workload is largely field-based, and can also take them on the road for considerable distances between fields, then radial tractor tyres will be a better option. Manufactured in bands around the tyre’s circumference, their design is stronger than that of cross-ply tractor tyres and provides much greater sidewall flexibility, for enhanced grip when at work and a more comfortable ride both in the field and on the road. CEAT Farmax R85, R80, R70 and R65 tractor tyres feature wide treads and large inner volume to maximise traction and minimise compaction, while rounded shoulders cut crop damage and a higher angle lug and lug overlap at the centre provides good roadability.
How much work is your tractor expected to do?
If you operate a premium tractor across large acreages for long hours, consider a premium radial tyre to match its workload. For high-horsepower tractors performing demanding tasks such as primary and secondary cultivations and crop establishment, and expected to also cover large distances on the road, a tractor tyre designed specifically for smooth, consistent transfer of high levels of torque from the tractor to the ground is essential. As an example, CEAT Torquemax tractor tyres feature a tilted lug tip that reduces vibration and noise, plus a higher angle and lug overlap at the centre that provides excellent roadability at speed. In the field, a low shoulder angle ensures high levels of traction, while rounded shoulders minimise crop and soil damage, and a wide tread plus large air volume maximise soil protection.
Selecting your tractor tyres based on your machine type and its work will help you to get the most out of both the machine and the tractor tyres themselves. Think about these factors when you’re choosing your next set of tractor tyres, before beginning your search for ‘tractor tyres for sale’ or ‘tractor tyres near me’ on the internet, or studying tractor tyres price lists.
Read the full blogTue, 5 Jul 2022 ceat-speciality:blogs-tags/all,ceat-speciality:blogs-tags/tyre-care

ceat-speciality:blogs-tags/all,ceat-speciality:blogs-tags/tyre-care
Why Invest In Radial Trailer Tyres?When seeking new trailer tyres , often nowadays done via internet searches for ‘trailer tyres for sale’ or ‘trailer tyres near me’, and then perhaps studying trailer tyres’ price lists, it’s worth weighing the additional cost of radial trailer tyre designs against the benefits they offer over bias/cross-ply trailer tyres.
While ‘super single’ trailer tyres similar to those used on lorries and trucks were once a common farm trailer tyre fitment, offering hard-wearing and high load-bearing characteristics but being unforgiving on fields surfaces, today there is a great deal more choice available when it comes to renewing trailer tyres. CEAT Specialty produces ranges of both cross-ply and radial trailer tyres, each with a number of characteristics that have a place according to the trailer’s primary applications and use.
Because radial trailer tyres, like other types of radial tyre, are constructed around the circumference of the tyre, rather than cross-sectionally from side to side as with cross-ply or bias tyres, they offer a number of advantages. While these are not as critical as they might be with a powered vehicle, where steering and power transfer to the ground are key issues, radial construction still offers a number of benefits over cross-ply when it comes to trailer tyres.
In the CEAT Specialty range, these benefits include higher traction and an enhanced ride from trailer tyres such as the Floatmax RT radials, ensuring the trailer’s weight is transferred into good field and road-holding, keeping it firmly under the control of the tractor. CEAT Floatmax RT design also incorporates robust centre blocks that minimise trailer tyre noise at speed by ensuring smooth running on hard surfaces.
As well as on-road benefits, there are also in-field advantages to radial trailer tyre construction. Here, a flatter crown width creates a larger footprint, and this means ground contact area is maximised, minimising soil compaction. The more flexible carcase characteristics inherent in radial trailer tyre design also help in this respect, while the pattern of inter-connected grooves in the trailer tyre tread also flexes more than that on a cross-ply trailer tyre, creating a self-cleaning capability. The same benefits of tyre carcase movement also apply to the rounded shoulders of the Floatmax RT design, helping limit soil and crop damage. And there is even a puncture-resistance benefit to the radial trailer tyre design, with the Floatmax RT’s steel-belted construction protecting the tyre against ingress of puncture material.
In situations where your trailer is required to work on loose field surfaces, CEAT Floatmax FT radial trailer tyres may suit your trailer’s workload better. The directional lugs of their tread provide even greater traction, stability, grip and flotation, and this in turn minimises soil compaction, helping maximise crop root development and growth. Meanwhile, a robust centre block provides enhanced stability and road handling, while a wider and flatter crown improves flotation.
So when the time comes to put new trailer tyres on your shopping list, and you sit down to search for ‘trailer tyres for sale’ or ‘trailer tyres near me’ and peruse trailer tyres’ price lists, consider these benefits of radial trailer tyres over cross-ply/bias types. The additional cost is likely to soon be returned.
Read the full blogSat, 2 Jul 2022 ceat-speciality:blogs-tags/all,ceat-speciality:blogs-tags/tyre-care

ceat-speciality:blogs-tags/all,ceat-speciality:blogs-tags/tyre-care
Tips to prevent trailer tyres from perishing or ‘dry-rotting’Because some trailers – those used for transporting grain or silage, for example – are often used only for a certain period of the year, when trailers are parked up inactive for sustained lengths of time their trailer tyres can be subject to carcase deterioration, particularly in the load-bearing sidewalls. If they are allowed to reach this state, their integrity will be compromised, resulting in slow release of air, flat-spotting, carcase damage and the need to replace them before time. To avoid having to make a search before time for ‘trailer tyres for sale’ and ‘trailer tyres near me’, and searches of trailer tyres’ price lists, follow these few pointers.
Regularly check trailer tyre pressures and top up the air as necessary
One of the primary reasons for sidewall perishing is the gradual loss over time of air from the carcase, which will happen in every sort of tyre. This occurs in an imperceptibly slow manner – unless the tyre has sustained some damage, such as a cut, or has suffered the ingress of a nail or other foreign body into the tyre, in which case it may occur faster. Even if your trailer is parked for a sustained period, ensuring that you check pressures regularly – every month, for example – and topping up with air if necessary according to the manufacturer’s recommended pressures will ensure your trailer tyres retain their carcase shape and, therefore, the sidewalls do not become stressed, which can lead to perishing.
Keep trailers and their trailer tyres protected from the elements
If possible, park your trailer undercover if not in use for an extended period. This will ensure it is protected from weather extremes which can affect the trailer tyres and the rubber compounds from which they are manufactured. Like any other type, trailer tyres parked in direct strong sunlight, for example, may be prone to damage from the sun’s ultraviolet rays. This is not a problem over a matter of a few weeks, but months of such exposure is not advised.
Do not leave a heavy load in a trailer over an extended period
It may sometimes be necessary to leave for an extended period a load of grain in a tipping trailer, for example, or a set of bales on a flatbed. Try to keep this load-bearing to a minimum if possible, and make a point of regularly checking the loaded trailer’s tyre pressures.
Move the trailer to rotate the trailer tyres half a turn if the trailer is unused for a long period
By moving the trailer even just half a metre, rotating the wheels and trailer tyres will help ensure that flat spots do not form on the trailer tyre treads.
If some sidewall perishing is visible, ensure the risk of further deterioration is minimised
Light sidewall perishing does not necessarily impact upon a trailer tyre’s ability to do its job, but it is important that if it has been noted, it is not allowed to worsen. This means following the points
Follow these few tips, and you will be doing all you can to prevent trailer tyre sidewalls from perishing or ‘dry-rotting’ – and that will maximise the time before you next have to search to ‘trailer tyres for sale’ or trailer tyres near me’, or start scanning trailer tyres’ price lists.
Read the full blogTue, 28 Jun 2022 ceat-speciality:blogs-tags/all,ceat-speciality:blogs-tags/tyre-care

ceat-speciality:blogs-tags/all,ceat-speciality:blogs-tags/tyre-care
What is the best way to clean my sprayer tyres?Whether soils are often dry and dusty during the season, or the tramlines in the crops you are treating can be a little soft and muddy when conditions are otherwise right for spraying, keeping your sprayer’s tyres and wheels clean helps prevent dirt ingress into the bead, stops chemical potentially reacting with the tyre compound, and minimises the risk of sharp stones puncturing the carcase. A little care and attention can help prolong the life of your sprayer tyres and extend the time until you next have to peruse a sprayer tyres price list or search the net for ‘sprayer tyres for sale’ or ‘sprayer tyres near me’. And choosing well-designed sprayer tyres from a specialist in the sector can bring attributes such as a self-cleaning tread design.
To ensure no contaminated cleaning water can run into any type of watercourse or drain, a sprayer should be cleaned only in the field in which it has been working or at the yard where it is filled, where there must be concrete hardstanding from where washings can drain into a sump for later disposal. Washing down a sprayer should be part of good husbandry whenever a particular spraying task has been completed.
Some crop protection products, particularly herbicides, can leave visible residue on a sprayer’s tyres and wheels as it passes through the crop, and before leaving the field this should be removed using a nylon-bristled brush and the washing lance fitted to your sprayer, if it has one, or an independent clean water source such as a knapsack sprayer.
If the tramlines in the field where you have been working are soft and muddy, cleaning the sprayer tyre treads of mud before heading onto the road is important, to avoid creating a skid hazard for other road users. This will also help to prevent flints and sharp stones in the mud potentially causing sprayer tyre damage.
High-quality sprayer tyres such as the CEAT Spraymax VF are designed with a tread pattern that incorporates stepped lugs that provide enhanced grip and traction, while also aiding self-cleaning of the sprayer tyres. Combined with the Spraymax VF’s rounded shoulders, which also minimise soil and crop damage, the tread design grips the soil as it passes through the field, but also squeezes it gently between the treads to provide a self-cleaning action that minimises the need to clean mud from between the tread chevrons, even in damp clay soils.
At the end of the spraying season, ensure your sprayer’s tyres and wheels are given a thorough pressure washing to remove all traces of soil and chemical, taking particular care to wash the insides as well as the outsides of each wheel and sprayer tyre. Such care before storage will ensure your sprayer tyres last as long as possible, and maximise the time before you next have to invest time to search for ‘sprayer tyres for sale’ or ‘sprayer tyres near me’, or study sprayer tyres’ price lists.
Read the full blogTue, 28 Jun 2022 ceat-speciality:blogs-tags/all,ceat-speciality:blogs-tags/tyre-care

ceat-speciality:blogs-tags/all,ceat-speciality:blogs-tags/tyre-care
Choosing between rowcrop, standard or flotation sprayer tyresDepending on the crops you grow, the stage of their growth when you need to treat them and the width of the tramline wheelings you use, there will be times when wide flotation sprayer tyres are best suited to your work, and others when narrow rowcrop sprayer tyres suit best, while for some tasks and situations standard tyres may suffice. When you next find yourself having to search the internet for ‘sprayer tyres for sale’ or ‘sprayer tyres near me’, or study sprayer tyres’ price lists, consider the merits of all types and the benefits each can bring to certain spraying tasks.
Many farms growing combinable crops traditionally start the crop protection spraying season running their sprayers fitted with flotation sprayer tyres. With plants small and conditions soft, spreading the weight of the sprayer across as wide a footprint as possible can help to minimise soil compaction. With the right carefully-chosen sprayer tyres, extending the twin footprint paths of the sprayer out beyond the tramline rows can be of significant benefit in terms of maximising flotation and minimising compaction, and result in very little crop damage – providing the machine is fitted with good quality sprayer tyres.
If you are seeking maximum levels of crop and soil care on soft seedbeds and delicate crops, a true flotation sprayer tyre may be the best option early in the season – or throughout it on short crops and grass. CEAT Floatmax FT radial floatation tyres are wide, small-diameter flotation sprayer tyres composed of a high rubber mass, providing a firm grip on loose soils early in the season. They feature directional lugs that maximise traction – particularly important on hilly land, especially with hydrostatically-driven machines – and a wide, flat crown for the best possible floatation. However, they also perform on the road, with a robust centre block that provides maximum stability and roadability at speed.
But for some operations a general sprayer tyre may suffice, particularly if you are dealing with combinable crops and resilient soils. As a universal sprayer tyre, CEAT Farmax RC radial tyres are recommended for use on self-propelled sprayers and on tractors working with trailed sprayers. They are made with a strong carcass and bead capable of bearing the high loads imposed by a full sprayer tank, yet incorporate rounded shoulders that minimise crop damage and a higher number of lugs to ensure sound traction on damp soils and hills, while a higher tread angle with lug overlaps at the centre delivers improved roadability and stability, providing a smooth ride even at speed on the road. If you are using wide tramline tracks, such sprayer tyres may be used throughout the season, depending on your crops and how late you have to spray.
With crops that, later in the season, grow into a bigger vegetative mass that intrudes into the tramlines, rowcrop sprayer tyres can be a must-have. CEAT Spraymax VF rowcrop sprayer tyres are specially designed for self-propelled sprayers. The VF carcase design means they are engineered to carry 40% more load than a standard radial, or the same load as a standard radial at 40% lower pressures, giving you the choice between maximising productivity or soil protection. Having the narrowest possible footprint minimises crop damage but does not impact performance. The stepped lug design maximises grip and traction, while the Spraymax VF’s rounded shoulders minimise soil and crop damage. And when moving between fields and farms the centre tie bar provides excellent roadability for swift, smooth travel, while a higher NSD ensures longer life, giving you a tyre that’s durable and built to last.
So when next scouring the web for ‘sprayer tyres for sale’ or ‘sprayer tyres near me’, or reading sprayer tyres’ price lists, consider the merits of specialist sprayer tyres , and what each could bring to your crops, your fields and your farming operation. An upgrade may well be worthwhile, bringing big benefits to your benefits.
Read the full blogMon, 27 Jun 2022 ceat-speciality:blogs-tags/all,ceat-speciality:blogs-tags/tyre-care

ceat-speciality:blogs-tags/all,ceat-speciality:blogs-tags/tyre-care
How accurate tractor tyre selection can help minimise soil compactionRegardless of the work it is doing, it is possible to get the maximum power and performance from your tractor while having the minimal possible impact on soil structure and compaction of the land on which you are working, with significant benefits for areas including crop growth and drainage. Next time your tractor tyres require replacement, before you sit down to scan the internet for ‘tractor tyres for sale’ or ‘tractor tyres near me’, or search through tractor tyres’ price lists, consider the benefits offered by modern tractor tyre technology and design to help you make the right choice for your soils.
Section width and profile
If your goal is to leave minimum impact on the land, aim to pick tractor tyres that are as wide and as low in profile as possible for the size of your tractor and the wheels with which it is fitted. to help spread the weight of the tractor across as wide an area as possible. Remember that the second number in a tractor tyre’s sizing code (eg 650/65 R38) denotes the tractor tyre’s profile as a percentage of the first figure, which is the width of the tractor tyre in millimetres. The wider the tyre, the greater the area over which its weight will be spread. Bear in mind, though, the limitations you may face in terms of the wheels fitted to your tractor, and also the overall width of the machine, as a few centimetres extra can make a difference around narrow lanes and on hard-to-negotiate yards.
IF and VF higher flexion tractor tyres
Having been introduced around 20 years ago, IF and VF tractor tyre technology has become well-established in the market as a route to reducing pressures and thereby broadening footprints. Advanced carcase sidewall design means increased flexion (IF) tractor tyres can carry the same load as a standard tractor tyre of the same dimensions at 20% lower pressure, spreading weight over a wider and longer footprint without compromising performance. The figure for the even more advanced design of very high flexion (VF) tractor tyres is 40%.
Selecting tractor tyres such as CEAT’s flagship Torquemax, which is available in both IF and VF formats in sizes up to 710/70 R42, therefore offers significant potential to help minimise your tractor’s impact on the land. This can be particularly beneficial if your work involves activities such as primary and secondary cultivation and crop establishment, plus grassland work such as slurry spreading and fertiliser application. And this can all be done without any need to alter pressures between road travel and fieldwork, with IF and VF tractor tyre designs not compromised for road speed.
Tread design
Tread design also plays a significant role in how the right tractor tyres can help minimise the compaction caused by your tractor. CEAT Farmax HPT tractor tyres, for example, feature rounded shoulders that minimise soil disturbance as the tractor tyres grip the soil. As part of the total section width, their wider tread width also helps spread the tractor’s weight to minimise soil compaction, while a high tractor tyre volume bot only provides a high load capability, but again means maximum cushioning of the load to minimise soil impact.
It is therefore possible to minimise the impact of your tractor and its operations on the soil whilst still operating efficiently and getting the maximum from your machine and from your crops, keeping at bay the compaction that can affect rooting and drainage. Before you next begin searching for ‘tractor tyres for sale’ or ‘tractor tyres near me’, or scanning tractor tyres’ price lists, study the benefits offered by tractor tyres such as Farmax and Torquemax to understand how their designs and technology can be of benefit for your soils.
Read the full blog
Tue, 21 Jun 2022 ceat-speciality:blogs-tags/all,ceat-speciality:blogs-tags/tyre-care

ceat-speciality:blogs-tags/all,ceat-speciality:blogs-tags/tyre-care
Five advantages of using dual wheels and tyres on your tractorWhile modern tractor tyre technology that provides a long and wide contact patch has eliminated some of the older reasons for using dual wheels and tractor tyres, there remain a number of circumstances where their use may still be advantageous. Consider these five advantages of using dual wheels and tyres on your tractor – they may lead you to seek out a dual wheel supplier, and perhaps the tyres to fit them by searching for ‘tractor tyres for sale’ or ‘tractor tyres near me’ on the web, or scanning tractor tyres’ price lists.
Flotation
Operating additional wheels/tractor tyres on the rear axle or both the front and rear axles of your tractor will obviously spread its footprint proportionately. By spreading the weight of the tractor over a greater area, ground pressure per unit of area is reduced. This is especially advantageous on secondary cultivations and drilling/sowing operations, where re-compaction of cultivated soils will be reduced considerably. It is also of benefit when, for example, rolling or harrowing grassland in the spring, when the topsoil may be damp and prone to compaction, which will hinder grass root development as a result. For best results, the tractor tyres on the dual wheels should be run at or slightly below the pressure of the inner drive wheels.
Grip
By putting more tractor tyre tread on the ground, rear or all-round dual wheels and tractor tyres are an effective way of providing your tractor with additional grip. This can be particularly beneficial when, for example, pulling a high-draft implement such as a mole plough or subsoiler. Checking that all of the tractor tyre pressures are correct is again crucial, as is consulting your tractor’s operator’s manual to ensure you are aware of any recommendations or caveats concerning the operation of the tractor’s transmission when working with dual wheels and tractor tyres.
Stability
Dual wheels and tractor tyres offer a particular advantage if your work with your tractor takes you across steep slopes where tractor stability may be an issue. Examples include chain harrowing or spreading fertiliser across hilly or mountainous permanent grassland. Because the dual wheels and tractor tyres effectively extend the wheel track of the tractor, they lower its centre of gravity, reducing the risk of the tractor tyres on the uppermost part of the slope losing traction, and potentially causing the tractor to overturn. If working in these situations it is advisable to fit front dual wheels and tractor tyres as well as rear ones, as this will help to avoid instability caused when turning at the field ends.
Versatility
With a dual wheel and tractor tyre arrangement, it is of course possible to install the dual wheels and tractor tyres only when they are required and remove them when they are not needed. They can also be fitted to the rear axle only, or to the front and rear axles of the tractor, according to the requirements of the workload and conditions.
Lower cost
Because outer dual tyres tend not to be required at the full specification of the inner ones, they may be purchased on a more cost-effective basis. As long as there are no compatibility issues – it is not recommended to mix crossply/bias and radial tractor tyres on the same axle, for example – then the dual wheels themselves may be of lower specification than the inner drive wheels, and the total cost of the dual tyres plus the tractor’s drive tyres may be less than the total cost of high-specification single tyres all round.
Although not as commonly used in Europe as they once were, there are still some situations where dual wheels and tractor tyres remain worthy of consideration. Use these five advantages of using dual wheels and tyres on your tractor to help you decide whether seeking out a dual wheel supplier – and the tyres to fit them by searching for ‘tractor tyres for sale’ or ‘tractor tyres near me’ on the web, or scanning tractor tyres’ price lists – may be the best option for your tractor’s key tasks.
Read the full blogMon, 20 Jun 2022 ceat-speciality:blogs-tags/all,ceat-speciality:blogs-tags/tyre-care

ceat-speciality:blogs-tags/all,ceat-speciality:blogs-tags/tyre-care
How to boost the tractive power of your tractor’s tyresWhether they are brand new, half-worn or down to the last ten per cent of their original tread depth, there are multiple ways in which you can ensure you transfer the maximum power of your tractor from the engine through the transmission to the tractor’s tyres. Maximising their productivity will do the same for your tractor, and ensure you get the greatest possible return from the combination, maximising conversion of fuel into productive work and delaying for as long as possible that next trawl through tractor tyres’ price lists or online searches for ‘tractor tyres for sale’ or ‘tractor tyres near me’.
Correct tractor tyre pressures
Operating your tractor’s tyres at the correct working pressures as recommended by the tractor tyre manufacturer is central to maximising tractive power. If they are operated at too high a pressure, their footprint will be reduced as the amount of tread in contact with the ground is progressively reduced the more air above the recommended level is pumped into the tractor tyre. This forces the centre of the tractor tyre tread deeper into the soil, but at the same time causes the shoulders of the tractor tyre and its tread to rise away from the ground, reducing the tractive power of the tractor tyre and the tractor itself.
Conversely, operating tractor tyres at below the recommended pressure causes depression of the centre of the tractor tyre tread, reducing its ability to transfer the full tractive force of the tractor and tractor tyre to the ground. It also places increased forces on the tractor tyre’s shoulders, and as such can result in the tractor tyre slipping on the rim.
Four-wheel drive engagement
Most modern tractors have a driven front axle with selectable four-wheel drive for in-field work. While most good tractor operators would make a point of ensuring 4wd is engaged when working on heavy draft tasks such as ploughing or subsoiling, it can be easy to forget the value and importance of also ensuring it is employed on secondary cultivations, when the tractive power of the rear tractor tyres will be reduced if the drive to the front tractor tyres/wheels is not also in use. Tractive power will also be maximised when performing tasks on hilly or steep ground, such as spreading fertiliser on hilly grassland, maximising tractor tyre productivity and operator safety.
Setting of the tractor’s draft control
Following on from the previous point, to maximise tractive power with 4wd engaged it is also crucial to ensure the tractor’s draft control system is correctly set. Depending on the load being imposed on the tractor, draft control sensitivity when performing deep primary tillage with a mounted implement such as a plough or subsoiler should be such that, when load above a set limit is imposed on the tractor’s top link, the system raises the implement very slightly until the resistance falls and the original depth setting is restored. This will help minimise wheelslip and maximise tractive force.
Wheelslip control
Whether or not you are working with a soil-engaging implement – and many now are semi-mounted through the lower links only, or fully trailed – it is also important to correctly set the tractor’s wheelslip monitor – if fitted – to maximise tractive power. As a general rule, wheelslip monitors should be set to operate at a wheelslip level of 12-15% when working on primary or secondary cultivations. This bracket provides the best blend of tyre performance and transmission protection, allowing the tractor tyres to bite into the soil and turn the maximum amount of tractive force into productive work.
Weight your tractor according to the load imposed on it during work
Front-end weights – and for difficult conditions perhaps also front wheel weights – are again an essential part of correct tractor set-up for heavy draft work. Not only will they ensure the front of the tractor stays firmly planted on the ground when a heavy rear linkage-mounted implement is raised, and thus also aid front wheel traction when turning on the headland, but they will also maximise the tractive power of the front tractor tyres because of this. For heavy draft work with large, long cultivators and ploughs, rear wheel weights may also be an advantage in maximising rear wheel traction. For tractors performing a lot of this type of work, consider asking your tractor tyre dealer to help weigh individual axles of the overall tractor and cultivator combination, to allow the weight imposition to be measured precisely and the tyre pressures to be set accordingly.
Follow these few points, and whether your tractor tyres have their full tread depth, half of it or very little left, you will ensure you are getting the most out of your tractor and its tyres, and maximise conversion of fuel into productive work. That should maximise the time before you next have to search tractor tyres price lists or make online searches for ‘tractor tyres for sale’ or ‘tractor tyres near me’.
Read the full blogMon, 13 Jun 2022 ceat-speciality:blogs-tags/all,ceat-speciality:blogs-tags/tyre-care

ceat-speciality:blogs-tags/all,ceat-speciality:blogs-tags/tyre-care
How worn tractor tyres can cut your tractor’s productivityIf your tractor’s tyres have less than 10% of their original tread remaining, the performance of your tractor will be compromised in multiple ways. To ensure the best timing for your investment in new tractor tyres, read on to remind yourself of the effects of worn tractor tyres on productivity before you begin looking for replacements by sifting through tractor tyres’ price lists or searching the internet for ‘tractor tyres for sale’ or ‘tractor tyres near me’.
A new set of tractor tyres with a full depth of tread provides the best possible conversion, via the engine and transmission of your tractor, of fuel and power into productive work. That’s particularly true on heavy draft tasks requiring all of a tractor’s pulling power, such as primary tillage operations including ploughing and subsoiling, where the tractor is working on soil that has been unmoved for some time. For every 10% worn from the original full depth of a tractor tyre’s tread, the tractor will be able to push against 10% less ground. This, by a corresponding amount, reduces its ability to convert fuel to power with maximum efficiency.
The same holds true during secondary cultivations and crop establishment when working on soil that has already been moved, requiring the tractor to bite into the loose surface. Here, the potential for excessive wheelslip will be increased for every 10% reduction in tread depth, with a corresponding 10% reduction in the amount of work that can be achieved in an hour. In addition to this reduction in productivity, there will be higher potential for soil damage caused by smearing as the tyres slip against the soil, with the possibility of reduced productivity not only from the tractor and implement, but also from the crop that follows the field operation.
The issue of losses in traction and efficiency are less acute for tractors used largely for haulage and work where it is not necessary to pull an implement through the ground, but rather operate one on top of it – mowing or fertiliser spreading, for example. Here, there may be little noticeable loss of performance. However, as tractor tyres become gradually more worn, there are also implications not just for productivity, but also safety. When working on hilly or steep land – when harrowing or rolling permanent grassland, or applying fertiliser to it, for example – worn tractor tyres will reduce the available grip and braking efficacy, which at best will lead to more hesitant driving and reduced workrates, and at worst can compromise the safety of the tractor and the operator.
Of course, no-one would advocate unnecessary advance replacement of tractor tyres that are anywhere between 1% and 90% worn. But tractor tyres that have 10% or less of their original tread lug depth remaining will significantly compromise the performance of the engine and transmission of your tractor, and hence the ability of the machine itself to perform at its most productive. Once the tread is at 10% of its original height/depth, you should start planning for replacement.
Worn tractor tyres can therefore have a significant effect on tractor productivity and efficiency, as well as safety. By ensuring you make your next search for ‘tractor tyres for sale’ or ‘tractor tyres near me’ and your browsing of tractor tyres’ price lists in plenty of time before that 10% tread depth remains, you will be assured that you will always be making the most of your tractor’s abilities by having sufficient tread depth to fully exploit them.
Read the full blogThu, 9 Jun 2022 ceat-speciality:blogs-tags/all,ceat-speciality:blogs-tags/tyre-care

ceat-speciality:blogs-tags/all,ceat-speciality:blogs-tags/tyre-care
How underinflated trailer tyres can lead to premature wearSome trailers are in operation daily, while others – those for grain or grass haulage, for example – may only be used seasonally. But whether a trailer is worked every day or for perhaps only a few weeks each year, loss of pressure – or underinflation in the first place – can cause multiple problems that will shorten the trailer tyre’s life. That will lead you back to your trailer tyre dealer and trailer tyre price lists – or to searching the internet for ‘trailer tyres for sale’ or ‘trailer tyres near me’ – long before it should be necessary.
The fact that the wheels on most trailers – except for those few equipped with driven axles – are not powered, and are therefore not directly turning fuel into traction, means they can sometimes be overlooked when it comes to regular servicing requirements. But trailer wheels and trailer tyres need the same level of attention as that given to those on the tractor if they are to perform safely and effectively. Checks for wheel nut tightness and trailer tyre inflation pressure must be part of a daily checklist whenever a trailer is in use.
Loss of trailer tyre pressure, or failure in the first place to inflate trailer tyres to the correct pressure as recommended by the trailer tyre manufacturer, can have multiple consequences that can have detrimental effects on trailer tyres’ safety and lifespan. Perhaps the most serious is the potential for the bead of the trailer tyre to become unseated and to slip against the wheel rim. The least severe consequence of this will be damaged trailer tyre sidewalls, leading to deformation of the trailer tyre, carcase damage and the need for immediate replacement. In the worst case scenario, it could lead to the trailer tyre becoming detached from the wheel rim, putting the load at risk of spillage, the trailer at risk of damage and potentially injuring other road users should the trailer become unstable and/or the trailer tyre detach from the rim.
But there are other potential problems caused by even minor under-inflation of trailer tyres. Under-inflation places additional load on the trailer tyre sidewalls, because they take more of the trailer’s weight as the centre deflates and the shoulders and sidewalls then bear a greater part of the load than intended. The additional forces this creates can place the sidewalls under great strain, leading to them flexing and potentially cracking.
The shoulders of underinflated trailer tyres will bear more load than the centre, so they too come under greater stress, and will wear faster than the central circumference of the tyre tread. Even if the overall integrity of the trailer tyre is sustained despite operating under pressure, this uneven wear will compromise the trailer tyre’s behaviour, particularly on the road where the trailer’s braking efficacy may be compromised.
All of these factors can result in premature failure of trailer tyres, meaning that at best they need replacing before time, or at worst may cause an accident. Trailer tyre pressures, along with those on the tractor, should therefore be checked daily during sustained periods of use, and also when a trailer is brought back into service after not being used for some time. Ensuring your trailer tyres are always operating at the correct pressures will minimise the risk of premature wear, and maximise the time before you next find yourself having to look for replacements by searching the internet for ‘trailer tyres for sale’ or ‘trailer tyres near me’, or looking through trailer tyres’ price lists.
Read the full blogTue, 31 May 2022 ceat-speciality:blogs-tags/all,ceat-speciality:blogs-tags/tyre-care

ceat-speciality:blogs-tags/all,ceat-speciality:blogs-tags/tyre-care
How can regular maintenance increase the lifespan of your trailer tyres?With tractors capable of 50, 60 or even 70km/hr now commonplace In modern agriculture, trailers and the trailer tyres with which they are fitted often travel at far higher speeds than they did just a few years ago, while as farm sizes have grown, they commonly travel much further too. While the design of modern trailer tyres has advanced considerably to help meet the challenges of these more demanding conditions, such workloads obviously place greater demands on trailer tyres, and potentially higher wear rates. So what can you do to maximise the lifespan of your trailer tyres and delay for as long as possible the need to start searching for ’trailer tyres for sale’ or ‘trailer tyres near me’, or read through trailer tyres’ price lists?
1. Regularly monitor trailer tyre pressures and adjust them as necessary
Pressure checks should, of course, be part of regular servicing of any vehicle or implement fitted with pneumatic tyres. While the tyres fitted to many machines are subject to a generally constant load, trailer tyres in particular are subject to significantly varying loads according to whether or not the trailer is laden. If operated at below the recommended pressure for any length of time they will not only be unsafe, potentially affecting braking and even the adherence of the trailer tyre’s bead to the wheel rim, but will be subject to a number of issues that will reduce their lifespan, including uneven wear, physical carcase damage and excessive heating that may cause the tyre to delaminate and lose its tread.
2. Check wheel nuts daily
In addition to the obvious danger surrounding the potential detachment of a wheel from the trailer, wheel nuts that start to slacken from their initial recommended torque settings will cause the wheel to run out of true, and as a result will cause the trailer tyre to wear in an uneven fashion. This may mean that, even if much of the tyre still has sufficient tread, it will require replacement much earlier than planned.
3. Ensure your trailer brakes are working correctly
Correctly-maintained trailer brakes are at the heart of safety when it comes to tractor and trailer travel on the road, protecting the tractor driver and other road users by ensuring the trailer and its load, which may well weigh more than the tractor itself, cannot push the tractor under braking. It is important to ensure, though, that they are not adjusted to tightly, such that they will lock up and abrade on the road surface, which will hasten tread wear and reduce trailer tyre life.
4. Observe and examine each tyre carcase every day
A check of trailer tyre carcase condition should be a routine part of daily maintenance, examining both sidewalls and the trailer tyre circumference. The lifespan of your trailer tyres will be prolonged if, for example, you remove stones and any other foreign objects from the channels in the trailer tyre tread as often as possible – when walking around the trailer during unloading, for example. This will minimise the chances of the stone or nail being forced deeper into the trailer tyre’s carcase and potentially penetrating sufficiently to cause a puncture.
Following these few maintenance points will help you to minimise wear rates, maximise the lifespan of your trailer tyres and ensure that your next search for ’trailer tyres for sale’ or ‘trailer tyres near me’, and your next trawl through trailer tyres’ price lists, is held off for as long as possible.
Read the full blogFri, 27 May 2022 ceat-speciality:blogs-tags/all,ceat-speciality:blogs-tags/tyre-care

ceat-speciality:blogs-tags/all,ceat-speciality:blogs-tags/tyre-care
The importance of sprayer tyres’ non-skid depth (NSD) in long tyre lifeIf you are searching for new sprayer tyres for a self-propelled machine – and the easiest way to do this today is probably by searching the internet for ‘sprayer tyres for sale’ or ‘sprayer tyres near me’ before you begin scanning sprayer tyres’ price lists – then non-skid depth is an important consideration. Read on to find out why.
Non-skid depth (NSD) is the term that essentially describes the depth of a tyre’s tread. On a tarmac-travelling vehicle such as a car or a truck, this factor relates to the complex tread pattern that governs how well the tyre can channel away water when travelling on a wet surface. However, with any type of tractor tyre or sprayer tyre that has a chevron-style tread designed to grip and provide traction primarily on field surfaces, the primary problem with a low non-skid depth is that it means reduced power transfer from the machine’s transmission to the ground, thereby reducing traction and fuel efficiency.
On self-propelled sprayers, many of which use hydrostatic transmissions, can work on wet soils and may be required to work on hilly land, it can also mean a lack of grip that is especially dangerous, particularly on slopes. Once a tyre’s tread is worn away, then it loses the ability to engage positively with the field or road surface beneath it. If it has a low non-skid depth to begin with, then this can happen surprising quickly, particularly if the sprayer is required to travel a lot of road miles at full speed on tarmac, which can result in high tyre temperatures and premature wear.
This is why investing in sprayer tyres such as CEAT’s Spraymax VF, which have a high non-skid depth, will give you maximum life and performance over the period you own your self-propelled sprayer. Because the tread is designed with highly-durable, hard-wearing compounds, Spraymax sprayer tyres high non-skid depth is one of the characteristics that gives the sprayer tyres maximum longevity, which as a result minimises the sprayer running costs over the lifetime of the machine.
A high non-skid depth, though, is just one tread characteristic you should look for when seeking new sprayer tyres. CEAT Specialty Spraymax sprayer tyres, for example, feature a stepped lug design, which is proven to provide better grip and traction, and that will be a benefit across a range of soil types, moistures and land topographies. Meanwhile, the rounded shoulders of the carcase mean less soil and crop damage. The Spraymax design provides better road performance too – vital for getting from field-to-farm and field-to-field faster. The tyres’ centre tie bar gives superior roadability – and that high NSD ensures durability and maximum lifetime. And with VF (very high flexion) technology, you can carry 40% more load than a standard radial, or the same load as a standard radial at 40% lesser pressure.
While many self-propelled sprayers do a lifetime’s work on one set of sprayer tyres, if you have a choice of tyres for a new self-propelled sprayer or require replacements for the sprayer tyres on your existing machine or a used sprayer purchase, make sure you consider the non-skid depth of the sprayer tyres you are considering. This factor will have a big influence on your sprayer tyres’ lifetime, ensuring it will be a good while before you next have to search the internet for ‘sprayer tyres for sale’ or ‘sprayer tyres near me’, or start scanning sprayer tyres’ price lists.
Read the full blogThu, 26 May 2022 ceat-speciality:blogs-tags/all,ceat-speciality:blogs-tags/tyre-care

ceat-speciality:blogs-tags/all,ceat-speciality:blogs-tags/tyre-care
The merits of very high flexion (VF) sprayer tyresWhile sprayers tend to spend most of their field travel time trafficking a minimal amount of land when working on crops grown within tramline or bed principles, keeping the compaction and consequent depth of those tramlines to a minimum is still essential, regardless of whether or not the tramlines are ripped up or reinstated each year. When you’re next searching for new sprayer tyres by surfing the internet for ‘sprayer tyres for sale’ or ‘sprayer tyres near me’, or scanning sprayer tyres’ price lists, consider the merits of VF sprayer tyres as a way of minimising compaction and maximising capacity.
As an example, CEAT Specialty Spraymax VF sprayer tyres are specially designed for use with self-propelled sprayers, which today can vary widely in weight depending on the capacity of the tank – which may range from 2,000 to 10,000 litres – and the width of the boom, which can cover a span from 12m all the way up to 54m.
This incredibly wide range of potential specifications means modern sprayer tyres have to be engineered with a flexible specification in order to meet the requirements of numerous different types of machine and user. Features and benefits of CEAT Specialty Spraymax VF sprayer tyres include a stepped lug design that maximises the sprayer tyre’s grip and traction in loose or damp soils and on steep land. At the same time, the rounded shoulders of the Spraymax ensure soil and crop damage are kept to a minimum. On the road between fields and farms, meanwhile, the advanced lug geometry and the tread’s centre tie bar makes for smooth road travel at speed, which is just as important as field travel if daily productivity is to be maximised. Spraymax sprayer tyre tread is also characterised by a high non-skid depth, which enhances durability to help maximise sprayer tyre life,
The VF difference
Available in sizes from 480/80 R42 to 380/90 R54, to fit a wide range of self-propelled sprayer tyre needs from the smallest to the largest boom widths and tank capacities, CEAT Specialty Spraymax sprayer tyres are all designed and equipped as standard with every high flexion (VF) technology. This carcase sidewall design makes it possible to carry 40% more load than a standard radial, or carry the same load as a standard radial at 40% lesser pressure.
VF technology offer the users two possible operating options for the sprayer to which the tyres are fitted. Firstly, it is possible to match such tyres to particularly high capacity sprayers, where their greater load-bearing capacity at standard pressures will help to maximise daily outputs. Alternatively, lowering pressures by up to 40% from the standard recommended figures will create a longer and slightly wider sprayer tyre footprint, enhancing flotation and traction, and reducing compaction by spreading the sprayer load over a greater area.
The merits of VF sprayer tyre design are therefore significant if you are seeking to minimise the impact on your soils of your sprayer, keeping your tramlines and trafficked paths shallow, or if you wish to carry maximum loads on high-output machines to minimise refill downtime. So when you’re next seeking out new sprayer tyres on the webvia searches for ‘sprayer tyres for sale’ or ‘sprayer tyres near me’, or perusing sprayer tyres’ price lists, consider the merits of VF sprayer tyres to protect your soils and your crops.
Read the full blogSat, 21 May 2022 ceat-speciality:blogs-tags/all,ceat-speciality:blogs-tags/tyre-care

ceat-speciality:blogs-tags/all,ceat-speciality:blogs-tags/tyre-care
The many benefits of upgrading your tractor’s tyresIf your tractor tyres are worn out, or perhaps you are finding that you are not getting the best performance from your machine and the tractor tyres fitted to it – in terms of grip, pulling power, low compaction, fuel efficiency and road manners – then you should consider upgrading your tractor’s tyres. But before you begin searching for ‘tractor tyres for sale’ or ‘tractor tyres near me’ on the web, or scanning tractor tyres price lists, ensure you are familiar with the features of modern tractor tyre design that could bring many benefits for a little additional investment.
Consider an upgrade to IF or VF tractor tyres
In the mid-2000s, tractor tyres able to carry greater loads at their standard pressure, or the same load at lower pressure, were introduced to the market. The word ‘flexion’ is used to describe the flexibility of these tractor tyres’ sidewalls. Increased flexion (IF) tractor tyres can carry 20% more load at the same operating pressure, or the same load at 20% lower pressure, thanks to the advanced design of their carcases, particularly in the sidewall area.A further advanced version of this, the VF or very high flexion design, doubles this ability, with VF tractor tyres having 40% greater load bearing capacity at the same operating pressure. Alternatively, they can carry the same load at 40% lower pressure.
There are multiple advantages to the additional investment cost of IF or VF tractor tyres. The primary one of these is that the tyre pressures can be adapted to the task at hand to maximise performance and minimise machine impact on the soil. For example, lowering the tractor tyre pressures in the field by 20% (IF) or 40% (VF) from the standard means the tractor tyres’ footprints are both lengthened and widened. This puts more tread in contact with the ground, for increased traction and fuel efficiency, as well as spreading the load over a greater area for reduced soil compaction. Because of the IF/VF carcase design, this is possible without risk of the tractor tyres slipping on their rims, incurring serious damage and potential failure, as would be the case on standard tractor tyres if pressures were lowered below those recommended.
However, for rapid travel on the road, particularly when hauling maximum loads, IF/VF tractor tyres can also be operated at their standard pressures, at which they will be able to bear 20% (IF) or 40% (VF) higher payloads than would otherwise be possible with standard tractor tyres at the same pressures. CEAT’s flagship Torquemax tractor tyres are available in both IF and VF formats, in sizes up to 710/70 R42.
Look at what enhanced tread patterns will bring to your work
Upgrading to a cutting-edge tractor tyre design for higher-hp tractors, such as the CEAT Torquemax, will also bring you the fruits of the latest in tread design research. Examples on the Torquemax include a tilted lug tip, which cuts reduces vibration and noise at high road speeds. A higher angle and lug overlap at the centre also ensure smooth road travel. In the field, performance is enhanced by a lower shoulder angle, which improves these tractor tyres’ bite into the soil for superior traction. This is combined, though, with rounded shoulders, to minimise damage to both to the soil and, if working during the growing season, to the crops. Upgrading to Torquemax also brings the benefits of a wide tread and large inner volume, characteristics which also minimise soil compaction.
So next time your tractor needs new tractor tyres, consider the benefits of upgrading to something with a superior design. The additional investment will be quickly returned in grip, pulling power, lower compaction, greater fuel efficiency and better road manners. And that will mean the time you spend researching ‘tractor tyres for sale’ or ‘tractor tyres near me’ on the web, or scanning tractor tyres’ price lists, will be time well spent.
Read the full blogThu, 19 May 2022 ceat-speciality:blogs-tags/all,ceat-speciality:blogs-tags/tyre-care

ceat-speciality:blogs-tags/all,ceat-speciality:blogs-tags/tyre-care
How to get more traction from your tractor tyresBuying new tractor tyres represents a significant outlay, so your purchases need to perform to their maximum potential in order to maximise the return on your investment. Following a few tips can help get maximum traction from new tractor tyres so that they, and your tractor, do their best for your business. That will ensure extended time between your internet searches for ‘tractor tyres for sale’ or tractor tyres near me’, or scanning tractor tyres’ price lists.
Check pressures regularly and adjust as needed
The correct pressures recommended for your tractor tyres, given their specification and the load they are required to bear, are fundamental to optimum tractor tyre performance. Over-inflated tractor tyres may scrabble for grip on dry and hard field surfaces, while under-inflated tractor tyres may slip on the wheel rims in the same circumstances.
Use weigh cells to ascertain individual axle loads
If your tractor works regularly with a heavy implement, whether trailed or mounted, it may be wise to measure the weight the implement imposes on the tractor4 by weighing the individual wheels using weigh cells. Consult your tractor tyre dealer for help if necessary – they in turn may be able to also call on the expertise of the tractor tyre manufacturer. A high load on an individual axle may warrant ballasting elsewhere on the tractor to even out the load for optimal traction – using front-end weights, wheels weights or, in the case of tractors with a centrally-mounted cab, rear deck weights.
Ensure you change your tractor tyres before they reach their absolute tread limit
It may be tempting to get another season from a worn set of tractor tyres with, say, 10-20% tread remaining on them, but especially if your crop establishment relies on deep cultivations – for activities such as subsoiling, or when preparing ground for potatoes, for example – then traction will be compromised. A decision to change tractor tyres before they become very worn will soon repay in terms of workrate and fuel efficiency gains.
Make proper use of 4wd and your tractor’s wheelslip monitor
With most modern tractors fitted with 4wd, this should be engaged when necessary – and disengaged when not. Its use is especially important to maximise tractor and tractor tyre performance when performing primary and secondary cultivations, but much less so when performing top work tasks such as mowing or fertiliser spreading – unless fields are steep and hilly.
Without 4wd engaged, higher levels of wheelslip will occur, damaging the soil surface and wasting fuel. However, it’s essential to remember to disengage 4wd when not required at speed on the road, as not all tractors do this automatically.
Ensure also that you maximise traction by using your tractor’s draft control and wheelslip monitor properly. For the ideal bled of traction, fuel efficiency and performance, wheeslip should be 12-15% when performing primary or secondary tillage. A properly-set draft control and wheelslip control system will ensure it is kept below this, raising the implement marginally out of work if it meets the limit.
With the cost of new tractor tyres probably the most significant among a tractor’s wearing parts, they need to perform at their best. Following these tips will maximise their tractive performance and prolong the period before you next have to spend time searching for ‘tractor tyres for sale’ or tractor tyres near me’, or scanning tractor tyres’ price lists.
Read the full blogWed, 18 May 2022 ceat-speciality:blogs-tags/all,ceat-speciality:blogs-tags/tyre-care

ceat-speciality:blogs-tags/all,ceat-speciality:blogs-tags/tyre-care
What do farmers need to know about tractor tyre sizes?When looking for a set of new tractor tyres – often done nowadays by searching the internet for ‘tractor tyres for sale’ or ‘tractor tyres near me’, or more traditionally by looking through tractor tyres’ price lists – knowledge of the coding that sets apart different sizes and types is essential to ensure you obtain the tractor tyres that put your machine’s power to the ground most effectively.
Many farmers understand the basic coding of tractor tyre sizes, in terms of section width, profile and rim size, but across the agricultural industry and beyond there is equally some confusion surrounding the figures that denote the different sizes and profiles of tractor tyres. So what factors should buyers bear in mind when selecting new tractor tyres?
The first thing to note is that, for international and historical reasons, tyre sizes – and not just those for tractor tyres – are denoted in a mix of metric and imperial units. Arguably the most obvious figure of which to be aware when purchasing new tractor tyres is the rim size – the diameter of the ‘hole in the middle. This is measured in inches, and denoted by an R number, such as R38, being the last of the figures in the tractor tyre coding.
Rim size
Many common mid-horsepower tractors are equipped with 34in or 38in wheel rims on the rear axle, for example, but this can rise to 42in or 46in for larger high-horsepower machines, with perhaps 34in rims on the front axle. Tractors are designed with transmissions that have gearing which matches particular wheel rim diameters on both front and rear axles, to ensure that the tractor’s speed and torque are transferred to the ground in a measured and specified way. It is only possible to change to a tyre with a larger or smaller rim size by changing the tractor’s wheels, and this can only be done if it is possible to do so according to the tractor’s manufacturer and supplying dealer.
For example, it may be possible on some tractors to swap from 34in wheels at the rear to 38in ones, and therefore from 34in to 38in tractor tyres, which will put more tread in contact with the ground. However, if the tractor is a 4wd model with driven front axle, it may also be necessary to change the front wheel rim sizes in proportion, to ensuring the correct drive ratio between front and rear wheels. It is also important to ensure larger wheels and tyres can be accommodated beneath the tractor’s mudguards.
Section width
Rather than changing wheel sizes, there is a simpler way of getting more tyre on the ground and thereby boosting traction and flotation. The first figure in a tyre’s coding describes the cross-section width in millimetres, and depending on whether total tractor width is a critical issue – for example whether the machine must sometimes manoeuvre through tight livestock yard passageways –tractor tyres of a wider section width may be fitted in order to enhance flotation and traction. Consult with your tractor tyre dealer to ensure they are compatible with the rim width of your tractor’s wheels. CEAT Torquemax and Farmax tyres are available to fit a wide range of rim sizes, and in a wide range of section widths.
Profile
The second figure in tyre coding denotes the profile, or the height of the sidewall – from the bead to the point where the tread begins – as a percentage of the section width. A 650/65 R38 size, a typical rear tractor tyre on commonplace 80-120hp tractors, and available in a range of CEAT Specialty tractor tyres including CEAT Torquemax and CEAT Farmax, has a width of 65% of 650mm, or 422.5mm. A lower profile tractor tyre will put more trade in contact with the ground.
This guidance should help your decision-making next time you need new tractor tyres and start studying tractor tyres price lists or searching the web for ‘tractor tyres for sale’ or tractor tyres near me’.
Read the full blogWed, 11 May 2022 ceat-speciality:blogs-tags/all,ceat-speciality:blogs-tags/tyre-care

ceat-speciality:blogs-tags/all,ceat-speciality:blogs-tags/tyre-care
How do new generation tractor tyres adapt perfectly to different uses?There have been rapid developments in tractor tyre technology over recent years, with design and manufacturing innovations in areas from tread format to carcase construction all playing a part in improving modern tractor tyres ’ performance, and the ability across a range to match different agricultural demands. But what features make a modern tractor tyre better than its predecessors? Before you invest time sifting through tractor tyres’ price lists and making the typical internet searches for ‘tractor tyres for sale’ and ‘tractor tyres near me’, read on to discover how features designed inthttps://www.ceatspecialty.com/uk/product/o the latest generation tractor tyres match different uses and working demands.
Tread
For example, tractor tyres such as the CEAT Torquemax radial, designed for the most demanding work with high-horsepower tractors, feature a tread that is designed with a tilted lug tip. Given that many high-horsepower tractors today work across greater land areas and therefore often have to spend more time travelling between farms and fields, this helps minimise vibration and noise, and hence operator fatigue, ensuring you or your tractor driver remains fresh and alert during long working days. The tread of Torquemax tractor tyres also features a higher angle and lug overlap at the centre. The benefit of this design is improved roadability, making for smoother travel at speed.
But it is obviously essential not to compromise field performance, and that a modern tractor tyre can adapt to field requirements. Here the Torquemax tread design is designed to adapt to field demands. The angle at the tyre shoulder is lower, a design which provides a better soil ‘bite’ and therefore superior traction, but rounded shoulders ensure minimise soil and crop damage. Torquemax also features a wider tread and larger inner volume, a further aid to reduce soil compaction, while the R1-W tread depth ensures longevity of the tyres.
Carcase design
One of the most recent innovations across the tractor tyre industry that helps tractor tyres adapt to different uses is the development of increased flexion (IF) and very high flexion (VF) tractor tyre carcase designs. This applies particularly to the tractor tyre sidewalls, which increases their flexibility under load. As a result, increased flexion (IF) tractor tyres are able to can carry 20% more load at the same operating pressure, or the same load at 20% lower pressure. The design of very high flexion tractor tyres is an extension of this, with a doubling of this ability that means VF tyres have 40% greater load bearing capacity at the same operating pressure, or the ability to carry the same load at 40% lower pressure.
These latest generation designs do cost more than standard designs, but allow the tractor to be adapted to the work in hand. For example, with IF/VF tyres, pressures can be lowered by 20% or 40% respectively from the standard, widening and lengthening the tractor tyre footprint, and thereby spreading the load and reduce ground pressure. Alternatively, they can be adapted to work at standard pressures for fast road haulage of maximum loads, with 20% or 40% higher payloads than would otherwise be possible with standard tractor tyres.
These features and adaptable abilities of modern tractor tyre designs ensure the tractor tyres match the work that’s expected of them, whether high-draft pulling in the field, such as deep cultivations, or high-speed haulage on the road. Tractor tyres such as the Torquemax, for high-horsepower tractors doing significant hours each year, are available in IF and VF specification,, with the additional investment soon returned in reduced haulage costs, soil compaction and fuel consumption. Look out for these features next time you need new tractor tyres and find yourself scanning tractor tyres’ price lists and searching the web for ‘tractor tyres for sale’ and ‘tractor tyres near me’.
Mon, 9 May 2022 ceat-speciality:blogs-tags/all,ceat-speciality:blogs-tags/tyre-care

ceat-speciality:blogs-tags/all,ceat-speciality:blogs-tags/tyre-care
A few things you should know before buying new trailer tyres…Spending time studying trailer tyres’ price lists and browsing the web for ‘trailer tyres for sale’ or ‘trailer tyres near me’ can be a confusing process, with a multitude of makes, brands, construction types, formats and sizes. Before committing to a purchase, ensure you are fully versed in what is available and what the different types can do for you.
The importance of the role played by trailer tyres in agriculture is often overlooked until issues raised by their performance become apparent. These might manifest themselves in terms of excessive soil compaction, for example, or perhaps a harsh ride on the road transferred from trailer to tractor. There are now many alternatives to the traditional ‘super single’ trailer tyres that are better able to given long wear life, high load-bearing capabilities and a broad and long footprint that spreads the load and minimises the ground pressure per square centimetre imposed on the field surface by the trailer tyre.
Modern trailer tyres can help protect your soil from compaction and associated costs
The right trailer tyre design can help a trailer to grip the field or road surface effectively and minimise shock loading transferred from the trailer to the tractor when travelling over rough surfaces. With robust centre blocks that reduce trailer tyre noise during travel at speed and ensure smooth running on hard surfaces, CEAT Floatmax RT radials also incorporate steel-belted construction that minimises the risk of puncture material ingress while aiding durability. And with a flatter crown width, the Floatmax RT trailer tyres spread the trailer’s load to reduce the ground pressure imposed and minimise soil damage, a quality further aided by rounded shoulders. Inter-connected grooves promote self-cleaning, ensuring minimal soil is taken onto the road.
They can also help to ensure the tractor/trailer combination’s stability and grip
While some trailer work involves working primarily on hard surfaces, or on dry and firm field surfaces, other tasks require the ability to perform on loose surfaces – for example when hauling potatoes from a harvester on sloping land and light soils. In these circumstances, trailer tyres such as the CEAT Floatmax FT are designed to help. Directional lugs help ensure good grip, while a robust centre block provides enhanced stability and road handling, vital qualities for trailers matched to today’s high-speed tractors. Stability and handling are also boosted in the field by a wider and flatter crown that gives greater flotation characteristics, while a high rubber mass creates a durable carcase that translates into a long working life.
Radial versus bias/cross-ply: a different decision compared to the choice in tractor tyres
Many buyers of tractor tyres find the additional investment in radial types well worthwhile in comparison to cross-ply/bias tractor tyres, for reasons of greater comfort and performance. However, for many applications cross-ply/bias construction is ideal when it comes to trailer tyres. If your trailer performs simple haulage tasks on hard surfaces, CEAT T422 Value Pro flotation trailer tyres may well fit the bill. These feature a large volume and footprint to maximise ground contact patch and so minimise soil compaction, complemented by rounded shoulders that help minimise crop damage.
For work that is more field-based, CEAT Flotation T422 I1 bias flotation trailer tyres incorporate a tough nylon casing and strong bead bundle for a high load-carrying capability, but feature the same large volume and footprint, with rounded shoulders to minimise crop and soil damage.
Then there is the 400/60 R15.5 CEAT TR800 bias flotation tyre and, for maximum flotation and minimal compaction, the 480/45-17 or 500/50-17 Flotation Plus models or, for maximum ground contact patch, the Flotation TX 440, in sizes from 500/60-22.5 to 700/40-22.5.
So before making a commitment to a trailer tyre purchase, consider the construction, flotation, stability and grip offered by the trailer tyres you are considering. Making the right decision could save you money in more ways than one – and help ensure a long trailer tyre lifetime before you next have to browse for ‘trailer tyres for sale’ or ‘trailer tyres near me’, or study trailer tyres’ price lists.
Read the full blogTue, 3 May 2022 ceat-speciality:blogs-tags/all,ceat-speciality:blogs-tags/tyre-care

ceat-speciality:blogs-tags/all,ceat-speciality:blogs-tags/tyre-care
How to choose the best sprayer tyres for your workloadIf you are seeking new sprayer tyres for your self-propelled machine, assessing factors such as the type and amount of work your sprayer has to do, and the terrain on which it has to work and travel, will help you make the right choice when searching for ‘sprayer tyres for sale’ or ‘sprayer tyres near me’, or scanning a sprayer tyres price list.
Sprayers spend their working lives carrying costly cargoes of crop protection products that need to be transported with care and applied with the utmost accuracy. This make equipping your sprayer with the best possible sprayer tyres for the work it is expected to do a sound investment. Whether you are replacing the sprayer tyres on anexisting machine on the farm, or you have a choice of tyres when it comes to specifying a new machine you are ordering, here are a few factors to consider in helping you make your selection.
Load-carrying capability
Very high flexion (VF) sidewall design technology is particularly beneficial when it comes to improving the performance of your sprayer. CEAT Spraymax VF sprayer tyres are engineered with VF sidewalls which mean they can carry 40% more load than a standard radial of comparable size operating at the same pressure. This makes them particularly ideal for farmers and contractors looking to move to sprayers with a larger tank size, to reduce the number of refills necessary and lengthen the time between refills, minimising downtime and maximising productivity.
Ground pressure
While some farmers may be most concerned with sprayer capacity and getting large areas of crops sprayed quickly during good weather periods, for others their soil type or general concerns over compaction may mean that minimising the depth of tramlines over the season is a priority, especially if they have to work on soils which may not dry out that quickly after rain. A further advantage of VF tyres is that, as an alternative to the point above, they can carry the same load as a standard radial of the same size at 40% lower pressure. This widens and lengthens the tyre’s footprint, spreading the sprayer’s weight over a greater area and reducing ground pressure and soil compaction.
Tread design
Maintaining secure grip and traction is important for maximum output and productivity in all situations, but particularly on fields that are hilly and land that is steep, where safety is also a concern. CEAT Spraymax VF sprayer tyres are designed with a stepped lug format which enhances grip and ensures surefooted traction regardless of terrain, gradient or soil moisture. Rounded shoulders also minimise crop damage as the sprayer tyres pass through the tramlines.
Road travel
Many of today’s larger farms and contracting businesses work over considerable land areas, necessitating significant road travel between fields and land blocks. CEAT Spraymax VF sprayer tyres are designed with these demands in mind, incorporating a centre tie bar that makes for smoother road travel, and a high non-skid depth for durability over a longer lifetime.
Available in a wide range of sizes from VF-380/90 R 46 to VF-480/80 R 50, CEAT SpraymaxVF sprayer tyres meet the criteria required by demanding cropping farmers and contractors for load-carrying, ground pressure, tread design and road travel capabilities. Consider these points to help you make the best choice of sprayer tyres to suit your workload whennext searching for ‘sprayer tyres for sale’ or ‘sprayer tyres near me’, or scanning a sprayer tyres price list.
Read the full blogFri, 29 Apr 2022 ceat-speciality:blogs-tags/all,ceat-speciality:blogs-tags/tyre-care

ceat-speciality:blogs-tags/all,ceat-speciality:blogs-tags/tyre-care
Tips to help choose the right sprayer tyresIf you have a choice of sprayer tyres for a new self-propelled sprayer, or require replacements for the sprayer tyres on your farm’s existing machine or a secondhand purchase, there are a number of tips that can help make your internet searches for ‘sprayer tyres for sale’ or ‘sprayer tyres near me’, and your selection from a sprayer tyres price list, just a little bit simpler.
Consider the merits of VF (very high flexion) sprayer tyres
Sprayer tyres such as the CEAT Spraymax VF radial, which is specially designed for self-propelled sprayers, are manufactured using very high flexion (VF) sidewall principles. This means they are engineered to carry 40% more load than a comparably-sized standard radial, or the same load at 40% lower pressure. If you work on soft, loose soils or in tramlines that sometimes remain damp and soft when spraying conditions are otherwise good, this latter quality can help you to spread the weight of the sprayer over a slightly wider and longer footprint, thereby reducing ground pressure and enabling travel when it might not otherwise be possible.
Examine characteristics that can help protect your soil and your crops
A well-engineered sprayer tyre design will help to minimise crop and soil damage, even in adverse conditions. As an example, the CEAT Spraymax VF features tread with a stepped lug pattern, which enhances grip and traction, ensuring that the risk of wheel slip on hilly or steep ground is minimised – with obvious benefits for operator safety too. Rounded lug shoulders also help to reduce soil compression and smearing as the sprayer travels over the ground, and crop damage as the machine passes through the field.
If you have to travel a lot on the road, consider road characteristics too
Many self-propelled sprayers have to spend a lot of time travelling significant distances between the main farm base and outlying land, and between fields themselves, especially as farms and contracting businesses grow in size. The tread design of CEAT Specialty Spraymax VF self-propelled sprayer tyres also features a centre tie bar which helps to smooth bumps encountered during road travel at speed, a feature many sprayer operators will welcome given the high pressures at which rowcrop sprayer tyres are required to operator in order to bear a significant load on a narrow footprint.
Seek sprayer tyres designed with a high non-skid depth (NSD)
Sprayer tyres with a high non-skid depth (NSD)will give you the longest possible life over the period you own your self-propelled sprayer, minimising its running costs over the machine’s lifetime, courtesy of high durability and maximum longevity.
Whilst many self-propelled sprayers do a lifetime’s work on one set of rowcrop tyres, if you have a choice of sprayer tyres for a new self-propelled sprayer, or require replacements for the sprayer tyres on your farm’s existing machine or a secondhand purchase, these tips will help make your internet searches for ‘sprayer tyres for sale’ or ‘sprayer tyres near me’, and your selection from a sprayer tyres price list, far easier.
Read the full blogTue, 26 Apr 2022 ceat-speciality:blogs-tags/all,ceat-speciality:blogs-tags/tyre-care

ceat-speciality:blogs-tags/all,ceat-speciality:blogs-tags/tyre-care
Four essential tips to help you make the best choice of tractor tyresIf it’s time to renew your tractor’s tyres, paying attention to a few points of advice can help you to make the decisions on type and format of tractor tyre that could potentially really make a difference to the performance of your farming business. Next time you’re using the internet to search for tractor tyres for sale, seeking ‘tractor tyres near me’ or consulting a tractor tyres price list, bear these guidelines in mind.
Match tractor tyre size to the wheel rims on your tractor – or consider new rims if it’s possible
The code stamped on a tractor tyre’s sidewall works in much the same way as any other. For example, a CEAT Farmax R70 tractor tyre with a specification of 710/70 R38 tyre is 710mm wide across the full width of its tread, with a profile height from the bead to the point at which the tread begins of 70% of that 710mm, or 497mm. The R38 figure denotes the diameter of the wheel rim in inches, and to make the best choice of new tractor tyres you must select new tyres of the same R number. If you would like to install tractor tyres of a greater diameter in order to boost traction, it may be possible to change to tyres of, for example, 42in diameter (R42), but to do this would require investment in new wheel rims, and before you do this consultation with the tractor manufacturer and its recommendations will be necessary, as larger diameter wheels and tractor tyres may affect the tractor’s transmission.
Increased flexion(IF) and very high flexion (VF) tyres offer flexibility and performance benefits
When compared to standard tractor tyre formats, the special sidewall design of increased flexion (IF) tractor tyres means they are able to can carry 20% more load at the same operating pressure, or the same load at 20% lower pressure.The design of very high flexion tractor tyres develops this further further, doubling this capacity increase to provide 40% greater load bearing capacity at the same operating pressure or the same load at 40% lower pressure. The extra cost of these designs can soon pay off in terms of reduced haulage costs, soil compaction and fuel consumption. Tractor tyres such as the Torquemax models, the flagship tractor tyre offering in the CEAT range, aimed at higher-horsepower tractors doing significant hours each year on tasks including field operations and road haulage, are available in IF and VF specification.
Understand radial and crossply/bias tractor tyre designs
While radial tractor tyres are now the more commonplace type, many older tractors may have been fitted from new with cross-ply or bias tractor tyres Radial tractor tyres are manufactured in a circular format around the circumference of the tractor tyre, while cross-ply tractor tyres are constructed from side to side. Cross-ply tractor tyres are cheaper to make and therefore cheaper to purchase, and have stiff sidewalls which may be of benefit on the front tyres of a tractor used with a front loader. However, they do not offer the ride comfort or grip benefits of the more modern radial tractor tyre design, which achieves these benefits because of its more flexible sidewalls. These points mean radial and cross-ply tractor tyre types must not be mixed on the same axle.
Replace tractor tyres in pairs unless the opposing one remaining is relatively unworn
Occasionally,damage to an individual tractor tyre means it alone may need replacing. If its ‘neighbour’ on the same axle is relatively unworn, it’s fine to replace just the one tractor tyre with another of the same size and type. However, if the opposing tyre is more than 50 per cent worn, you should consider replacing both of the tractor tyres on that axle, for performance and safety reasons.
Consider these four points when next searching for tractor tyres for sale, searching the internet search for ‘tractor tyres near me’ or consulting a tractor tyres price list, and they will help you make the best choice of tractor tyres.
Read the full blogMon, 25 Apr 2022 ceat-speciality:blogs-tags/all,ceat-speciality:blogs-tags/tyre-care

ceat-speciality:blogs-tags/all,ceat-speciality:blogs-tags/tyre-care
Three easy steps to correcting the alignment of your tractor tyresWith a conventionally-steered tractor, incorrect alignment of the front wheels can hasten wear of the tyres, as well as making it irregular in nature. To ensure you get maximum performance and the longest possible life from your tractor tyres, follow these tips to ensure they are properly aligned. That way you will lengthen the time between the internet searches you have to make for ‘tractor tyres for sale’ and ‘tractor tyres near me’, and the times you have to study a tractor tyres price list.
Incorrectly-adjusted front wheel tracking is a common issue on conventional tractors with front-wheel steering. Without correction, it can lead to tractor tyres that wear irregularly across their profile and steering that is more difficult,as either the insides or outsides of the tractor tyres will be under greater load than the other, depending on whether the front wheels are toeing in or out. This can lead to reduced grip in the field, affect safety under braking, have a detrimental effect on fuel efficiency, and result in the need to prematurely replace the front tractor tyres.
It’s possible to swap the front tractor tyre sides to correct uneven wear, but it is best to address the problem’s cause. Firstly, measure the distance between the wheels on the front axle, and do this between both the front and the rear of the front tractor tyres. These distances should be identical, or with a slightly greater distance between the leading edges of the front tractor tyres – a slight ‘toe-out’.
If the front tractor tyres are not parallel or have this ‘toe-out’ described, then alignment adjustment is necessary. To do this, you should consult the operator’s manual for your tractor, but as a general guideline, the first step will be to loosen the locknuts on each end of the track rod. These will likely be self-locking nuts, requiring pressure to placed on them to prevent the ball bearing beneath causing the nut to rotate.
With pressure, this should allow you to remove the track rod end, and to screw it in or out to either shorten or lengthen it as required. You should then be able to reposition the wheel as required to ensure it has the described parallel or slight toe-out stance when compared with its opposite number, which should of course have an opposing stance. Next, reinsert the track rod end.
The self-locking nuts must be replaced due to the nature of their design, so ensure you have some new ones before beginning. Because the inside of the nuts is made from nylon, this chews into the opposing thread when first tightened, so cannot be reused. The final step is to then re-secure the locking nut which fastens the track control rod.
Because it will reduce both premature and uneven tractor tyre wear, and overall tractor tyre performance of your machine as a whole, by ensuring the front tractor tyres pull and steer properly, it is well worth checking a few times a year that your front tractor tyres are parallel, and adjusting them this way if they are not. It will help to mean longer intervals between the internet searches you have to make for ‘tractor tyres for sale’ and ‘tractor tyres near me’, and the times you have to study a tractor tyres price list.
Read the full blogFri, 22 Apr 2022 ceat-speciality:blogs-tags/all,ceat-speciality:blogs-tags/tyre-care

ceat-speciality:blogs-tags/all,ceat-speciality:blogs-tags/tyre-care
What if I want to change the size of my tractor tyres?Tractor tyres with a greater diameter and/or a wider section width can provide your tractor with an increased ground contact area, thereby increasing traction, reducing ground pressure, and boosting productivity. But if you want to change the size of your tractor tyres , what factors should you consider before you start searching the internet for ‘tractor tyres for sale’ or tractor tyres near me’, or studying tractor tyres price lists?
Tractors on arable farms used mainly for primary and/or secondary cultivations, or those used largely on grassland or for tasks such as spreading manure, can benefit significantly from the fitment of tractor tyres that offer a longer and/or wider footprint. More contact area means lower ground pressure, which in turns spread weight and therefore minimises compaction, so that grass and crop growth is less affected by the compressed soils that will otherwise impede rooting and water ingress.
If you are considering changing the size of your tractor’s tyres, first consider the diameter of the wheel rims with which it is fitted. While tractor tyre dimensions are generally given in millimetres, international marketing dictates that wheel rims are still measured in inches, denoted by the R number which is the last in the series of figures that denote a tractor tyre’s size. The most common wheel rim sizes found on tractors of an average size – say from 50-250hp – are 34in, 38in, 42in and 46in, with the latter two found only on the largest models. Within reason, you should be able to change your tractor’s tyres to any other size provided the rim diameter is the same. If you would like to change your tractor’s tyres for ones of a larger rim diameter, in order to benefit from a longer footprint and the greater grip and lower ground pressure this brings, you must change the wheels to ones of a greater diameter, first measuring to ensure that the larger diameter tractor tyres will fit under the tractor’s mudguards. You should also check with you tractor’s dealer/manufacturer that larger tractor tyres will not unduly affect the tractor’s transmission and its gearing and speed ratings. Take advice also on how changing the diameter of front or rear wheels/tyres alone will affect the tractor’s gearing and speed – you may have to change the sizes of the wheels and tractor tyres on both axles of your tractor.
Even if you are staying with the same diameter of tractor tyre wheel fitment, a deeper profile or aspect ratio may also affect the transmission. Consider a tractor tyre sizing of 650/65R38, commonly found on the rear of 80-120hp tractors. The second number describes, as a percentage of the section width (the first number), the tractor tyre’s profile – the height of the sidewall of the tractor tyre from the bead to the point where the tread begins. To ensure any new tractor tyres of a different size will fit beneath the tractor’s mudguards, make sure the tyre’s profile percentage is compatible with the wheel rim diameter and the space beneath the tractor’s mudguards.
Lastly, if you are considering fitting tractor tyres of a wider section width to spread weight and reduce compaction potential, you should ensure they are compatible with the rim width of your tractor’s wheels. Your tractor tyre dealer should be able to advise you on this.If larger – or smaller – tractor tyres is something you are thinking about, consider these factors before you start searching the internet for ‘tractor tyres for sale’ or tractor tyres near me’, or studying tractor tyres price lists.
Read the full blogThu, 21 Apr 2022 ceat-speciality:blogs-tags/all,ceat-speciality:blogs-tags/tyre-care

ceat-speciality:blogs-tags/all,ceat-speciality:blogs-tags/tyre-care
Things to know about your tractor’s lead ratioSince the advent around half a century ago of 4wd or ‘front-wheel assist’ models with selectable front- as well as rear-wheel drive,front tyres have become much more critical to a tractor’s overall performance. This is particularly true where it’s expected to work on primary or secondary cultivations, or on steep land. If this applies to you, next time you are seeking out new tractor tyres – perhaps by searching the internet for ‘tractor tyres for sale’ or ‘tractor tyres near me’ or by looking through tractor tyres’ price lists – take into account the following advice on selecting the tractor tyres to ensure the correct lead ratio and the best performance as a result.
Aside from very small tractors or very large ones, both of whichoften feature the additional cost and complication of articulated or four-wheel steering, most tractors are designed with front wheels of a smaller diameter than those at the rear. While this means those models may not have as great a ground contact area as an equal-wheeled machine, the main benefit is good manoeuvrability, as smaller steered wheels mean a smaller turning circle than would be possible with front wheels the same size as the rear ones. However, the main challenge for designers in engineering a tractor of this type is to calculate the necessary required ratio (the lead ratio) of the speeds of the front and rear wheels when front-wheel drive is engaged – which will, of course, be different, given their different diameters –for any given forward speed. The transmission designed for and installed into the tractor will take this into account, and so will the recommended wheel and tractor tyre sizes.
Therefore, should you choose at any point to increase the size of your tractor’s tyres to obtain greater productivity, you should ensure you change all four tyres, and not simply the front or rear units – and you must change the front tractor tyres in proportion to the rear tractor tyres, and vice versa. Larger rim diameters will have an obvious effect on lead ratio, but so too will tractor tyres that are lower or high in profile than those originally fitted, as they will reduce or increase the overall wheel/tyre combination diameter.
Excessive lead ratio of 4-6% and more – this will depend upon the make and model of tractor and the wheel/tyre equipment it is designed to be fitted with – will mean the speed of the tractor’s rear axle will slow down the speed of the front axle. This can hasten front tractor tyre wear and affect the tractor’s steering. If, on the other hand, the rear axle is operating at a faster speed than that of the front axle, the former will push the latter. Not only will this result in excessive fuel use, tractor tyre wear and potential soil smearing from slippage, but it will also potentially damage the transmission.
This is why you should understand and take into account your tractor’s lead ratio when fitting new tractor tyres, and always ensure you fit tractor tyres of matching types – all radial or all cross-ply/bias – and of the matched sizes recommended in the tractor operator’s manual and/or by your tractor dealer. Put this high on your list of things to consider when next seeking new tractor tyres by searching the internet for ‘tractor tyres for sale’ or ‘tractor tyres near me’ or by searching through tractor tyres’ price lists.
Read the full blogWed, 13 Apr 2022 ceat-speciality:blogs-tags/all,ceat-speciality:blogs-tags/tyre-care

ceat-speciality:blogs-tags/all,ceat-speciality:blogs-tags/tyre-care
What to look for when buying trailer tyresSearching for new trailer tyres can be a challenging process, with a bewildering array of makes, types, formats and sizes. Next time you’re browsing the internet for ‘trailer tyres near me’ or ‘trailer tyres for sale’, or scanning trailer tyres ’ price lists, bear the following information in mind to help you make your choice.
Cross-ply/bias construction
Bias or cross-ply trailer tyres are made using a lower-cost production process. While radial construction tends to be the preferred modern option for many tractor manufacturers, owners and operators, due to the enhanced ride comfort it provides, with a trailer this is not an issue. As a result, depending on the type of work for which the trailer is used, cross-ply/bias trailer tyres may be sufficient for the nature of the tasks.
One example is CEAT’s T422 Value Pro flotation trailer tyres, which offer a large volume and footprint for maximum ground contact and minimal soil compaction, plus round shouldersto minimise crop damage.
Cross-ply trailer tyres can also work well in certain field situations, though. With a tough nylon casing and strong bead bundle that combine to provide high load-carrying capability, CEAT Flotation T422 I1 bias flotation trailer tyres are ideal for fieldwork, benefiting from a similar large volume that gives a long and wide footprint, and the same rounded shoulder design to limit crop and soil damage. Consider also the TR800 bias flotation tyre, which is available in a 400/60 R15.5 size, and also features CEAT’s typical high air volume, large footprint and rounded shoulder design.
Ultimate flotation
If you are looking to spread heavy trailer loads over the greatest possible area, you may need to look at the two flagship trailer tyre ranges from CEAT. In 480/45-17 or 500/50-17 sizes, maximum flotation can be attained by fitting CEAT Flotation Plus trailer tyres. However, to benefit from the maximum amount of rubber in contact with the ground, there is the Flotation TX 440, available in sizes from 500/60-22.5 to 700/40-22.5.
Radial construction
Radial design, where the trailer tyre is constructed around the circumference, offer a number of benefits. As an example, Floatmax RT radials are designed incorporating features that provide enhanced ride and surface-holding, with steel-belted construction that helps reduce puncture risk and enhances durability. Their construction includes robust centre blocks that minimise travel noise at speed by smoothing the runningof the trailer on hard surfaces. There is a flatter crown, creating a larger footprint that ensures the trailer load is spread over as much surface area as possible to minimise soil compaction. A pattern of inter-connected grooves gives Floatmax RT trailer tyres good self-cleaning properties, and the round shoulders keep soil and crop damage to a minimum.
For working on loose soil and other surfaces, Floatmax FT trailer tyres may be preferable, offering additional traction and stability for greater grip. They also provide better floating characteristics, minimising soil compaction and so aiding crop growth. Directional lugs aid traction, whilea robust centre block enhances stability and road handling, and a wider, flatter crown improves floatation. A greater rubber mass enhances durability and working life.
So when looking for new trailer tyres, consider your budget, your trailer’s workload, and the features and benefits you are seeking. Take these into account, and you should end up with a sound set of trailer tyres that serves you well for years to come. That should mean there is plenty of time before you next find yourself searching the internet for ‘trailer tyres for sale’ or ‘trailer tyres near me’, or studying trailer tyres’ price lists.
Read the full blogThu, 31 Mar 2022 ceat-speciality:blogs-tags/all,ceat-speciality:blogs-tags/tyre-care

ceat-speciality:blogs-tags/all,ceat-speciality:blogs-tags/tyre-care
What’s The Secret To Trailer Tyre Selection?When you’re looking for new trailer tyres , perhaps by searching the internet for ‘trailer tyres for sale’ or ‘trailer tyres near me’, or studying ’ trailer tyres price lists, it’s easy to be overloaded with information and mystified by evolving terminology. Updating your knowledge before starting your trailer tyre search will mean you can make a better-informed decision.
Traditionally, many trailers were equipped with ‘super single’ trailer tyres , designed to be hard-wearing, particularly on the road, and well able to bear heavy loads. Such trailer tyres are very similar to those found on lorries and trucks. However, their most significant downside is their relatively low footprint and consequent high propensity to cause soil compaction. Super singles may be ok for trailers working mainly on tarmac, concrete and other forms of hardstanding such as compacted stone farm tracks. However, for work that involves haulage from fields, and/or considerable road travel, then there are many better options.
The secret to trailer tyre selection is to ensure you understand the capabilities and benefits of modern alternatives to super single trailer tyres. As an example, CEAT Specialty offers trailer tyres of both cross-ply and radial designs.
Engineered to provide higher traction and a comfortable ride, Floatmax RT radials feature robust centre blocks for low noise travel and smooth running on hard surfaces. A flatter crown width means a larger footprint which spreads the trailer load to minimise soil compaction in the field, while a pattern of inter-connected grooves aids self-cleaning and rounded shoulders help limit soil and crop damage. In addition, steel-belted construction protects against puncture material ingress and aids durability.
If your work often involves hauling on loose fields surfaces, though, Floatmax FT trailer tyres may be a better alternative. These provide additional traction and stability for greater grip, plus better floating characteristics to minimise soil compaction and so aid crop growth.
Selecting such trailer tyres means you benefit from directional lugs that aid traction, plus a robust centre block for enhanced stability and road handling. They also benefit from a wider and flatter crown for improved floatation, and are constructed from a greater rubber mass to ensure durability and a long working life.
There are also multiple lower-cost bias or cross-ply alternatives in the trailer tyre sector. If seeking very simple trailer tyres for use on hard surfaces, CEAT’s T422 Value Pro flotation trailer tyres feature a large volume and footprint for maximum ground contact and minimal soil compaction. Rounded shoulders help minimise crop damage.
If your tasks are more field-based, the CEAT Flotation T422 I1 bias flotation trailer tyres are manufactured with a tough nylon casing and strong bead bundle for a high load-carrying capability. There is the same large volume and footprint plus rounded shoulders for minimal crop and soil damage.
Further alternatives include the CEAT TR800 bias flotation tyre. Available in a 400/60 R15.5 size, it helps reduce soil compaction and protect yields with the typical CEAT design of a larger air volume and footprint plus rounded shoulders.
For the ultimate in flotation, though, two ranges sit at the top of the CEAT line. If you are seeking 480/45-17 or 500/50-17 trailers and need maximum floatability, consider the Flotation Plus range, but if you need the maximum amount of rubber in contact with the ground, look at the Flotation TX 440, with sizes from 500/60-22.5 to 700/40-22.5.
The secret to trailer tyre selection, therefore, is to assess your workload and do your research. You trailer tyre dealer should also be a good source of help, so that when you’re next looking for new trailer tyres , perhaps by searching the internet for ‘trailer tyres for sale’ or ‘trailer tyres near me’, or studying trailer tyres’ price lists, you will feel more confident about choosing the right brand and product.
Read the full blogTue, 29 Mar 2022 ceat-speciality:blogs-tags/all,ceat-speciality:blogs-tags/tyre-care

ceat-speciality:blogs-tags/all,ceat-speciality:blogs-tags/tyre-care
When is the right time to change my sprayer tyres?Traditionally, the seasonal nature of their work has meant many self-propelled sprayers are not fitted with new sprayer tyres during their lifetime. However, with farm businesses getting larger, and sprayers spending more time in the field and on the road as a result, this is starting to change. In addition, with more farmers considering used sprayers to counter new machine supply issues, refurbishing a secondhand model has become more attractive, but new sprayer tyres may be required alongside other wearing parts. So before searching the internet for ‘sprayer tyres for sale’ or ‘sprayer tyres near me’, or scanning sprayer tyres’ prices lists, how should you assess whether the sprayer you own or are considering buying needs new sprayer tyres?
Most obviously, the right time to change any self-propelled agricultural vehicle tyres are when they have less than 10% of the original tread remaining. With a self-propelled sprayer, this is particularly important if you farm hilly or steep land. It is vital that your machine is able to transmit its full power to the ground and obtain full traction and braking, given the risk of a grip failure and the potential consequences for operator injury, machine breakage, valuable product loss and environmental damage. The steep your ground, the more important it is that you change worn sprayer tyres well before they reach that critical 10%. As rowcrop sprayer tyres tend to have a longer physical life than more regularly-used tractor tyres, they can be subject to sidewall and/or inter-lug perishing over time, so make regular inspections for this – if it is observed, the sprayer tyres should be replaced before the risk of tyre failure becomes high.
Because of their shallower tread and greater surface area, wide, low ground pressure sprayer tyres for early-season use can be subject to a shorter life than rowcrop sprayer tyres, as they are more flexible than rowcrop types. If you operate such sprayer tyres for all or part of the season, regularly assess the carcase of each sprayer tyre for splits, cracks and perishing. The shallower tread of flotation tyres also means this is worn away more quickly than the chevron tractor-type tread of rowcrop sprayer tyres, and are more likely to become smooth over the lifetime of the machine. Replace such tyres aas soon as tread reaches the 10% level to avoid skid risk on hills.
CEAT Specialty Spraymax VF sprayer tyres have a stepped lug tread design to maximise grip and traction to provide maximum grip and machine safety on hills. A centre tie bar means a smooth road ride, while high non-skid depth aids durability, maximising the life of the sprayer tyre.Rounded shoulders minimise soil and crop damage, and a steel belt design in selected specifications aids puncture protection. These are benefits to remember if needing new sprayer tyres and considering the CEAT Specialty Spraymax, available in 14 sizes to suit 42in, 46in, 50in or 54in wheel rim sizes, and section widths of 380mm or 480mm. When considering new sprayer tyres by searching the internet for ‘sprayer tyres for sale’ or ‘sprayer tyres near me’, or studying sprayer tyres’ price lists, consider these points to ensure you are making the right decision at the right time.
Read the full blogFri, 25 Mar 2022 ceat-speciality:blogs-tags/all,ceat-speciality:blogs-tags/tyre-care

ceat-speciality:blogs-tags/all,ceat-speciality:blogs-tags/tyre-care
Specialist tyres for self-propelled sprayers –a specialty of CEAT SpecialtySprayer tyres is a specialist market where the knowledge and expertise of companies with high levels of experience in this particular agriculture tyre area can bring a great deal to the performance and profitable operation of your machine and the crops it treats. So before you begin seeking new sprayer tyres for your machine, searching the internet for ‘sprayer tyres for sale’ or ‘sprayer tyres near me’, or scanning through sprayer tyres’ price lists, take some time to consider the points below, as they could help you maximise the return on your investment.
When one considers the value of the crop protection products that may be applied by a self-propelled sprayer during a year, ensuring it is maintained and equipped to a high standard is unquestionably essential. In addition to areas of the application equipment itself, such as the pump, nozzles and boom, just as critical to this are the components of the base vehicle itself, from the engine and transmission to the parts that put their power to the ground – the wheels and the sprayer tyres fitted to them. If your long-serving sprayer requires new sprayer tyres, or if you have purchased a machine that requires refurbishment or updating, study how sprayer tyres from a specialist in this sector could help your sprayer, your soils and your crops
As an example, Spraymax VF sprayer tyres from CEAT Specialty are designed to a dedicated format for self-propelled sprayers. The VF designation means they are designed and manufactured with VF sidewall design technology. This means they are able to carry 40% more load than a standard radial operating at the same pressure, or the same load as a standard radial at 40% lower pressure. As a result, users are able to select the way they configure their sprayer tyres and their sprayer, to maximise output or to minimise soil damage in difficult conditions.
The tread pattern on CEAT Specialty Spraymax VF sprayer tyres features a stepped lug design that enhances grip and traction, particularly important for output and safety if your land is sloping or hilly. A centre tie bar ensures a smooth ride on the road, to counter the effect of tyres that have to operate at high pressures given their narrow profile, and a high non-skid depth ensures durability for a long sprayer tyre life. And in the field, where it’s most important, the rounded shoulders of Spraymax sprayer tyres’ tread design help to minimise soil and crop damage. Whether at work on the land or travelling between fields, tyre damage and downtime risks are minimised by the availability of a steel belt design in selected specifications for protection from punctures
CEAT Spraymax self-propelled sprayer tyres are available in 14 sizes to suit 42in, 46in, 50in or 54in wheel rim sizes, and come in section widths of 380mm or 480mm. Next time you are looking for new sprayer tyres, perhaps by surfing the web for ‘sprayer tyres for sale’ or ‘sprayer tyres near me’, or studying sprayer tyres’ price lists, take these points into consideration.
Read the full blogTue, 22 Mar 2022 ceat-speciality:blogs-tags/all,ceat-speciality:blogs-tags/tyre-care

ceat-speciality:blogs-tags/all,ceat-speciality:blogs-tags/tyre-care
A quick guide to different tractor tyres, sizes and recommendationsIf you’re looking for new tractor tyres, before you look online for ‘tractors tyres for sale’ or ‘tractor tyres near me’, or start scanning tractor tyres’ price lists, it’s worth refreshing your knowledge of the ever-evolvingand potentially bewildering world of different tractor tyre types, sizes and configurations.
Tractor tyre size codes
All tyres have an embossed code on their sidewalls which describes their sizing, including the rim diameter they will fit, their section width and their profile. A710/75 R42 tyre has a width of 710mm wide, and you will generally be able to fit tractor tyres that match the rim width of your tractor wheels. Modern tractor tyres, though, do give a greater element of flexibility here, with designs that spread the width of the tyre’s ground contact patch beyond the wheel rim width.
The second figure describes the sidewall profile height, from the bead of the tractor tyre to the point where the tread begins, and it is expressed as a percentage of that width. For this particular tractor tyre size, therefore, it is 75% of the710mm figure, which is 532.5mm. The higher the number, the more the length of tractor tyre contact with the ground, but when selecting new tractor tyres you must ensure the profile will fit beneath the mudguards of your tractor.
The third figure, the R number, represents the rim diameter, but historical, international standards mean this is measured in inches rather than millimetres. This is own of the most important figures when selecting a new tyre, as this number must match the diameter of the wheels of your tractor.
Different tractor tyre design types: standard, increased flexion and very high flexion
Standard tractor tyres are often fine for most tasks, and usually sufficient for general farm work, grassland jobs and ordinary road travel. However, if your tractor is a high-horsepower model that spends a lot of time on field tasks such as cultivation, and also has to travel frequently on the road for long distances between fields, increased or very high flexion tractor tyres should be considered. Specially-design sidewalls mean increased flexion (IF) tractor tyre types can bear 20% higher loads at the same recommended operating pressure, or the same load at 20% lower pressure.At these lower pressures, the tractor tyre footprint becomes wider and longer, thereby spreading the load over a greater surface area and reducing overall ground pressure.
With very high flexion tractor tyres, the principle is the same, but a development of the design principles means their additional capacity is double that of increased flexion types, and they can carry 40% higher loads at the same operating pressure or the same load at 40% lower pressures. If your tractor spends most of its time on primary and secondary cultivations and crop establishment, and frequent movements between fields and roads IF or VF tractor tyres are worth considering to minimise soil damage.
Specialist options are available for specialist demands.
If your tractor is a high-horsepower machine and/or has high-speed capability, consider tractor tyres designed to match, such as the CEAT Farmax HPT. These tractor tyres feature specially-designed lug patterns reinforced with base grooves that providing higher strength at higher speeds and horsepower/torque loadings. A high denier textile casing and sidewall rubber compound also help here. Reinforced bead construction with higher bead-to-bead distance enhances load bearing and eases fitment. You might also consider the CEAT Torquemax, designed to ensure constant and smooth transfer of torque to the ground. And if a great deal of rowcrop and/or spraying work is in your tractor’s workload, CEAT also offers SprayMax spray tyre options.
This is just a quick guide to different tractor tyres, sizes and recommendations. Before you scan the web for ‘tractors tyres for sale’ or ‘tractor tyres near me’, or compare tractor tyres’ price lists, bear these points in mind and consult with CEAT Specialty or one of its dealers for advice on the best tractor tyres to suit your machine and its workload.
Read the full blogMon, 21 Mar 2022 ceat-speciality:blogs-tags/all,ceat-speciality:blogs-tags/tyre-care

ceat-speciality:blogs-tags/all,ceat-speciality:blogs-tags/tyre-care
Proper care and maintenance of your tractor tyresTractor tyres, like all other components of a machine, will not only perform better if looked after, but will be safer to work with and will last longer too. And well cared-for tractor tyres will also have a positive impact on the tractor’s value when it’s time to trade in the machine for a replacement. All this adds up to lower operating costs and improved margins, lengthening tractor tyre life and stretching the periods between the times when you need to search the internet for ‘tractor tyres for sale’ or ‘tractor tyres near me’, or trawl through a tractor tyres price list to buy new tractor tyres. So what are the key care and maintenance points to follow?
Check pressures regularly and adjust as needed
This is the most basic of tractor tyre care principles. Not only are the correct pressures crucial to tractor tyre performance and to safety, but checking and adjusting them where necessary as part of regular care and maintenance will help maximise their lifespan. Over-inflated tractor tyres are at greater risk of damage from stones on hard land, and from greater wear during road travel at speed on tarmac. Meanwhile, under-inflated tractor tyres are at greater risk of sidewall damage, with the sidewalls unable to support the tractor’s weight. Make pressure checks a fixed part of your regular tractor maintenance at least every week, using a good quality pressure gauge, and at the same time inspect the valve for damage.
Inspect carcase condition daily
Before beginning the day’s work with your tractor, examine the circumference and both sidewalls of each tractor tyre to check for signs of damage such as splits, cracks and bulges. Provided they are not embedded so deeply in the tractor tyre that they could cause air leakage or rapid decompressions, remove any significant stones, flints and foreign objects in the rubber, before they can do further damage.
Regularly wash your tractor’s tyres and wheels
If your work involves especially muddy conditions, such as root crop or maize harvesting, pressure-wash the wheels and tractor tyres often as part of the tractor cleaning process. This will not only aid tractor tyre performance, as it will keep the areas between the lugs free of mud, but will also keep them free of the stones and flints – potential puncture material – this mud may contain. In addition, it will allow the sidewalls and inter-tread areas to be examined for stone/flint ingress and damage.
Try to minimise wear
Ensure that, if one is fitted, the wheel-slip management system of your tractor is correctly set. This will not only protect the soil and save fuel, but also minimise slippage against potentially-damaging stones and flints. On the road, ensure you leave plenty of time and distance when braking for junctions, and try to avoid postholes and kerbs
If you follow these care and maintenance points as part of the daily, weekly and monthly elements of checking over your tractor, you should maximise the life of your tractor’s tyres and minimise its running costs, while lengthening the time before you next need to search the web for ‘tractor tyres near me’ and ‘tractor tyres for sale’, or peruse a pile of tractor tyres price lists.
Read the full blogThu, 17 Mar 2022 ceat-speciality:blogs-tags/all,ceat-speciality:blogs-tags/tyre-care

ceat-speciality:blogs-tags/all,ceat-speciality:blogs-tags/tyre-care
Things to know when looking for tractor tyresLike most aspects of technology and engineering, tractor tyre development is constantly evolving, as are the ways in which tractor tyres are marketed and sold. The next time you are searching the internet for ‘tractor tyres for sale’ or tractor tyres near me’, or searching a tractor tyres price list use these pointers to help you understand what to look for when buying tractor tyres. Whether you are a regular customer, an infrequent buyer for tyres to fit a lightly-used tractor, or a customer new to tractors and purchasing tyres for them, the advice below will help you find what’s best for your situation.
Ensure you fully understand what can fit your tractor
The first thing to ensure when looking for tractor tyres is that the size under consideration will fit your tractor’s wheels. Wheel rim diameter is measured in inches, and the most common types for tractors of 50-250hp are 34in, 38in, 42in and 46in. If you would like to change to larger diameter wheels you must ensure that the tractor tyres they will be paired with can fit under the tractor’s mudguards, and that the larger wheel and tyre diameter matches the gearing of the tractor’s transmission.
The same is true for tractor tyres of a deeper profile or aspect ratio. In a tractor tyre sizing such as 420/85R38, a common size for a typical 80-120hp tractor, while the first number in a tyre’s specification denotes its section width in millimetres, the second is a measurement of its profile – the height of the face of the tractor tyre from the bead to the point where the tread begins. This is expressed as a percentage of the section width. To ensure any new tractor tyres of a different size will fit beneath the tractor’s mudguards, make sure the tyre’s profile percentage is compatible with the wheel rim diameter and the space beneath the tractor’s mudguards.
Some manufacturers market tractor tyres under different brands
Different brand names on the sidewall of a tractor tyre may not necessarily mean they are made by different firms. The result of mergers, acquisitions and takeovers is that some names may be different brands of the same manufacturer. Do some research on the internet and consult your tractor tyre dealer if you are unsure of the brand you are buying. Some names have a long history of tractor tyre manufacturing, but are relatively new to some markets.
The development of IF and VF technology can give you greater flexibility
Many tractors spend as much time on the road as they do in the field. If this is true of your tractor’s workload, consider investing in the returns offered by tyres with sidewalls that offer greater flexion. Increased flexion (IF) tractor tyres provide the flexibility to operate at the same pressures on the field and the road, and can carry 20% higher loads at the same operating pressure or the same load at 20% lower pressures.For even greater flexibility between road and field work suitability, beyond IF tractor tyres you may wish to consider very high flexion (VF) types, which can carry 40% higher loads at the same operating pressure or the same load at 40% lower pressures.
When next replacing your tractor’s tyres and scanning the web for ‘tractor tyres for sale’ or tractor tyres near me’, or looking through tractor tyres price lists, bear these points in mind. They will help to ensure you select the best tyres for your tractor and its tasks.
Read the full blogWed, 16 Mar 2022 ceat-speciality:blogs-tags/all,ceat-speciality:blogs-tags/tyre-care

ceat-speciality:blogs-tags/all,ceat-speciality:blogs-tags/tyre-care
What is the maximum load my trailer tyres can bear?It can be all too easy to overload a trailer, with serious consequences not only for its body, chassis, key components and general safety, but particularly for tyre wear and integrity. So when next searching the internet for ‘trailer tyres for sale’ or ‘trailer tyres near me’, or looking through a trailer tyres price list for replacements, consider the following advice to ensure your trailer and its tyres are never overloaded.
The first data to note when you are selecting new trailer tyres is the maximum payload rating of the trailer itself. This will be stamped on the trailer’s serial plate, usually found on the drawbar. Once this has been noted, it will then be possible to select the trailer tyres that match this rating.
Because trailer tyres are among the smallest in diameter used on farm machines, they make many revolutions compared to, say, the tyres on the tractor that pulls the trailer, with the most marked difference occurring, of course, at higher speeds. They also undergo rapid cycles between field and road and being fully laden and unladen, both occurring at high speed in situations where produce and goods are being transported from field to farm, or vice versa.
Overloading a trailer to try and minimise load numbers can have significant drawbacks, from putting strain on body and chassis components to exerting stress on wheels and trailer tyres. This can mean the inconvenience of unexpected service costs, or even a trailer tyre blow-out, meaning downtime as a tyre is repaired or replaced, or at worst dealing with an accident.
Identify the load index
To determine the maximum load your trailer’s tyres are capable of bearing when operated at their correct pressures, identify the load index among the numbers on the trailer tyre sidewall. This will be a number from 100 and 200, corresponding to the acceptable load for the tyre at a given pressure. It will be accompanied by the speed index letter, which relates to maximum speed at which the trailer tyre can be used. Tyre manufacturers produce load and speed index tables that cover all of the tyre models they manufacture, and using these to calculate the load your trailer will be carrying and the maximum speed at which it will be hauled will enable you to select the appropriate trailer tyres for the trailer’s most demanding tasks. Remember that while a tractor may be capable of a certain maximum speed, and the tyres on its trailer or other implement may be rated to match that speed, the maximum permitted speed for the trailer or implement may not be as high as that of its tyres, or of the tractor pulling it.
Check tyres’ age and condition
The maximum load a trailer tyre can bear will depend not only on its load rating, though. It will also be heavily influenced by its age and condition. Trailer tyres, like any others, must be checked regularly for cuts, cracks and splits, and for perishing, particularly on the sidewalls, which can occur particularly in older trailer tyres and those which have been operated while under- or over-inflated. Add this factor into any assessment of the load your trailer tyres can bear. And, of course, regardless of trailer tyre type the maximum load for a single axle trailer/trailed implement in the UK is 16 tonnes, rising to 29 tonnes trailers/implements with tandem axles and 32 tonnes for those with three axles.
Remember the role of bigger tyres and more air in carrying greater loads
Implement and trailer tyres with wide and/or long footprints will be capable of bearing greater loads that might otherwise require high pressures, thanks not only to their greater ground contact and bigger design, but also their higher internal air volumes. As a result, the impact of the trailer tyres and their load on the land is minimised.
Bear these factors in mind when searching the internet for ‘trailer tyres for sale’ or ‘trailer tyres near me’, or looking through a trailer tyres price list for replacements. They will help you to make the best choice when it comes to selecting trailer tyres designed to match the maximum load your trailer is designed to bear.
Read the full blogMon, 14 Mar 2022 ceat-speciality:blogs-tags/all,ceat-speciality:blogs-tags/tyre-care

ceat-speciality:blogs-tags/all,ceat-speciality:blogs-tags/tyre-care
Five signs that indicate you should change your tractor tyresNobody wants to find themselves browsing tractor tyres price lists or searching the internet for ‘tractor tyres for sale’ or ‘tractor tyres near me’ more often than necessary. So what signs show when your tractor’s tyres require replacement?
1. Tread depth/tread bar height
One of the most apparent signs tractor tyres need replacement is the level of wear of the tread bars. Once the tread is at 10% of its original height/depth, it’s time to start considering replacement. For road travel and ‘top work’ tasks such as mowing or fertiliser spreading, there may not be too much noticeable loss of performance unless, of course, you are working on sloping ground and hills. In ploughing and other primary cultivation situations, though, tractor tyres worn to a tread depth of 10% and lower will be much less capable of transferring the tractor’s full power to the ground, and wheelslip and fuel use will increase as a result.
2. Tread damage
If the stone or flint content of your soils is high, the tread bars, the area between them and even the tractor tyre sidewalls can all become damaged, particularly if high-draft tasks such as ploughing and subsoiling are practised. In severe cases, cuts to the tractor tyre tread can lead to detachment of rubber portions, triggering the further breakdown of the tractor tyre. If, for whatever reason, your tractor’s tyres have significant areas of damaged tread, consider replacing them.
3. Sidewall damage
Damage to the sidewalls of a tractor tyre can occur if it has been under- or over-inflated for a time, but is also caused by, for example, sharp flints in stony soils when ploughing in the furrow. Sidewall damage can also be caused by kerb or pothole damage sustained during road travel. Sidewall damage can significantly affect the integrity of the structure of the tractor tyre and, at its most serious, this can result in a bulge as the air in the tractor tyre exploits the carcase weakness, with the potential for a tyre explosion. If the sidewall of a tractor tyre has sustained significant damage, even to a small area, it must be replaced.
4. Rubber compound perishing
Tractor tyres fitted to tractors that do only a few hours in a year and so are not regularly replaced can be subject to perishing, particularly on the sidewalls and between the tractor tyre treads. This can be exacerbated by higher orlower tractor tyre pressures than those recommended for the tyres. Perished rubber can lead to air loss from the tractor tyre carcase, particularly in tubeless tractor tyres, making the tyre more susceptible to penetration by sharp objects, potentially raising the risk of punctures. Replace tractor tyres that show severe signs of perished rubber.
5. Poor performance
Some tractor tyres are unsuited to the job they are being asked to do. Perhaps you have purchased a secondhanded tractor with poorly-manufactured or maintained tractor tyres, or that are unsuited to the work for which you intend to use the tractor. If you are not getting what you need from your tractor and its tyres, consult a tractor tyre specialist and do some research to see what better options are available.
Follow these five points, and you should ensure that your tractor tyres are changed on time to maintain the full performance of your machine. That will ensure you don’t find yourself again browsing tractor tyres price lists or searching the internet for ‘tractor tyres for sale’ or ‘tractor tyres near me’ too soon.
Read the full blogMon, 14 Mar 2022 ceat-speciality:blogs-tags/all,ceat-speciality:blogs-tags/tyre-care

ceat-speciality:blogs-tags/all,ceat-speciality:blogs-tags/tyre-care
What you need to know before buying sprayer tyresIf you are specifying tyres for a new self-propelled sprayer, or renewing the tyres on an existing machine, there are a few things to bear in mind when selecting sprayer tyres and placing an order. Before you enter ‘sprayer tyres near me’ or ‘sprayer tyres for sale’ into a search engine when ordering online, take these tips into account.
Choose tyres specifically designed for self-propelled sprayers
Whether you are selecting standard, flotation or row crop tyres for your self-propelled sprayer, ensure they are specifically designed for the machine and the wheels to which they will be attached. With farmers often now working at wider tramline widths of 24m or even 36m, many are prepared to close off additional drill rows when setting their tramlines and make the tramline blank rows wider, enabling wider tyres to be fitted to the sprayer. Others prefer to use traditional narrow tramline row widths, particularly if working to narrower tramline spacings, and these will be best suited to s sprayer working on row crop sprayer tyres. And, of course, there may be a need for wide flotation tyres for you sprayer, for work in the early stages of a crop, oron grassland.
Assess the lug design of the tyres under consideration
The efficacy of a set of sprayer tyres, particularly the grip and traction they provide, will depend highly on lug format and tread pattern. A stepped lug design enhances grip and traction, particularly on sloping ground and hills, where it will provide maximum security and safety. This type of design will also ensure maximum machine stability, helping maintain an even height across the full width of the boom, which is essential for accurate application. Acentre tie bar, meanwhile, will provide comfortable and safe handling at speed on the road between farm and field. Look also for rounded tyre shoulders that will minimise soil and crop damage, and a high non-skid depth (NSD)that will ensure the longest possible tyre life.
Consider increased or very high flexion tyres for your sprayer
Increased flexion tyres can carry 20% more load than a standard radial, or the same load at 20% lower pressures. Tyres such as the CEAT Spraymax VF go even further, incorporating very high flexion (VF) design technology to enable them to carry 40% more load than a standard radial, or to operate at 40% lower pressures while bearing the same load as a standard radial. This enables the user to carry more weight in order to increase capacity and daily output, or spread the existing weight of the machine over a greater footprint, reducing the overall impact on the soil.
Bear this advice in mind when specifying tyres for a new self-propelled sprayer, or renewing the tyres on an existing machine, when scanning the internet for ‘sprayer tyres near me’ or ‘sprayer tyres for sale’ to order online. These few pointers will help you make the right decision when it comes equipping your sprayer with the best possible tyres for your circumstances.
Read the full blogThu, 10 Mar 2022 ceat-speciality:blogs-tags/all,ceat-speciality:blogs-tags/tyre-care

ceat-speciality:blogs-tags/all,ceat-speciality:blogs-tags/tyre-care
What role do specialist sprayer tyres play in agriculture?When specifying the tyres on a new sprayer, or choosing replacements for the sprayer tyres on an existing machine, take time to consider the benefits of specialist sprayer tyres. A search of the internet for ‘sprayer tyres for sale’ or ‘sprayer tyres near me’ can yield many results, but before you select from a sprayer tyres price list, think about how they can help your farming as a whole.
Protecting the soil and the crop
While most sprayers working in arable crops will be operating on marked-out tramlines, keeping the trafficked area of the field to a minimum, those tramlines may well have to be ripped up again at the end of the season, so ideally the compaction caused to the soil beneath them should be minimal. There may also be times when the slight depression in the field surface created by tramlines retains moisture long after rainfall, so that, while the weather may be good for spraying, soil conditions may not support the sprayer.
It is these factors that make well-designed specialist sprayer tyres an important part of a self-propelled sprayer. The CEAT range of Spraymax VF tyres is specially designed for self-propelled sprayers, andengineered to very high flexion (VF) principles. VF tyres can carry 40% more load than standard units, or the same load as a standard radial but a pressure 40% lower. For owners and operators of self-propelled sprayers, this offers two distinct advantages. If ground conditions are good, the greater load capacity means they can operate at total capacity with a full load of crop protection products, or of fertiliser – which has a heavier specific weight – without fear of causing excessive soil compaction. But if they are operating in more delicate soil conditions – where the tramlines are still soft from recent rain, or when applying pre-emergence herbicides to a just-sown seedbed, for instance – then they can operate at a sprayer tyre pressure 40% lower than that for a standard sprayer radial. The longer and slightly wider footprint this creates helps to maximise the tyre to soil ground contact. As a result, compaction is minimised. Traction is also enhanced, aided by the Spraymax VF’s stepped lug design, which provides better grip and traction. and this also improves fuel efficiency. In addition, Spraymax VF’s rounded shoulders prevent crop damage.
Protecting the load, the environment and the operator
Specialist sprayer tyres also have an important role to play in ensuring the stability of the sprayer. Carcase designs such as that of the CEAT Spraymax VF, which blend rigidity and flexibility and are constructed to withstand high side loadings, provide a high degree of sprayer stability, which is particularly important if the machine has to work across slopes on hilly fields. Greater stability reduces the possibility of the machine tipping sideways, protecting the sprayer itself from damage, the operator from serious injury and the load from the risk of being spilled, with the associated environmental and cost consequences.
Helping the boom stay stable – ensuring crops are treated evenly
There is another reason why the stability provided by a sprayer tyre with a carcase design such as that of the CEAT Spraymax VF, blending rigidity and flexibility and constructed to withstand high side loadings, is important. In addition to machine stability, these design principles help insulate the sprayer boom and its nozzles, from the forces imposed on the machine when working on side slopes. This plays a part in ensuring even, accurate application, helping to keep the boom steady and the nozzles at a consistent height from the crop.
Ensuring safety on the road
Self-propelled sprayers often have to spend significant time on the road travelling between fields and the farm base, and many are capable of 40- or 50km/hr maximum travel speeds. To ensure a smooth, safe ride, CEAT Spraymax specialist sprayer tyres are designed with a centre tie bar which helps provide good roadability and comfort at speed, and a high non-skid depth which ensures durability and longer life.
Next time you are ordering a new self-propelled sprayer and specifying its tyres, or choosing new sprayer tyres for a machine you already own, think about how these principles apply to the sprayer tyres from which you are choosing. Looking through a sprayer tyres price list, or searching the web for ‘sprayer tyres for sale’ or ‘sprayer tyres near me’,will all be made simpler by bearing in mind the attributes of specific sprayer tyre designs.
Read the full blogThu, 10 Mar 2022 ceat-speciality:blogs-tags/all,ceat-speciality:blogs-tags/tyre-care

ceat-speciality:blogs-tags/all,ceat-speciality:blogs-tags/tyre-care
Picking The Right Tyres For Your TractorThe huge range of tractor tyre manufacturers, brands, types and sizes can make selection an arduous task when choosing replacements from tractor tyre price lists and the range of tractor tyres for sale on the market. While tractor tyre price may be a strong influence, there are a number of other factors that will help you pick the right tyres for your tractor when entering ‘tractor tyres near me’ into a search engine and browsing the tractor tyres for sale from suppliers.
Cross-ply or radial
Radial tractor tyres offer many advantages over cross-ply types. However, their more advanced design does mean that they cost more. There may be circumstances where your tractor, the nature of the work it does and the number of hours it works in a year mean that cross-ply tractor tyres are perfectly adequate. Cross-ply tractor tyres are constructed in bands from one side of the tractor tyre to the other. This older technology means they are cheaper to produce, but they are perfectly adequate for tractors which have a low annual workload, carry out simple tasks and are not expected to travel far. The format of their construction means the ride they produce is firm, and so they are less well-suited to tractors that travel frequently at speeds above 30km/hr (18mph). For the same reason, the cross-construction means they do not offer the same levels of grip as comparable radial tractor tyres, due to the more rigid sidewalls. If your tractor is fitted with a front loader, however, this may be an advantage, as the more rigid sidewalls offer greater load-bearing capabilities and reduced movement under load. It is important to always replace tractor tyres in pairs across axles, and cross-ply and radial tractor tyres must not be mixed on the same axle.
Radial tractor tyres are a more recent design, and feature a construction that means the tractor tyre is manufactured in bands around its circumference. The result is a high-strength tractor tyre that also offers a high degree of sidewall flexibility. On the tractor’s front/steering axle, this provides enhanced control over wheel/tyre direction at speed on the road.For modern tractors that have top travel speeds of 40, 50 or even 60km/hr speeds, this means a high level of road contact is retained at all times, and improved heat dissipation. Both of these factors have significant implications for road safety and tractor tyre life.
Standard, IF or VF
Compared with standard tractor tyres, increased flexion (IF) tractor tyre types can carry 20% higher loads at the same operating pressure, or the same load at 20% lower pressures. For farmers seeking even greater versatility and capability from their tractor tyres, there is the further option of very high flexion tractor tyres, which can carry 40% higher loads at the same operating pressure or the same load at 40% lower pressures. If you are especially concerned about the impact of heavy machinery on your fields’ soils, and if much of the work for your tractor involves field tasks such as primary and secondary cultivations and crop establishment, such tractor tyres should be a consideration. These tractor tyre types will also be of benefit if your farm arrangement means that you need to travel frequently between fields at high speed, as they mean adjustment of tractor tyre pressures will not be necessary.
The ideal profile for your tractor’s workload
The second figure in a tyre’s numbering denotes its sidewall profile as a percentage of its width. If minimising soil damage is a priority for you, choose tractor tyres which have a low profile, which will provide a wide footprint. When combined with the longer footprint produced by modern tractor tyre designs – particularly IF ad VF types – the result will be maximum ground contact and hence minimal ground pressure and soil damage.
Following these points when scanning tractor tyres price lists and searching the internet for ‘tractor tyres for sale’ and ‘tractor tyres near me’, and they will help you to pick the right tyres for your tractor and the work it is expected to do.
Read the full blogWed, 9 Mar 2022 ceat-speciality:blogs-tags/all,ceat-speciality:blogs-tags/tyre-care

ceat-speciality:blogs-tags/all,ceat-speciality:blogs-tags/tyre-care
The Importance of Correct Trailer Tyre PressuresBy their very nature, trailers are designed to bear a load. It follows, therefore, that the role of trailer tyres is crucial in supporting and cushioning that load. Under- or over-inflated trailer tyres can therefore have a significant impact on the land beneath them – and there can be repercussions for the trailer tyres themselves. When next browsing for ‘trailer tyres for sale’ or ‘trailer tyres near me’, or looking through a trailer tyres price list for replacements, remember the importance of using the correct trailer tyre pressures once installed.
Over-inflated trailer tyres
Trailer tyres inflated above their recommended pressures will cause problems both on the road and in the field. When travelling on the highway, one of the biggest dangers from over-inflated trailer tyres is the impact they will have on the trailer’s braking performance. Because the contact patch of an over-inflated tyre is less than one running at the correct pressure, the efficacy of the brakes will be reduced. Not only will this impair braking performance, with serious implications for road safety, but it will also lead to over-heating of the trailer tyres, potentially leading over time to delamination of the treads. Impaired braking from over-inflated trailer tyres will also ultimately lead to premature failure of the trailer brakes. Over-inflated trailer tyres will also wear much faster, leading to shortened lifetimes.
In the field, the biggest problem cause by over-inflated trailer tyres is increased compaction. Increasing the tyre pressure above the recommended setting re-shapes the trailer tyre, causing its contact area with the ground to be reduced as its profile is elongated by the excess air and changing the tyre shape. This increases the load borne by each square centimeter still in contact with the ground, and so increases soil compaction. This has multiple detrimental effects for the land, including impaired drainage and plant root growth.
Under-inflated trailer tyres
If there is insufficient air in a trailer tyre – below the minimum pressure recommended by the manufacturer – different but no less serious problems can occur. Firstly, the bead of the trailer tyre may become unseated, allowing the trailer tyre to move on the rim and potentially come loose. This has implications for road safety in particular – should a tyre become detached at speed it has the potential to cause serious accidents involving the tractor driver and any other road users.
The carcase of an under-inflated trailer tyre can become easily damaged, particularly given the additional load imposed on the sidewalls. This can lead to premature failure of the trailer tyre and the need for early replacement before the natural end of its life.
It therefore pays to regularly check the pressures in your trailer tyres daily during sustained periods of use, and also when a trailer is brought back into service after not being used for some time. Upon searching the internet for ‘trailer tyres for sale’ or ‘trailer tyres near me’, or looking through a trailer tyres price list for replacements, you should bear in mind the need for correct pressures upon installation, and regular checks.
Read the full blogWed, 9 Mar 2022 ceat-speciality:blogs-tags/all,ceat-speciality:blogs-tags/tyre-care

ceat-speciality:blogs-tags/all,ceat-speciality:blogs-tags/tyre-care
Three ways to choose the right pressure for your tractor tyresSelecting and purchasing a new set of tractor tyres, perhaps after searching the internet for ‘tractor tyres for sale’ and ‘tractor tyres near me’, is an investment that can soon start to reward with a return, bringing about improved grip, performance and fuel efficiency from your tractor. However, the correct pressures according to the tyre type, the load and the work tasks are essential to ensure you get the maximum from tyres and tractor. So how should you choose them?
Tyres are the medium by which a tractor’s power is transmitted to the ground and turned into productive activity that brings about the intended result. Whether it’s hauling heavy loads on the tarmac, pulling a plough or cultivator through the ground, or travelling lightly across the top of grassland when applying fertiliser, correctly set-up tyres can make the difference between wasted fuel and economic performance. The most crucial setting is the amount of air in the tyres, so setting the pressures correctly for the tyres, the machine and the job is vital. Select the correct pressures for your tractor’s tyres , based on the most critical aspect of their work – the weight they are bearing.
If you do not have weigh cells available, it is still possible to calculate the load that each tractor axle bears when the tractor is attached to an implement. You will need to know the tare weight of each of the tractor’s axles, which can be found on the tractor serial plate or another source of manufacturer information such as the operator’s manual. Each axle load figure needs to include any front weight or implement (a) that will impact the front axle load and any rear-mounted or semi-mounted implement weight (b) that will impact the rear axle load.
Next, measure the distance between the centre of the front weight or implement and the centre of the front axle (D1). Then measure the distance between the front axle and rear axle (D2). Lastly, measure the distance between the centre of the rear axle and the centre of the rear mounted/semi-mounted implement (D3).
You can then calculate the weight on each axle:
Front-end load = front weight x ((D1 + D3)/D2) + front axle weight)
Rear end load = rear weight x ((D1 + D3)/D2) + rear axle weight)
If you own a set of weigh cells, or if your tractor tyre dealer can make them available and help you with setting the tyre pressures for your tractor, you can precisely measure the weight borne by each of the tractor’s axles. Before doing this, ensure that any mounted or semi-mounted rear implement is lowered to the ground when the load carried by the tractor’s front axle is being weighed. Do the opposite, and raise the implement when measuring the load on the tractor’s rear axle.
When you have these figures, divide the weight by two and you will have the load borne by each tyre. Using a pressure/load table, you can now set the optimal pressure for your tractor’s tyres across the front and rear axles.
Unless you have purchased increased flexion (IF) tractor tyres, which can carry 20% more load at the same pressures or the same load at 20% lower pressures, or very high flexion (VF) tyres, for which the comparative figures are 40% in both cases, add 0.4 bar to pressure table figures for tractors that do considerable road work. This additional pressure will help minimise wear on hard surfaces.
If you have the basic weight information for your tractor as detailed in point 1, several smartphone apps can be downloaded to help you define the correct pressures for your tractor’s tyres at their given loads. Bear in mind that the estimated load figures provided for such calculations will be in the region of – but not necessarily precisely at – the optimal value.
Remember that the tractor tyres you purchase should be supplied with recommended pressure info which can give an approximate guide to the required pressures. Tractor tyres that are under-or over-inflated will be unproductive, damaging to the soil, easily damaged at best, and dangerous at worst. Follow these three points to find the correct pressure for your tractor tyres, and you will get the best from them, prolonging the time before you next find yourself searching the internet for ‘tractor tyres for sale’ and ‘tractor tyres near me’.
Read the full blogThu, 17 Feb 2022 ceat-speciality:blogs-tags/all,ceat-speciality:blogs-tags/tyre-care

ceat-speciality:blogs-tags/all,ceat-speciality:blogs-tags/tyre-care
Important tips for extending tractor tyre lifeWhen you buy a new set of tractor tyres – perhaps after typing ‘tractor tyres for sale’ or ‘tractor tyres near me’ into a search engine, or studying tractor tyres price lists – you make a significant investment. You invest not just in your machine’s operating capabilities, but also its financial performance. Here’s some advice to maximise tractor tyre life and help get the most from your outlay.
1. Make tractor tyre pressure checks part of your daily service routine
Few things will shorten a tractor tyre’s life faster than under-inflation. Not only are under-inflated tyres dangerous at speed on the road and less effective at work in the field, but they are also prone to slippage on the wheel. This slippage occurs because tyres are designed so the recommended pressure provides the force that causes the bead of the tyre to engage with the wheel rim. This engagement transmits the torque from the tractor transmission to the tractor tyre, and onwards to the ground. If the tractor tyre slips on the wheel rim, the bead can become damaged, writing off the tractor tyre. Under-inflations will also affect the integrity of the tractor tyre sidewalls, causing them to flex and potentially crack.
Over-inflation of tractor tyres tends to be a less common issue, but will also negativelyaffect tractor tyre life. Over-inflated tractor tyres will again be subject to increased sidewall deterioration, in this instance due to the greater strain put on them by the excessive air pressure. In short, aim to make tractor tyre pressure checks part of your daily service routine.
2. Take care during road travel
When travelling between farms and fields, adjusting your driving manner and speed to the road and its condition can significantly prolong tractor tyre life. When approaching roundabouts and junctions, try to use the tractor’s transmission to reduce its speed gradually. In this way, not only will brake life be extended, but so too will the life of the tractor tyres as they will be subject to lower levels of friction with the tarmac and therefore reduced abrasion of the rubber compound that makes up the tread. Unnecessary use of the brakes rather than the transmission to slow the tractor will abrade the tractor tyres much faster. With modern tractors able to travel at speeds from 40-80km/hr, road wear is potentially a much more significant issue than when 30-40km/hr was the most common road travel speed.
Try also to minimise the likelihood of damage to the tractor tyres’ tread and sidewalls from potholes by avoiding them wherever it is possible to do so. Traffic calming and parking prevention measures such as kerbs and speed islands can also damage tractor tyres – particularly the sidewalls – when hit at speed, so try to steer clear of them where possible.
3. Focus on the wear factors you can easily influence
Unnecessary front ballast that remains fitted to the tractor even when not needed for the task in hand can be a big wear influence on front tractor tyre wear, mainly if the tractor is doing a lot of road travel. Try to ensure that front weights are removed whenever they are unnecessary, such as if the tractor is spending time performing road work with a trailer.
Ensure that when working on concrete – when unloading grain or silage trailers, for example – you try to minimise tight turns, and ensure that four-wheel drive is never engaged when on concrete surfaces.
Follow these few points during tractor operation, and you should get the maximum life length of lifespan from your tractor tyres. You will also maximise the time before you next find yourself searching for ‘tractor tyres for sale’ or ‘tractor tyres near me’, or looking through a tractor tyres price list.
Read the full blogThu, 17 Feb 2022 ceat-speciality:blogs-tags/all,ceat-speciality:blogs-tags/tyre-care

ceat-speciality:blogs-tags/all,ceat-speciality:blogs-tags/tyre-care
How to know when your tractor tyres need replacingWorn-out tractor tyres can be unproductive at best and dangerous at worst. So how should you judge when it’s time to make those internet searches for ‘tractor tyres for sale’ and ‘tractor tyres near me’, and begin studying tractor tyre price lists?
How can you tell when your tractor needs a new set of tyres – either on one axle or both? It may seem an obvious question, but it can be quite hard to make a judgement call on when to decide that investment in replacements is necessary. There are a few things, though, that you can use as guidelines.
1. Tread depth
The apparent indicator in terms of replacement requirement is tractor tyre tread depth. Unlike road vehicle tyre tread, where there is a legal minimum depth requirement, no such regulations exist for tractor tyres. However, for several reasons,the worn tread will mean your tractor tyres require replacing. The first and most obvious is a lack of grip in the field. Whatever the power of your tractor, it cannot perform optimally if it cannot grip the ground effectively. Once the tread bars of a tractor tyre have less than 10% of their original height remaining, their efficacy will be greatly reduced. Make a regular observation and check tread depth to ensure you order new tractor tyres in plenty of time before the tractor is expected to perform high-traction work such as primary cultivations. Another check worth making is monitoring the wheelslip of your tractor’s tyres during high-draft work such as ploughing and subsoiling. High slippage rates indicate that it is time to consider tractor tyre replacement.
2. Sidewall damage
Tractor tyre sidewalls can become damaged for many reasons, from on-highway causes such as kerb abrasions to in-work damage from stones in heavy soils when, for example, ploughing in the furrow. While damage is uncommon as the tractor tyre sidewalls do not come under direct load, the sidewalls are potentially the weakest areas of the tractor tyre. If they become damaged – a tear or a split – there is a greatlyincreased risk that the tractor tyre could explode if the weakness becomes significant. For this reason, tractor tyres should be replaced as a matter of course if they suffer considerable sidewall damage, even if – unfortunately – there is a great deal of tread remaining on the circumference of the tractor tyre. Safety must come first.
3. Uneven wear
Uneven wear of a tractor’s tyres can occur particularly on smaller front tractor tyres due to the extra attrition from steering on hard surfaces and the potential for the tracking/toe-in of the steering wheels to be forced out of alignment. For this reason, regularly check the toe-in of your tractor’s front wheels and adjust as necessary according to the operator’s manual. It may be possible to even out the wear of front tractor tyres that have become unevenly worn from an incorrect toe-in angle by swapping the front tractor tyres over.
Follow this trio of tips as a set of guidelines that will help you judge when your tractor tyres need replacing and you need to begin searches for ‘tractor tyres for sale’ and ‘tractor tyres near me’, and studying tractor tyre price lists. Remember that, unless one tractor tyre is damaged and the pair across the axle is less than 50% worn, you should replace the tractor tyres across the axle at the same time with tractor tyres of the same make, type and size.
Read the full blogThu, 17 Feb 2022 ceat-speciality:blogs-tags/all,ceat-speciality:blogs-tags/tyre-care

ceat-speciality:blogs-tags/all,ceat-speciality:blogs-tags/tyre-care
Five essential techniques for optimal tractor tyre performanceFrom material composition to tread design and carcase structure, modern tractor tyres have characteristics that mean they have greater power transmission capability and a lesser soil impact when compared with older types. But after scanning tractor tyres price lists for ‘tractor tyres for sale’ and ‘tractor tyres near me’, it’s wiseto follow a few tips if you want to optimise the performance of your purchases.
Farming – mainly arable farming – is, of course, a very weather-influenced business. While dry conditions can cause problems, more often than not, it is wet soils that present the most significant challenge to timeliness of field operations, successful results, and good yields of high-quality cropsat harvest. Working in particularly wet conditions – even if the tractor can maintain reasonable traction – can result in smearing and compaction of the soil and reduce work rates. If you have sufficient capacity to get your work done on time, consider whether the conditions in which you are working are affecting the soil’s health and structure, or whether you can wait a day or two for better weather. The performance of your tractor’s tyres will be optimised in drier soil.
For optimal performance of tractor tyres in primary or secondary cultivations, the ideal target bracket for wheelslip is 12-15%. The figure will be at the lower end of this if your tractor is performing preliminary work, such as ploughing, subsoiling or stubble cultivation straight onto the field after a previous combinable crop harvest. If your tractor is working on ploughed or cultivated ground – performing secondary cultivations or drilling, for example –it is likely to be at the higher end of the bracket. For optimal performance, ensure your tractor’s wheelslip monitor, if it has one, is calibrated to this level.
Soils are cultivated to improve structure and drainage but, once loosened, often require reconsolidation to provide a firm, structured surface into which you can sow crop. Consolidation after ploughing can also break down large furrow slices in heavy soils or prevent moisture loss in lighter ones. Working directly onto ploughed but unpressed land can present difficult conditions in clay soil types and result in the tractor digging into sandier soil. To prevent this from having an impact on the tractor making the next pass after ploughing or primary cultivation, consider operating a front press on a front linkage if your tractor is equipped as such, to give your tractor’s tyres a firmer surface to gain traction.
Keeping a regular check on tractor tyre pressures will be made much easier if your tractor has its own dedicated tractor tyre pressure gauge kept as part of the essentials in the tractor operator’s toolbox. Use it to check pressures at a fixed time daily if possible, or at least weekly, and ensure that the gauge is put back in its place each time. This tractor tyre check technique will pay dividends in ensuring your tractor’s tyres are always at the optimum pressures for the work they are asked to do and the weights they are expected to bear.
A good tractor tyre specialist, or at least the agricultural specialist from their supplier, should be equipped with a set of weigh cells that can be used to help set up the tractor tyre pressures for a particular tractor/implement combination. Use of weigh cells to determine wheel/axle loads and determine required weighting and tractor tyre pressures is especially applicable for tractors used with trailed primary cultivators and drills. Ask your dealer if they have such cells available and if they can help with the correct set-up of your tractor/implement combination. By determining the individual axle weights with the implement attached, they can then advise you on how to weight your tractor’s wheels and front-end for optimal tractor tyre performance.
These five essential techniques should help you get the best performance from your tractor tyres. Adopt them as a matter of course, and you will soon see the benefits.
Read the full blogMon, 31 Jan 2022 ceat-speciality:blogs-tags/all,ceat-speciality:blogs-tags/tyre-care

ceat-speciality:blogs-tags/all,ceat-speciality:blogs-tags/tyre-care
Five essential keys for better management of tractor tyresOnce you have sourced new tractor tyres, perhaps by searching the internet for ‘tractor tyres for sale’ or ‘tractor tyres near me’, or checking tractor tyre price lists, you will have made a significant investment in your machine. Careful management will ensure you get the maximum return from it. Here are five tips to help.
1. Add ballast weights when needed – and remove them when they’re not
For tractors performing primary cultivation tasks direct onto stubbles – ploughing, one-pass cultivating or subsoiling, for example –tyre slippage and fuel use will be minimised and traction maximised if the tractor is properly ballasted. This should be done considering the weight of the implement and the forces imposed on the tractor tyres when the tractor/implement combination is at work.But it is also essential to ensure that front-end and wheel weights are removed when not required. Removal will minimise soil damage when performing lighter field tasks and –on the front tractor tyres in particular – keep wear rates down when on the road.
2. Fix a regular time to make pressure checks and damage assessments
Ensuring your tractor’s tyres are operating at the correct pressures is vital for safety and performance reasons, but it also helps to manage your tractor tyres for maximum lifespan. With the fickle nature of the farming seasons and some tractors’ workloads, it’s not always easy to remember to check your tractor’s tyre pressures regularly. To ensure it gets done, try to keep to a routine that includes tractor tyre pressure checks at fixed intervals so that you can address low pressures before they can cause a problem. Also, check of the inside, outside and circumference of each tractor tyre for damage.
3. Keep an eye on wear rates
Assessing your tractor’s tyres for wear rates at regular, fixed intervals is another element of good management practice, so try to ensure it is done on a routine, recordable basis. Assessment of the tread can help you plan and budget better for your next set of tractor tyres. If wear rates are higher than expected, try to ascertain the cause. It is worth checking that your tractor tyres are not inflated above the recommended pressures.
4. Try to maintain good road travel practice
Good management also extends to assessing your driving style and, if you are not the only driver, will help you to advise your operators on best driving practices. This particularly applies if your tractor does a lot of road work.It may be the case that some minor improvements to driving techniques, such as ensuring braking for junctions and roundabouts is carried out smoothly in plenty of time, can help minimise wear from road travel.
5. Maintain your farm tracks where possible
There is little you can do about the state of the roads on which you travel with your tractor, and in the field tractor tyres must work in often challenging conditions, from hard, dry ground to very stony or flinty soils. If your tractor must travel between your fields on farm tracks, though, this is one area you can potentially address if conditions are challenging and detrimental to tractor tyre wear. Suppose sufficient funds and time are available, investment in repairing potholes and flattening rough. In that case, stony surfaces will be money well spent, as not only will the potential for tyre wear and damage be reduced, but downtime will be minimised, as travel will be smoother and faster.
Follow these five essential keys for better management of tractor tyres, and you will maximise their performance and lifetime. In this way, you will get maximum return on your tractor tyre investment and maximise the intervals before you next find yourself searching the internet for ‘tractor tyres for sale’ or ‘tractor tyres near me’, or checking tractor tyre price lists.
Read the full blogMon, 31 Jan 2022 ceat-speciality:blogs-tags/all,ceat-speciality:blogs-tags/tyre-care

ceat-speciality:blogs-tags/all,ceat-speciality:blogs-tags/tyre-care
Seven Things To Keep In Mind When Selecting Tractor TyresThere are multiple factors to consider when investing in a new set of tractor tyres , making the decision process daunting for some buyers. But following seven simple points can help to ensure you pick the best tyres for your tractor when perusing a tractor tyres price or searching the internet for ‘tractor tyres for sale’ and ‘tractor tyres near me’.
1. The tasks on your farm
When selecting the type of tractor tyres you need for the model you own, the variety of tasks your tractor is expected to do should be a significant influence on your investment. If you are carrying out a lot of primary cultivations over an extensive area of land, then it will pay to invest more in a quality tractor tyre that will stand up better to hard use. For work that tends to involve more time travelling short runs on tarmac, for example, qualities found in higher-cost tractor tyres, such as an advanced grip design and good self-cleaning properties, may not be so important. Lower-cost tractor tyres may suffice.
2. The workload for your tractor
On some farms, a tractor may do hundreds of hours in a year, but on smaller units, or if a tractor is used for more specialist or dedicated tasks, the workload may be no less important but potentially much smaller. The annual workload for your tractor should be another significant factor in the decision-making process when selecting tractor tyres. Lower-cost tractor tyres that have been designed and manufactured using standard technologies may well suffice for a low-workload tractor. For tractors expected to undertake higher workloads, consider investing a little more in your tractor tyres to obtain the best technologies in areas such as carcase design, lug profile and manufacturing materials.
3. The soil types on your land
Farming takes place, of course, across a wide range of soil types, and all have a different abrasive effect on tractor tyres. Some, such as stone-free silts, have small impact on tractor tyre abrasion. In contrast, stiff clays with high stone contents, for example can wear tractor tyres much faster, as there is little potential for movement of the stone against the tractive forces of the tractor tyres. Sandy soils and loam types with high sand contents can also be incredibly abrasive. Challenging soils of this type warrant higher investments in tractor tyres developed to cope with them.
4. Your tractor’s seasonal work
Perhaps your tractor does some tyre-challenging primary cultivations for a few hours each autumn. On the other hand, maybe it will do these types of tasks for long periods each autumn and spring. Is your tractor expected to work more in difficult, damp soil conditions, or at times when the ground is drier but harder? These factors should be borne in mind when selecting the tractor tyres to fit your machine. As an example, consider more advanced designs with longer footprints if your tractor works for long periods on high-moisture soils.
5. Whether you will use your tractor with a front loader or front-mounted equipment
Using a tractor in combination with a front loader, or regularly using it with front-mounted equipment such as a cultivator or press via a front hitch, will mean that the front axle, and therefore its wheels and tyres, will come under greater stress. Consider this workload when determining how often you may have to replace the tractor’s front tyres.
6. Whether a specialist tractor tyre type may suit your needs
When searching tractor tyres price lists for ‘tractor tyres for sale’ or ‘tractor tyres near me’, consider whether an additional investment in tractor tyres with a more advanced type of carcase flexion may be worth investing in to match the nature of your work. If much of your tractor’s workload is likely to be on soft ground such as silt, or pre-cultivated soils, the flotation capabilities of the tractor tyres ,the advantages of increased flexion (IF) and very high flexion (VF) tractor tyres will be worth considering. IF tractor tyres can carry 20% higher loads at the same operating pressure or the same load at 20% lower pressures. VF tractor tyres offer even greater flexibility, with relative figures of 40%.
7. Manufacturer and dealer experience and support
The completely different nature of tractor tyres to those for high-speed road-going vehicles means they need a specialist approach from manufacturers and dealers. When you are searching price lists and adverts for new tractor tyres for sale, choose tractor tyres from a manufacturer with long experience in the sector and a good agricultural specialist tractor tyre dealer with expert knowledge of agriculture. By selecting in this way you will benefit from the reputation, experience and support of both parties, providing you with the best installation and operating advice.
Bear these points in mind when selecting tractor tyres, searching for ‘tractor tyres near me’or looking through a tractor tyres price list, and the selection process will be just that little bit easier.
Read the full blogMon, 31 Jan 2022 ceat-speciality:blogs-tags/all,ceat-speciality:blogs-tags/tyre-care

ceat-speciality:blogs-tags/all,ceat-speciality:blogs-tags/tyre-care
Why different-sized tyres and wheels front and rear on a tractor?Tractor design has changed out of all recognition since the first combustion-engined models were introduced over a century ago. With a few exceptions, though, one aspect remains largely unaltered. Tractor tyres and wheels are smaller at the front and larger at the rear on most tractor types. But when you are searching the internet for ‘tractor tyres for sale’ or ‘tractor tyres near me’, or looking through a tractor tyres price list, do you wonder why this remains the most common configuration?
Of course, there are several tractor designs that do feature equal-sized wheels front and rear, but they tend to be more complex in design – and therefore have a higher purchase price and operating cost – than a more common tractor with front wheels and tyres smaller than those at the rear. Equal-wheel configuration tends to be more common among the largest and very smallest tractors, where scale and specialism are the key justifications for the expense. For example, at these ends of the spectrum, the additional cost of steering axles front and rear, or an articulating joint between the axles, can more commonly be justified by high-value specialist crop farming such as fruit production or large-scale agriculture with big fields.
Among most other farm types, tractors with large rear wheels and tyres, and smaller ones at the front, remain the most common type. But what does this mean for your tractor tyre purchasing decisions, and how should it influence how you operate your tractor and look after your tractor tyres.
Steering
A primary reason for designing a tractor with smaller front wheels than the rears is that it makes steering much more effortless. The smaller diameter of the wheels and tractor tyres means a smaller ground contact patch, but this also results in a reduction in required turning effort and less tyre scrub on with the road – where the movement will wear the tractor tyres – or the field, where it will smear the soil surface. Larger front wheels also require a heavier front axle, contributing to overall tractor weight and exacerbating soil compaction. Of course, the development during the 1970s of power steering for tractors made a big difference to the ease with which a tractor could be steered – even one with equal-sized wheels. Many modern tractors feature automatic disengagement for the drive to the front axle above a certain speed to prevent front axle tractor tyre wear on the road. If yours doesn’t have this, ensure you disengage four-wheel drive before leaving the field.
Traction
Tractors with front tyres and wheels as big as those at the rear were originally designed to provide the additional pull of a driven front axle and take full advantage of this via the maximum footprint afforded by large front tractor tyres. However, the design of many modern tractor tyre types for those with conventional front axles means that even a ‘small’ front tyre can offer a long footprint, with multiple lugs engaged with the ground and, therefore, the maximum tractive force from the tractor put to the ground. This is because modern carcase designs are moulded with more advanced tread patterns and use more flexible materials, allowing the tractor tyres to be run at lower pressures.
Manoeuvrability
Having wheels and tyres of a smaller diameter at the front of the tractor, on the steering axle, makes steering the machine much more effortless. The turning radius is important even if most of its work is in large fields. For example, it will still be necessary to make neat turns with the minimum of manoeuvring and shunting when meeting the headland at the end of each field run, no matter the type of work or the field size. Modern tractor steering systems on tractors with powered front axles angle the wheels when fully turned, to maximise manoeuvrability. However, turning sharply on full steering lock will benefit neither your tractor’s front tyres not the surface underneath them, causing abrasion and damage.
Weight distribution
If a tractor with large rear wheels and smaller ones at the front is fitted with good tyres operated at the correct pressures and is properly weighted on the nose for the job it is undertaking, it should have a weight distribution of 60% on the rear axle and 40% on the front. With a soil-engaging mounted or trailed implement, this weight distribution will alter to 50% front and 50% rear when the tractor and implement combination is working. The tractor can pull more weight with the rear axle higher than the front while keeping the front tractor tyres fully anchored to the ground. The larger rear wheels also counterbalance the tractor when it has only a light load on the rear, while their more extended footprint and broader section width help distribute the tractor’s weight thoroughly to minimise ground pressure.
When searching the internet for ‘tractor tyres for sale’ or ‘tractor tyres near me’, or looking through a tractor tyres price list, bear these principles in mind – respect them, and they will help you get the best from your tractor tyres.
Read the full blogThu, 20 Jan 2022 ceat-speciality:blogs-tags/all,ceat-speciality:blogs-tags/tyre-care

ceat-speciality:blogs-tags/all,ceat-speciality:blogs-tags/tyre-care
Six Things You Absolutely Must Know About Your Tractor TyresPerhaps you have purchased a tractor and need to familiarise yourself with its tractor tyres. Or maybe you have invested in replacements for an existing machine after searching tractor tyres price lists for ‘tractor tyres for sale’ or ‘tractor tyres near me’. There are a few vital things you should know.
1. The make of your tractor tyres
Tractor tyres should be paired across axles, using the same size, and ideally the same make, meaning their carcase design and tread type is consistent, and matches the way in which the manufacturer designed them. It will ensure the transfer of even and equal levels of power and grip to both wheels, which is essential for good tyre and tractor performance.
2. The construction of your tractor tyres: cross-ply tyres
Older and some basic tractors are sometimes fitted with cross-ply tractor tyres instead of the more modern radial type. In simple terms, radial tractor tyres are constructed circularly, around the entire circumference of the tractor tyre, while cross-ply tractor tyres are built from side to side. Cross-ply tractor tyres will be cheaper to buy, but their design means the ride will be firmer and grip may be less than a comparable radial as the sidewalls have less flexibility, although this does lend itself to working with a front loader. You must not mix cross-ply and radial tractor tyres on the same axle.
3. The construction of your tractor tyres – radial tyres
The more modern radial tractor tyre design, where the tyre is designed and manufactured in bands around the entire circumference, gives them a flexible sidewall while still retaining strength. This aids control over the direction of the (front) tyres on the road providing much better precision and speed of movement when travelling at speed. When cornering at the 40, 50 or even 60km/hr speeds of which modern tractors are capable, the radial tractor tyre retains much greater road contact than a cross-ply type, with significant safety benefits. Flexible sidewalls also mean improved heat dissipation for enhanced tractor tyre life.
4. The design of your tractor tyres and their load-bearing abilities
Make sure you understand the load and pressure capabilities of the design of your tractor’s tyres. Check with your tractor tyre dealer the pressures your tractor tyres should be operated at, given their design type and the load they will typically be bearing for working with particular implements, especially mounted ones. Over and above standard tractor tyres, increased flexion (IF) tractor tyre types can operate at the same pressures on the field and the road.IF tractor tyres can carry 20% higher loads at the same operating pressure or the same load at 20% lower pressures. Alternatively, very high flexion tractor tyres cantake40% higher loads at the same operating pressure or the same load at 40% lower pressures.
5. The pressures at which your tractor’s tyres should be operated
This relates to the previous point but is underlined here because it is an essential set of data you should always be familiar with. Standard tractor tyres will be capable of being operated within a relatively narrow band of variation in terms of pressure, and you must ensure this is checked and adjusted as necessary as often as possible as part of daily tractor maintenance. IF and VF tyres offer a greater band of flexibility in terms of pressures, but this should not be taken for granted. They should be adjusted according to the weight of the tractor and implement combination under load.
6. The current condition of your tractor tyres
As well as regularly checking your tractor’s tyres for pressures and damage, you should periodically assess the amount of tread left on the tyres relative to the tread depth when they were new. Tread checks will not only ensure you are fully aware of what your tractor should be capable of in difficult field conditions – shallow tread will compromise performance – but will also help you to plan for the purchase of your next set of replacement tractor tyres.
Follow these few points, and you should get the most from the tyres with which your tractor is fitted.
Read the full blogThu, 20 Jan 2022 ceat-speciality:blogs-tags/all,ceat-speciality:blogs-tags/tyre-care

ceat-speciality:blogs-tags/all,ceat-speciality:blogs-tags/tyre-care
Six Important Details to Consider When Buying Tractor TyresNew tyres are among the most significant investments you can make regarding a tractor’s replacement parts. So, what things should you consider when looking for replacement tractor tyres and searching tractor tyres price lists for ‘tractor tyres for sale’ or ‘tractor tyres near me’?
1. The support from your dealer
The best agricultural specialist tractor tyre dealers will have expert knowledge of agriculture, farm vehicles and the particular needs of the sector. When you are searching price lists and adverts for new tractor tyres for sale, consider not just the tractor tyres themselves but the reputation, experience and support offered by the dealer, who should be able to provide operating advice as well as installation.
2. Whether you are happy with your current tractor tyre make or want to investigate alternatives
Consider the performance of your current tractor tyre makes. Have the tractor tyres performed well? How were their levels of wear, grip, fuel consumption, comfort? What do you know about other makes on the tractor tyre market? Even if you have been impressed with the make you are replacing, it is always worth investigating what else is available.
3. The reputation of the manufacturer
Talk to other tractor tyre users about the performance of the tyres fitted to their tractors. Word of mouth and swapping comparisons are among the best ways of selecting the perfect tractor tyres for your needs, as you can be more assured by someone else’s experiences. If you hear good reports, don’t be afraid to try a make that is perhaps a little less well-known than some major brands.
4. The work your tractor will be doing
Do your tractor tasks involve operation on soft ground?Work with heavy rear-mounted equipment? These are essential factors to consider that should govern your choice of tractor tyre type when searching tractor tyres price lists for ‘tractor tyres for sale’ or ‘tractor tyres near me’. For soft land, consider the flotation capabilities of the tractor tyres , which will depend primarily on the length of their footprint and the width of their profile or cross-section, identified by the first figure in the tractor tyre numbering. If working with heavy equipment on the tractor’s rear linkage, ensure you consider the advantages of increased flexion (IF) and very high flexion (VF) tractor tyres , which can operateat the same pressures on the field and the road. IF tractor tyres can carry 20% higher loads at the same operating pressure or the same load at 20% lower pressures. The figure for VF tyres in both cases is 40%
5. Your tractor’s annual working hours
When considering your tractor’s workload, also look at the number of hours per year it will realistically do. Look at what proportion of these hours will be spent on high-demand work that will have a high-wearing effect on tractor tyres, such as primary cultivations. This may affectthe amount you wish to invest in the replacement tractor tyres you are planning to purchase.
6. The requirement for radial or cross-ply tyres
While cross-ply tractor tyres are older in design and considered less advanced than the modern radial type, their simpler manufacturing technique makes them cheaper to produce.They are therefore more affordable, making them worthy of consideration where tractor tasks are simple and price is an issue. The trade-off will be a firmer ride and lower grip levels than with radial tractor tyres. Radials will cost more but will be more productive in the field and more comfortable on the road.
Consider these six points when buying your next replacement tractor tyres, and it should help you make the best selection for your business.
Read the full blogThu, 20 Jan 2022 ceat-speciality:blogs-tags/all,ceat-speciality:blogs-tags/tyre-care

ceat-speciality:blogs-tags/all,ceat-speciality:blogs-tags/tyre-care
Guide To Tractor Tyre MaintenanceRegular checks and maintenance are an essential part of keeping your tractor performing effectively in the field and safely on the road. The same goes for your tractor tyres, so following simple upkeep and care points can help them perform productively and ensure long life. Bear these in mind once your purchases are installed after completing your search for ‘tractor tyres near me’ and looking through tractor tyres for sale and tractor tyres price lists.
Check pressures regularly
Operating tractor tyres at the correct pressure per the manufacturer’s recommendation and according to the load they are bearing is possibly the most critical part of tractor tyre maintenance. At too high a pressure, the ride will be uncomfortable on hard surfaces such as tarmac, with shocks transferred more harshly to the tractor itself, while in the field, traction will be compromised as there may be fewer tread lugs engaging with the soil. Low pressures can damage the tractor tyre sidewall as it flexes, potentially causing cracking of the carcase and impacting handling when travelling at speed on the road, which can be extremely dangerous. Fuel consumption will also be higher. Therefore, pressure checks should be a central part of regular maintenance, particularly if the tractor has stood for a while. If your tractor will be parked for a considerable length of time, start it regularly and move it forwards or backwards a few inches to prevent flat spots.
Observe the pattern and level of tyre wear
If your tractor’s front tyres are wearing unevenly across their tread profile, this is likely to have been incurred during road travel. Swapping the tractor tyres from one side to the other will help even out the wear over the tractor tyres’ lifetime. However,to address the cause, you should consult your tractor’s operator’s manual and adjust the tracking as instructed, ensuring the front wheels are parallel. If your tractor is regularly used for work with a front implement or with a front loader, or if often fitted with front weights even when not needed, front tractor tyre wear will be increased. Consider removing weights when not required.
Examine the carcase fordamage
An essential part of daily maintenance is examining each tractor tyre for cuts, splits and wear. Check both sidewalls of each tyre and examine the areas between each lug, as well as the lugs themselves. Should you spot any puncture material such as stones, flints or metal items already embedded in the tyre carcase, assess how deeply the object is implanted before deciding if it can be removed safely. If it cannot, consult your agricultural tractor tyre specialist for advice on whether a repair is possible.
Check wheel rim condition
If you frequently navigate potholed roads and/or work in challenging ground conditions, not only can the sidewalls of your tractor tyres be subject to damage, but so can the wheel rims, with serious potential consequences for the integrity of the bead, where the tyre meets the rim. Examine therims regularly for signs of damage and the wheel centres for cracks caused by repeated impacts. Clean the wheels after completing jobsin wet or dusty conditions to prevent rust formation and dirt ingress into the bead area.
Keep wheel nuts tight
Make sure all wheel nuts are checked daily for tightness, ideally using a torque wrench to ensure the correct torque level is achieved when tightening each nut. Check – and, if necessary, tighten – opposing nuts to ensure the wheels are secured in alignment. Loose wheel nuts can be a safety hazard, particularly at speed on the road, but can also cause wheel damage over time. Consider investing in some wheel nut security indicators. Lightly greasing the threads on both nuts and studsis advisable when reinstalling a wheel/tractor tyre after service or tractor tyre repair.
Ensure mounted implements are lowered when the tractor is parked
As well as being a safety-first measure, ensuring you place mounted implements on the ground when the tractor is parked will minimise undue pressure on your tractor’s tyres. Do the same with a front loader, if fitted.
Following these maintenance points will ensure you get the maximum performance from your tractor tyres. Try to remember them once your search for ‘tractor tyres near me’ is complete and you have searched ‘tractor tyres for sale’ and ‘tractor tyres price lists’.
Read the full blogMon, 27 Dec 2021 ceat-speciality:blogs-tags/all,ceat-speciality:blogs-tags/tyre-care

ceat-speciality:blogs-tags/all,ceat-speciality:blogs-tags/tyre-care
Everything You Need To Know About Buying Tractor TyresWhen your tractor tyres need renewing, many factors can make selecting replacements a daunting task. There is a wide variety of manufacturers, brand names, types and sizes on the market when searching for tractor tyres for sale, seeking ‘tractor tyres near me’ or consulting a tractor tyres price list. But it’s essential to base your decision on more than tractor tyre price alone. Here are a few things worth remembering when buying tractor tyres.
Understanding tractor tyre sizing code is essential
Tractor tyres, like those for other machines, are stamped with a code that deno5tes their sizing. For example, a 650/65 R42 tyre is 650mm wide and has a profile height of 65% of that 650mm, or 422.5mm. It can be mounted only on wheel rims of 42in diameter.
There is a big difference between standard, increased flexion and very high flexion tyres
Compared with standard tractor tyres , their unique sidewall design means increased flexion (IF) tractor tyre types can carry 20% higher loads at the same operating pressure or the same load at 20% lower pressures. Very high flexion tractor tyres take this a stage further, offering double the capability of increased flexion types, meaning they can carry 40% higher loads at the same operating pressure or the same load at 40% lower pressures.Such tractor ti come at additional cost, but if much of your tractor work is on arable tasks, you are frequently moving between field and road and you want to minimize soil damage, the investment is worth considering.
You must not change the tractor tyre size without checking what is feasible
Most mid-sized agricultural tractors are fitted with wheels/rims 34in, 38in, 42in or 46in in diameter. The wheel rim diameter will be the first element that governs the size of tractor tyre you will purchase to fit your tractor. The final number in the tractor tyre sizing, the R number, will denote the wheel rim diameter in inches to which you can fit the tractor tyre. Unless you change the wheels on your tractor, which may not always be possible, you must stick with the R dimension of the tyres previously fitted to your machine. You must also ensure that the tractor tyre profile you choose – the second number in the tractor tyre sizing – will fit beneath the mudguard of your tractor. Sticking to the same tractor tyre profile as the tractor was previously fitted with will also ensure the gearing and speed of the tractor are not compromised. Remember that if you choose to fit wider tyres to increase contact area and therefore flotation, you may need to consider wider wheel rims to match.
You should purchase in pairs where possible
It may sometimes be necessary to purchase a new tyre to replace one irreparably damaged. However, the tractor tyres should ideally be replaced in pairson the same axle unless the opposing tractor tyre is relatively new. Replacing the tractor tyres in this way will ensure each tyre does an even amount of work when pulling hard, and the tractor’s grip is even across the axle.
It’s wise to buy from a dealer with specialist agricultural knowledge
Not every tyre dealer is a tractor tyre specialist or has employees who specialise in this area. While the basic principles of, for example, tyre fitting and inflation are similar, there are many differences between tyres for road use and tyres for tractor applications.
Manufacturer names and brands may change ownership
Takeovers, buy-outs and market entries/departures are all a natural part of the business. Check whether the name on the tractor tyres you are buying is that of the manufacturing business or a brand name. While the brand may be relatively new in Europe, some names, such as CEAT Specialty, have been part of the tractor tyre sector for decades.
These factors are well worth considering when you are next seeking tractor tyres for sale, doing an internet search for ‘tractor tyres near me’ or consulting a tractor tyres price list.
Read the full blogMon, 27 Dec 2021 ceat-speciality:blogs-tags/all,ceat-speciality:blogs-tags/tyre-care

ceat-speciality:blogs-tags/all,ceat-speciality:blogs-tags/tyre-care
Three Tips To Maximize Your Tractor Tyres’ PerformanceWhatever type of tractor you operate, its performance is only as good as the tyres with which it is fitted. They, after all, are what connects your machine, with all its power and technology, to the ground. Following these few pointers can help ensure you get the most from your tractor tyres , and they are worth remembering next time you seek out ‘tractor tyres for sale’ or ‘tractor tyres near me’ in an internet search. The numbers on a tractor tyres price list mean nothing if the purchase is not made with care and attention to maintain the tractor tyres ’ performance once they are fitted.
1. Wheelslip management
Wheelslip management is essential to effective tractor tyre performance, particularly in primary or secondary cultivations when the maximum power conversion to grip is critical. Excessive wheelslip wastes fuel, wears tractor tyres faster, damages soil through smearing and compaction, and reduces work rates. However, a controlled amount of slip is necessary for best performance from tyres and the tractors to which they are fitted. As the lugs of the tractor tyre grip the ground via the force that the tractor transmission transmits to the wheel, those lugs compress the soil until they encounter sufficient resistance to propel the tractor forwards. This compression varies soil type, condition, composition and moisture content. Wheelslip of 12-15% is ideal.In loose/cultivated or wet soil, it will be at the higher end of this bracket. If soil moisture is the problem, stop work if possible until conditions are drier. If soil structure is the issue – perhaps you are making a second pass on cultivated soil – consider perhaps consolidating the ground with a front-mounted press.
Suppose your tractor does not have a wheelslip management system. In that case, a simple assessment of slip levels can be made by measuring a set distance in the field and asking an assistant to count the revolutions of the tyre made over this distance when the tractor is at work. Calculate the total distance of the wheel revolutions covered by the circumference of the tractor tyre, and compare them against the measured distance worked on calculating a percentage slip.
However, many modern tractors are equipped with wheelslip monitors, which use radar to measure the actual distance travelled by the tractor and compare it against the revolutions of the wheels/tyres. If your tractor has wheelslip monitoring, ensure it is set for the optimum amount of wheelslip given the work being carried out and the soil conditions present.
2. Correct ballasting
Different tasks have different tractor ballast requirements. If you are using mounted equipment, you will naturally require sufficient front-end tractor ballast to counter-balance the tractor/implement combination both when in work and when the implement is raised. Ensure also, though, that this front weight is removed when not required once the job is complete, as to retain it will increase tractor tyre wear and potentially affect the steering.
Front-end weights are often also required for trailed implements with a high draft requirement, such as primary cultivators. Weights for the rear and front tractor wheels can also help. Seek advice from a tractor tyre specialist, particularly one with weigh cells available. Observe your machine at work to assess its performance – for example, if the front wheels are scrabbling for grip, more front weight is needed.
3. Correct pressures
Tractor tyres operated at pressures exceeding those recommended by the manufacturer will suffer from impeded performance. Their contact patch will be reduced, cutting the amount of tyre tread in contact with the soil. Conversely, tractor tyres operated at pressures below those recommended may move on the wheel rim, which at best will result in wasted power. For optimum performance from your tractor tyres , check their pressures daily and adjust them whenever necessary.
Remember these points next time you are seeking new tractor tyres for sale and looking down a tractor tyre price list because regardless of the tractor tyres’ price, they can only perform as well as they are maintained.
Read the full blogMon, 27 Dec 2021 ceat-speciality:blogs-tags/all,ceat-speciality:blogs-tags/tyre-care

ceat-speciality:blogs-tags/all,ceat-speciality:blogs-tags/tyre-care
The Importance Of Correct Tractor Tyre PressuresNo matter which tractor tyres you choose for sale on the market, they cannot efficiently, effectively and safely transfer a machine’s power to the ground unless it contains the correct amount of air for which it is designed. When you are seeking tractor tyres for sale, searching ‘tractor tyres near me’ in an internet search or scanning down a tractor tyres price list, the tractor tyres you finally select should be supplied with recommendations for the correct pressures that they should be installed with and maintained at.
But there are multiple factors that may mean that a tractor’s tyres may not be inflated to the right pressures. Regular checking is essential, even during the busiest of periods, to ensure tractor tyres are not losing air. At the same time, it’s also vital to ensure that the gauge you are testing pressures with is accurate. It can be easy to underinflate a tractor tyre if in a hurry, while it may also become underinflated if, for example, a slow puncture develops. And on the other hand, it is essential not to overinflate a tyre, either accidentally or purposely. Remember these points when seeking tractor tyres for sale, searching ‘tractor tyres near me’ in an internet search or scanning down a tractor tyres price list.
But what makes each of these two issues so critical? Let’s deal first with underinflated tractor tyres. When tractor tyres have insufficient air inside them, several things will – or will potentially – occur. Firstly, there is the likelihood of the bead failing to seat properly, which can mean the tyre slipping on the rim and potentially coming off it. That can have very serious consequences, whether in the field on low-speed work oron the road at much higher speeds. The best-case scenario is a damaged tyre carcase, while at worst, it could lead to an on-highway accident.
With a damaged carcase, much will depend on when it is detected. It is possible that, if only underinflated by a relatively small amount, significant damage may take time to become noticeable – but it will happen. In the meantime, likely problems include excessive tyre wear, particularly as the shoulders of the tractor tyre will be bearing more of the tractor’s weight and tractive load than the centre. The tractor tyre will potentially slip on the wheel rim when it comes under significant tractive load and torque. A tubeless tractor tyre can lead to rapid deflation and the tractor tyre potentially coming off the rim. This situation can also occur on the road at higher speeds, particularly when making significant steering movements, potentially affecting the vehicle operator and other road users. Look for advice on these issues when seeking tractor tyres for sale, searching ‘tractor tyres near me’ in an internet search or scanning down a tractor tyres price list.
The issue of overinflation is just as critical. The first potential danger, of course, is that the tractor tyre may again potentially become unseated from the wheel rim. In this case, the issue is particularly during inflation, with a severe risk of explosion and injury or death. An explosion is even more likely to occur if, during work, the tractor tyre has incurred damage such as cuts to the sidewalls and inter-tread areas. Weak areas such as bulges and cracks in the sidewalls of the tractor tyres can be exacerbated by over-inflation and make an overinflated tyre more susceptible to potential explosion. Bulges are likely to have arisen from sharp stones penetrating the sidewalls, while cracks tend to be age-related. In either circumstance, the replacement of the tractor tyre is essential. When you seek tractor tyres for sale, search ‘tractor tyres near me’ in an internet search or scan down a tractor tyres price list, advice on these issues should be available from manufacturer and supplier.
Overinflation also causes more load to be borne by the centre of the tractor tyre tread. This causes uneven wear and reduces the tyre footprint, thereby reducing ground contact and grip and reducing the load-bearing area of the tractor tyre, causing greater soil compaction. On the road, reduced contact area means more tractor tyre wear in the centre of the tread, and less control under acceleration, braking and steering.
To ensure the best performance and absolute safety, check your tractor’s tyre pressures as often as possible, and ensure you never over or under-inflate. Next time you seek tractor tyres for sale, or search ‘tractor tyres near me’ in an internet search or scan down a tractor tyres price list, remember these points when managing your tractor tyres once fitted.
Read the full blogFri, 24 Dec 2021 ceat-speciality:blogs-tags/all,ceat-speciality:blogs-tags/tyre-care

ceat-speciality:blogs-tags/all,ceat-speciality:blogs-tags/tyre-care
Six Tips For Getting The Best From Your Tractor TyresA modern tractor’s advanced productivity features are worth little if it cannot effectively and efficiently put its power to the ground. So, what can owners and operators do to ensure their tractor tyres are up to the task?
1. Tractor tyre condition
When checking the suitability and soundness of tractor tyres in preparation for work, first assess their condition, starting with the tread. Tractor tyres with less than ten per cent tread are unlikely to be capable of good field-holding and grip. Look for cuts in the tread bars that may affect the tractor tyre sability and safety. Also, look in between the bars to ensure the area between each one is free from severe splits and cracks, as this can be a more vulnerable area as the tread bars are worn down over a tractor tyre’s lifetime. Next, examine the sidewalls on both the outside and inside of each tractor tyre. These can potentially become damaged on very stony soils, mainly where ploughing in the furrow is practised. Look for splits and cracks. If these have become serious enough to create bulges, you must replace the tractor tyre.
2. Wheel condition
Also, ensure that the tractor wheels themselves are examined for damage. Rim damage can be of particular concern, as it can seriously affect the security of the tractor’s tyre on its rim, with the potential for blow-out if the bead should become unseated. Wheel nuts should, of course, be checked regularly as suggested in your tractor’s operator’s manual.
3. Inflation gauge and compressor
Before checking tractor tyre pressures, ensure you use a good quality and accurate gauge. You should also make sure your compressor is safe and effective, with regular service by an expert engineer being advisable.
4. Correct inflation pressure
Use the guidelines given by the manufacturer of your tractor tyres to ensure they are inflated to the correct pressures for the tasks, speeds, loads and conditions in which they will be operating. Before commencing inflation, the last of the tractor tyre condition checks should be for the inflation valve itself, ensuring it is clean, undamaged and soundly attached to the tyre. A tractor tyre specialist from your chosen manufacturer or dealer should be able to advice on the correct pressures for the load your tractor will be operating at with a particular implement.
5. Check pressures regularly
Check your tractor’s tyre pressures each day before work begins, as the slightest penetration of the inner carcase and (if fitted) the tube can lead to a relatively slow loss of air, which can have a significant impact on efficacy, efficiency and safety. And while underinflated tractor tyres can slip on the rim and incur carcase damage – as well as resulting in a tractor using more fuel – overinflated tractor tyres can cause more significant soil damage and tyre wear. Both will be costly in the long run.
6. Working tips
With your tractor and its tyres all set for work, it’s worth remembering a few tips for top performance. If working on primary or secondary tillage tasks, use your machine’s wheel slip monitor to ensure slip is kept in the ideal range, with slight slippage helping to transfer tractive force from the tractor tyres while protecting the topsoil. Slip should be no more than 12-15%. On the road, meanwhile, it goes without saying that smooth acceleration and braking will help get the maximum wear life from your tractor’s tyres , while on tarmac or yard concrete keeping tight turns to a minimum where possible will minimise scrubbing.
Follow these six guidelines, and you will get the best from your tractor tyres – and your tractor.
Read the full blogFri, 24 Dec 2021 ceat-speciality:blogs-tags/all,ceat-speciality:blogs-tags/tyre-care

ceat-speciality:blogs-tags/all,ceat-speciality:blogs-tags/tyre-care
Seven Things To Consider When Selecting Tractor TyresA significant investment is required to replace tractor tyres, making careful planning and selection a must when choosing a brand and a product from the tractor tyres for sale on the market. Beyond tractor tyre price, when entering ‘tractor tyres near me’ into a search engine and selecting from those tractor tyres for sale from suppliers, there are a few points to help in your decision-making before making your choice.
1. The manufacturer
When studying tractor tyre price lists, there are many manufacturers in the tractor tyre business and multiple tractor tyre brands. Do a little research into the name of the tractor tyres for sale that you are considering. Is it the name of the manufacturer or one of the brands it owns? Some names may not be as prominent as others. Still, a manufacturer with a long history in the tractor tyre market is likely to have the product proficiency, engineering capability and application experience to match today’s agricultural demands.
2. Dealer service
A good dealer will support a strong manufacturer, and vice versa. Tyre makers who have dedicated specialty tyre divisions tend to work with dealers who, likewise, have a deep knowledge of the field of agriculture. At the same time, good agricultural dealers are also cautious to pick from the tyre franchises available to them because tractor tyre price will not be the only criteria on which customers will make their choice. When choosing ‘tractor tyres near me’, pick a dealer that stands behind the products they offer and is supported by manufacturers behind their dealer.
3. Correct application
Ensuring you select the correct tractor tyres for your tractor’s typical tasks is essential to successful and safe performance. For example, when choosing from tractor tyres for sale, think carefully before specifying tractor tyres on a new machine or replacing them on an existing one. If your tractoris doing more road than fieldwork, consider a specialist tyre type with hybrid or road tread to ensure maximum tarmac contact patch.
4. Increased flexion (IF) options
If your tractor is doing almost as much road travel as fieldwork, consider the potential benefits offered by increased flexion (IF) tractor tyre types. These provide the flexibility to operate at the same pressures on the field and the road, and IF tractor tyres can carry 20% higher loads at the same operating pressure or the same load at 20% lower pressures.
5. Very high flexion (VF) tyres
If you seek tractor tyre types thatoffer further flexibility between road and field worksuitability, another alternative to standard tractor tyre types is very high flexion tyres. These offer double the capability of increased flexion types, meaning they can carry 40% higher loads at the same operating pressure or the same load at 40% lower pressures.
6. Matching the tyres to the tractor
Before studying a tractor tyres’ price list or searching for ‘tractor tyres near me’, take time to consult your tractor dealer and your tractor tyre specialist. They will be able to provide advice on the best wheel and tyre combination to match your tractor model and the primary tasks it will be doing. Consider the wheel size and tyre size pairing and how they will work together to get maximum performance for your tractor and the expected work.
7. Correct sizing
Bearing in mind there may be several options, make sure you specify the correct tractor tyre sizes for your machine and its intended tasks. Most machines will be suited to a wide range of tractor tyre size options, varying by width, diameter and profile, and if ordering a new tractor, you may also have a choice of wheel rim sizes.It is also vital to ensure that the front and rear tractor tyre sizes are correctly matched to the gearing of the tractor.
The array of tractor tyre makes and models on the market can be bewildering. Before making your choice, considering these points can help you make the right decision and the best investment.
Read the full blogFri, 24 Dec 2021 ceat-speciality:blogs-tags/all,ceat-speciality:blogs-tags/tyre-care

ceat-speciality:blogs-tags/all,ceat-speciality:blogs-tags/tyre-care
Maintenance Tips To Maximise The Life Of Tractor TyresA new set of tractor tyres is a considerable investment. Before searching the internet for ‘tractor tyres near me’ and ‘tractor tyres for sale’ – and before looking down a tractor tyres price list –a reminder of a few key factors can help get the maximum return from the money you are investing, and the best possible performance and lifetime from your tractor tyres.
Firstly, before working with your tractor, ensure regular checks are made of the tractor tyre pressures. As addressed previously in this blog, under or over-inflated tyres not only create safety, ride and performance issues, but they will also result in premature tractor tyre wear. Tyres run at pressures higher than those recommended are likely to abrade faster on the road at speed and will also be subject to high sidewall forces, which may cause cracking. Those run at lower pressures may move on the wheel rim, potentially damaging the bead, the valve, and even the carcase structure.
In addition to pressures, make a regular check of tyre condition before or after a significantfield task has been completed. Catching an issue such as puncture material in a tractor tyre carcase before it is forced deeper into the rubber and becomes a serious problem can help reduce the risk of shortened tractor tyre life.
The vast majority of modern tractors are equipped with 4wd. In the field, ensure 4wd is engaged when necessary – and disengaged when not. That means it should be used when working on operations such as primary tillage, where it will be needed to transfer as much power as possible to the ground for maximum pull, and secondary tillage, where the loose field surface means drive to all wheels is essential for full traction. Without four-wheel drive (4wd) 4wd being engaged, the result will be higher levels of wheelslip. This causes soil damage through smearing, wastes fuel by reducing the amount of diesel turned into tractive force and results in the tractor tyres moving against stones and flints in soils contain a high proportion of these. This tractor tyre movement abrades the rubber compound faster and reduces the tyres’ likely service life, while at worst, it can result in a puncture.
It is also essential to disengage 4wd when not required, particularly when travelling on the highway and when manoeuvring on concrete such as farmyard surfaces. If the operator does not do so, the front tyres, in particular, will wear far faster, while transmission problems are also likely.
Take a regular look at the condition of your tractor’s steering components. Any faults or misalignment could result in the tractor tyres wearing unevenly across their tread profile. Try if at all possible to take care to steer away from serious potholes on rough tracks and country roads and to keep away from kerbs on urban highways. This is easier said than done with modern large tractors, but it is worth a reminder to help avoid sidewall damage.
Lastly, ensure your tractor is not overloaded, either with trailed or mounted equipment, according to its lift capacity and gross vehicle weight. Overloadinghas obvious safety implications but will also affect how quickly your tractor tyres wear. Always remove front weight blocks when not required. Next time you are examining a tractor tyre price list and looking for ‘tractor tyres for sale’ and ‘tractor tyres near me’, following these tips will help you get the maximum possible life from your eventual tractor tyre purchase.
Read the full blogFri, 24 Dec 2021 ceat-speciality:blogs-tags/all,ceat-speciality:blogs-tags/tyre-care
Ballasting is utilized for equipment functionality and stability, as well as transferring power to the ground.
Commonly used ballasting materials include rocks, soil, cast iron, water, calcium chloride, magnesium chloride, beet juice and more. Some of these are relatively cheap while others are expensive. Some are environmentally friendly and others not so much. Some have lots of versatility while others do not.
— The most critical aspect of adding ballasting is how much weight to add and where to place these materials –
Agricultural and construction equipment with buckets or lifting forks have massive cast iron counterweights built into the design of the machine to provide functionality. Agricultural tractors have optional wheel, axle and suitcase weight packages to address total weight and the weight distribution that is critical to optimum performance.
Concerning farm tractors, the first critical factor is knowing the engine horsepower of the tractor and the axle weights. Ideally, the weight per horsepower ratio should be between 100 and 120 pounds/hp. The lighter weights are more desirable and efficient as long as there are no performance issues such as stability or wheel hop. Increased weight ratios may be utilized to reduce slip which increases efficiency especially in demanding applications.
The weight distribution is extremely important:
Allowances for additional weight due to attachments should also be calculated into your weight distribution adjustments. Wheel weight, axle weight and suitcase weight packages are utilized to obtain the correct weight total and distribution.
Additional weight adjustments should include weight packages as the first option. Keep in mind that for optimum performance, the weight required often changes with the implement that is carried by the three-point hitch or pulled with the draw bar as well as the application.
Maximizing versatility with weight adjustments should be a major consideration. Adding liquid ballast into the tyre’s air chamber is the least desirable. Liquid ballast reduces performance due to inhibiting the deflection of the sidewalls of radial tyres. Liquid ballast is less versatile but may be utilized as part of your weight distribution program.
Air pressures should be set just above the maximum load carrying capacity you are expecting from your tyres based on the most demanding application. The calculated air pressures for roading are quite different from operational pressures for field work. Changing air pressures between road and field usage is time consuming and usually not practiced.
–– Air pressures should be set for the road application due to the higher speeds which is the most demanding from a load carrying aspect —
Under inflating tyres will damage the tyres and eventually lead to failure. Tyres are too expensive to risk failure from under inflation for any of your applications!
Correct weight distribution and overall weight totals are key to maximizing tractor performance and transfering power to the ground.
Read the full blogSat, 4 May 2019 ceat-speciality:blogs-tags/all,ceat-speciality:blogs-tags/tyre-care
